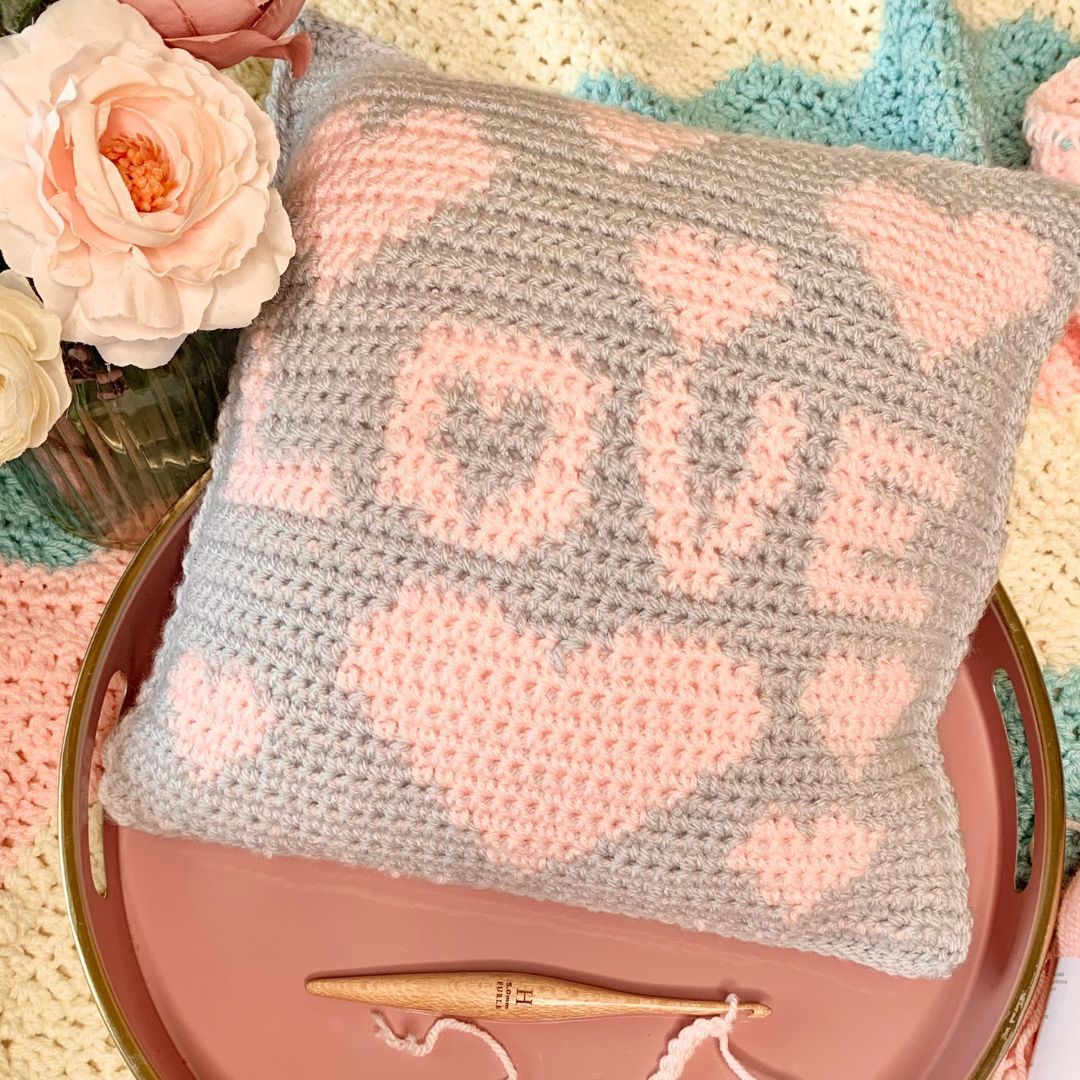
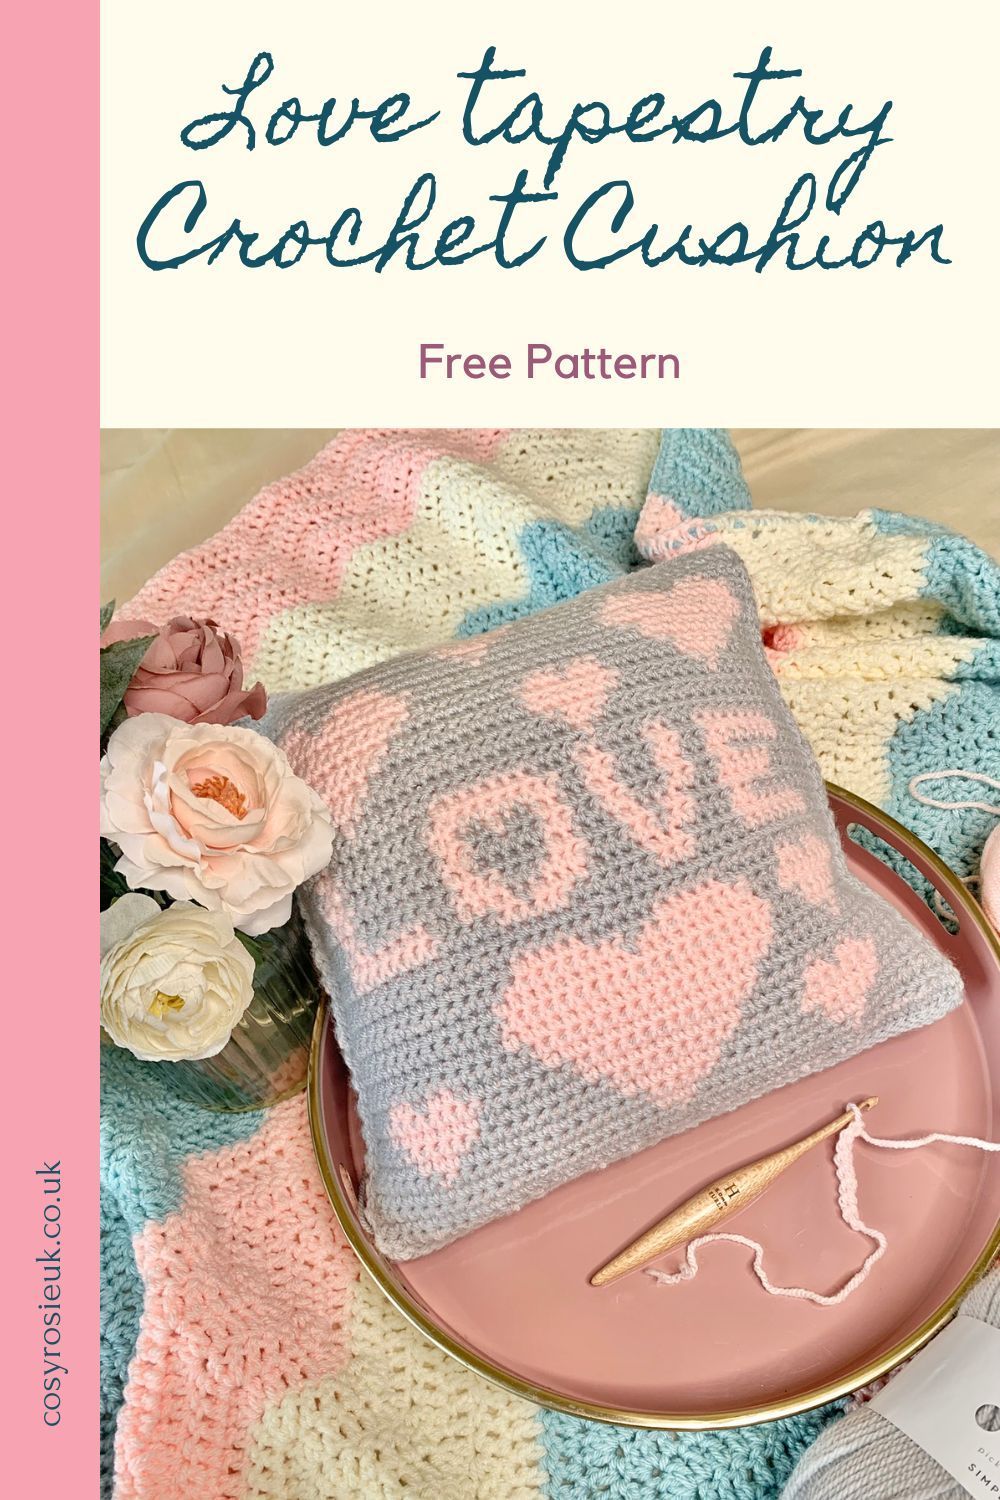
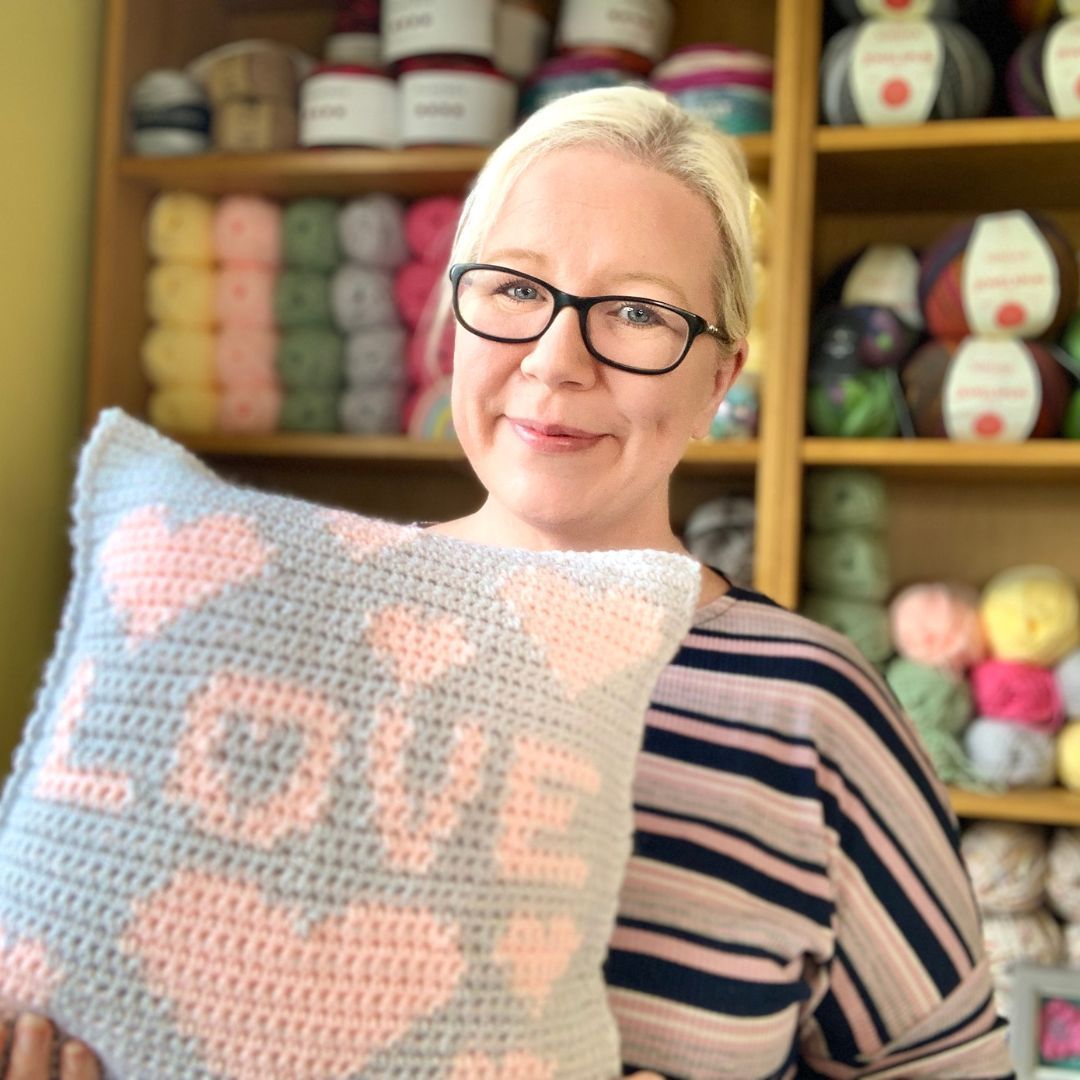
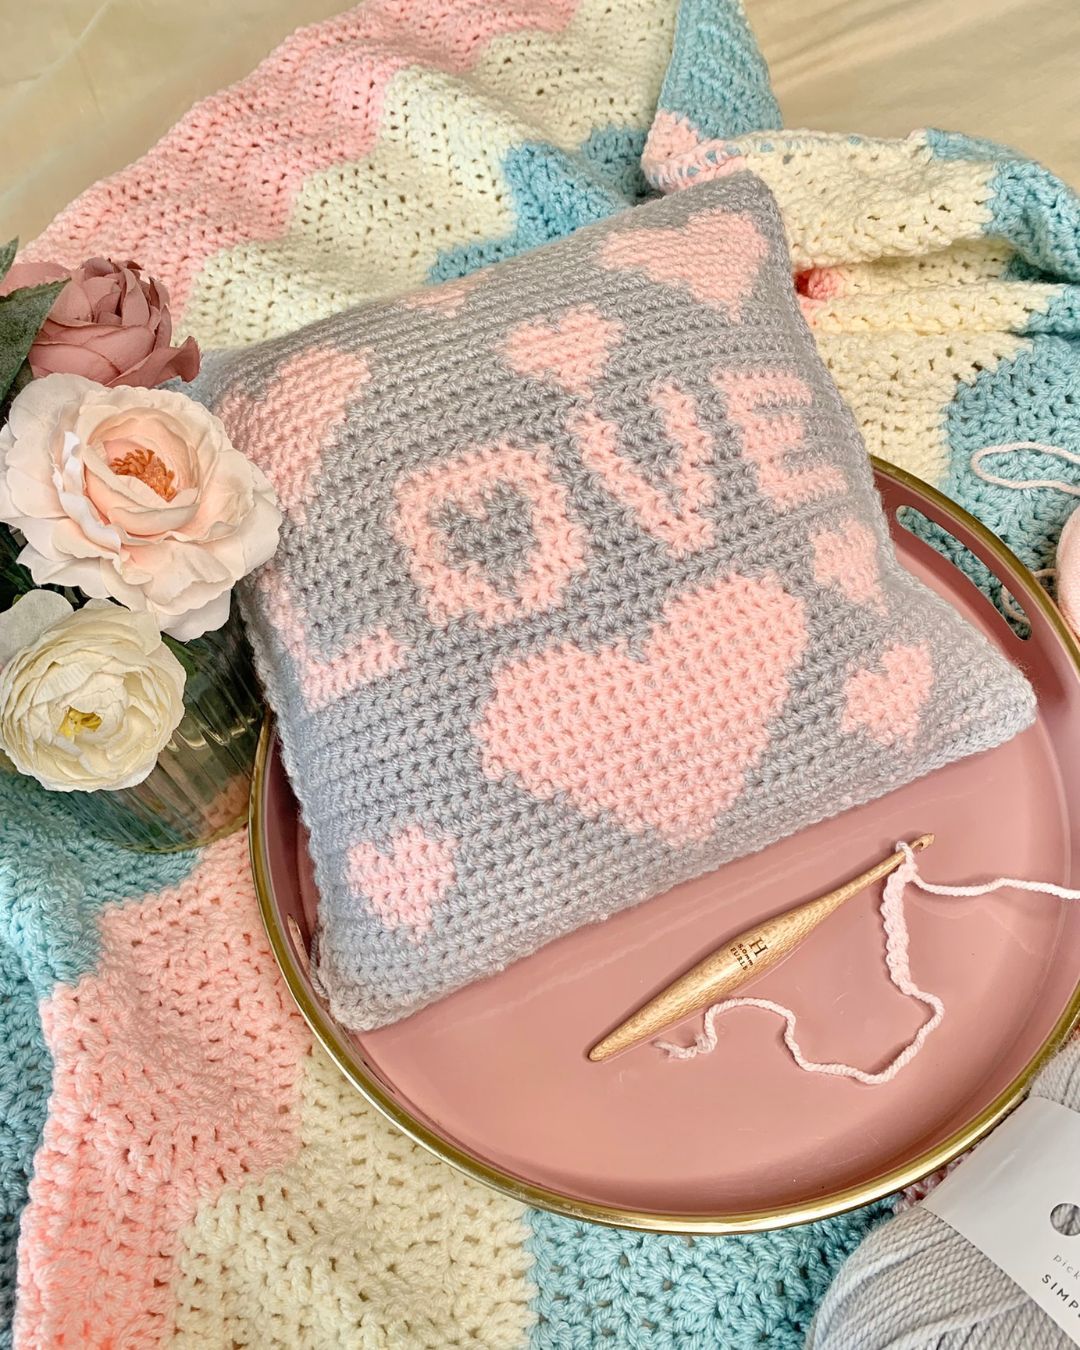
Love Hearts Tapestry Crochet Cushion Pattern
Use the tapestry crochet technique to create a crochet cushion covered in love hearts. This tapestry crochet project is a free pattern that is worked with 2 colours as an introductory pattern to the tapestry crochet technique.
Love Hearts Tapestry Crochet Cushion | Free Crochet Pattern
This super sweet crochet cushion pattern uses a colour work technique called tapestry crochet, where you use 2 or more differently coloured yarns, all worked in the same row of crochet.
Tapestry crochet changes between the different colours for different stitches within the row, working over the strands of yarn not being used, hiding the unworked yarn inside the stitch.
To find out what is tapestry crochet click here.
This love heart tapestry crochet cushion is created by making 2 panels, one using tapestry crochet and a second using just basic crochet stitches, that are crocheted together to join them.
Pin this Pattern to make it later
WE LOVE CROCHET!
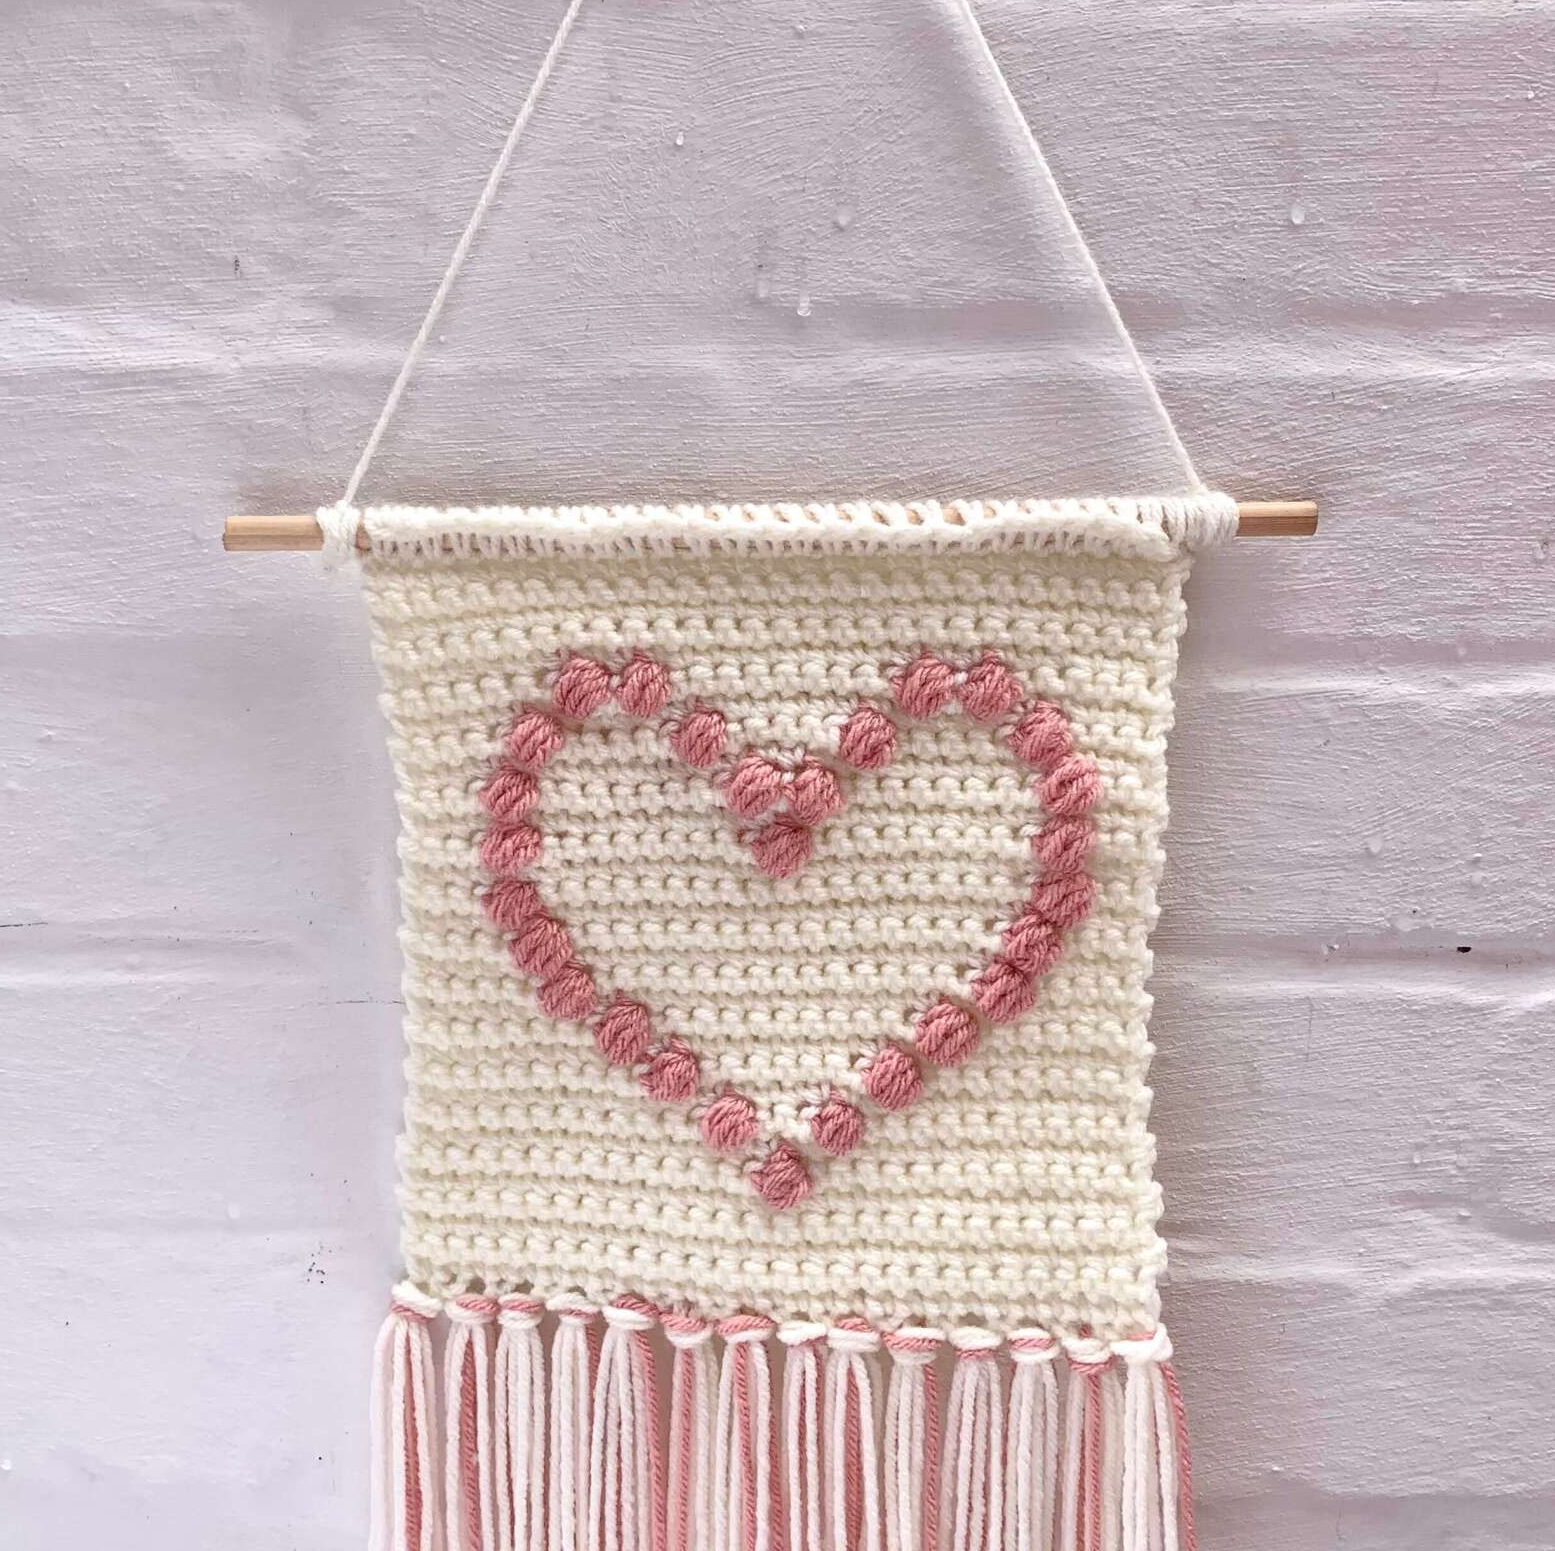
Like many people, crochet is one of the biggest loves in my life. There are a number of crochet patterns on this website that feature the love heart shape; all created using different crochet techniques.
One of my most popular patterns is the Show the Love Wall Hanging that uses the intarsia colour work technique to create a puff stitches in a contrasting colour without the headache of carrying the colour through the whole project. Click here to see this free pattern and create your own wall hanging.
There is also a beginner friendly LOVE Heart cushion that is a beginner friendly pattern that uses basic stitches, with increases and decreases to create the heart shape. Click here to see this free pattern and create your own LOVE Cushion.
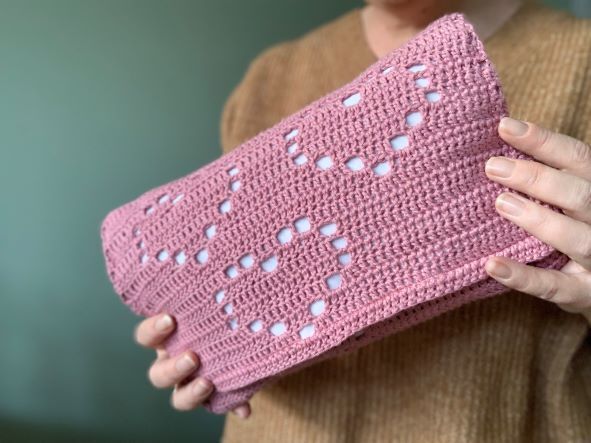
The same layout/chart for this LOVE Tapestry Crochet Cushion, was re-imagined to create the Heart to Hold Clutch Bag that used filet crochet, where chain spaces create an image in crochet fabric. Click here to see this free pattern and create your own

Purchase the Printable PDF Pattern
You can purchase a printable copy of this pattern by Clicking the button below to purchase from your favourite retailer:
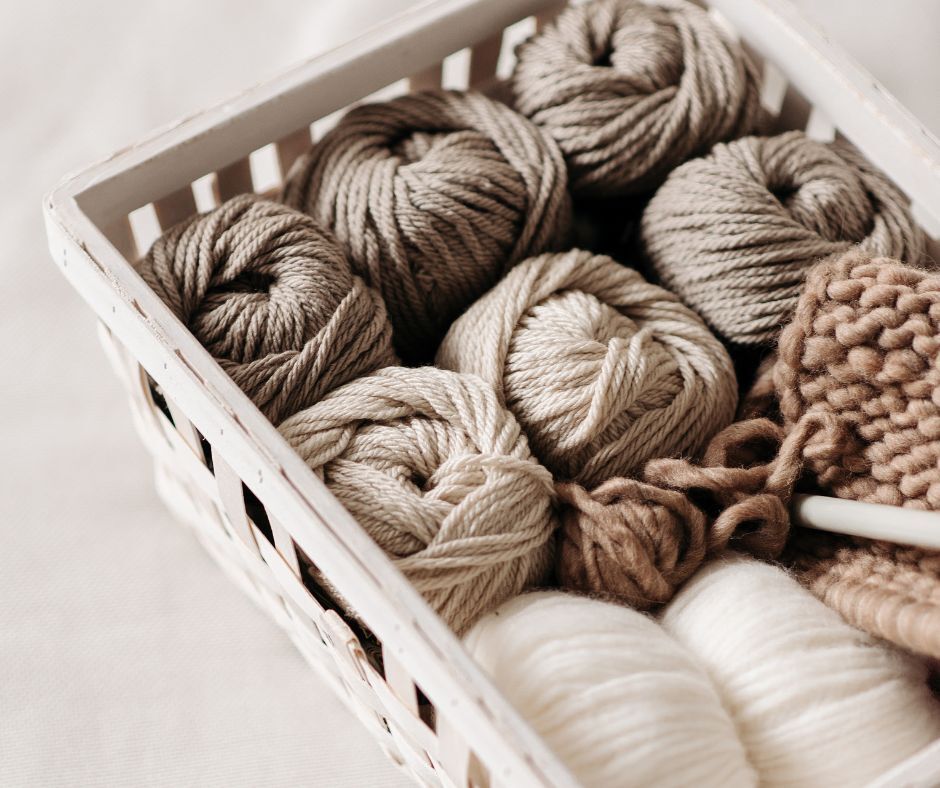
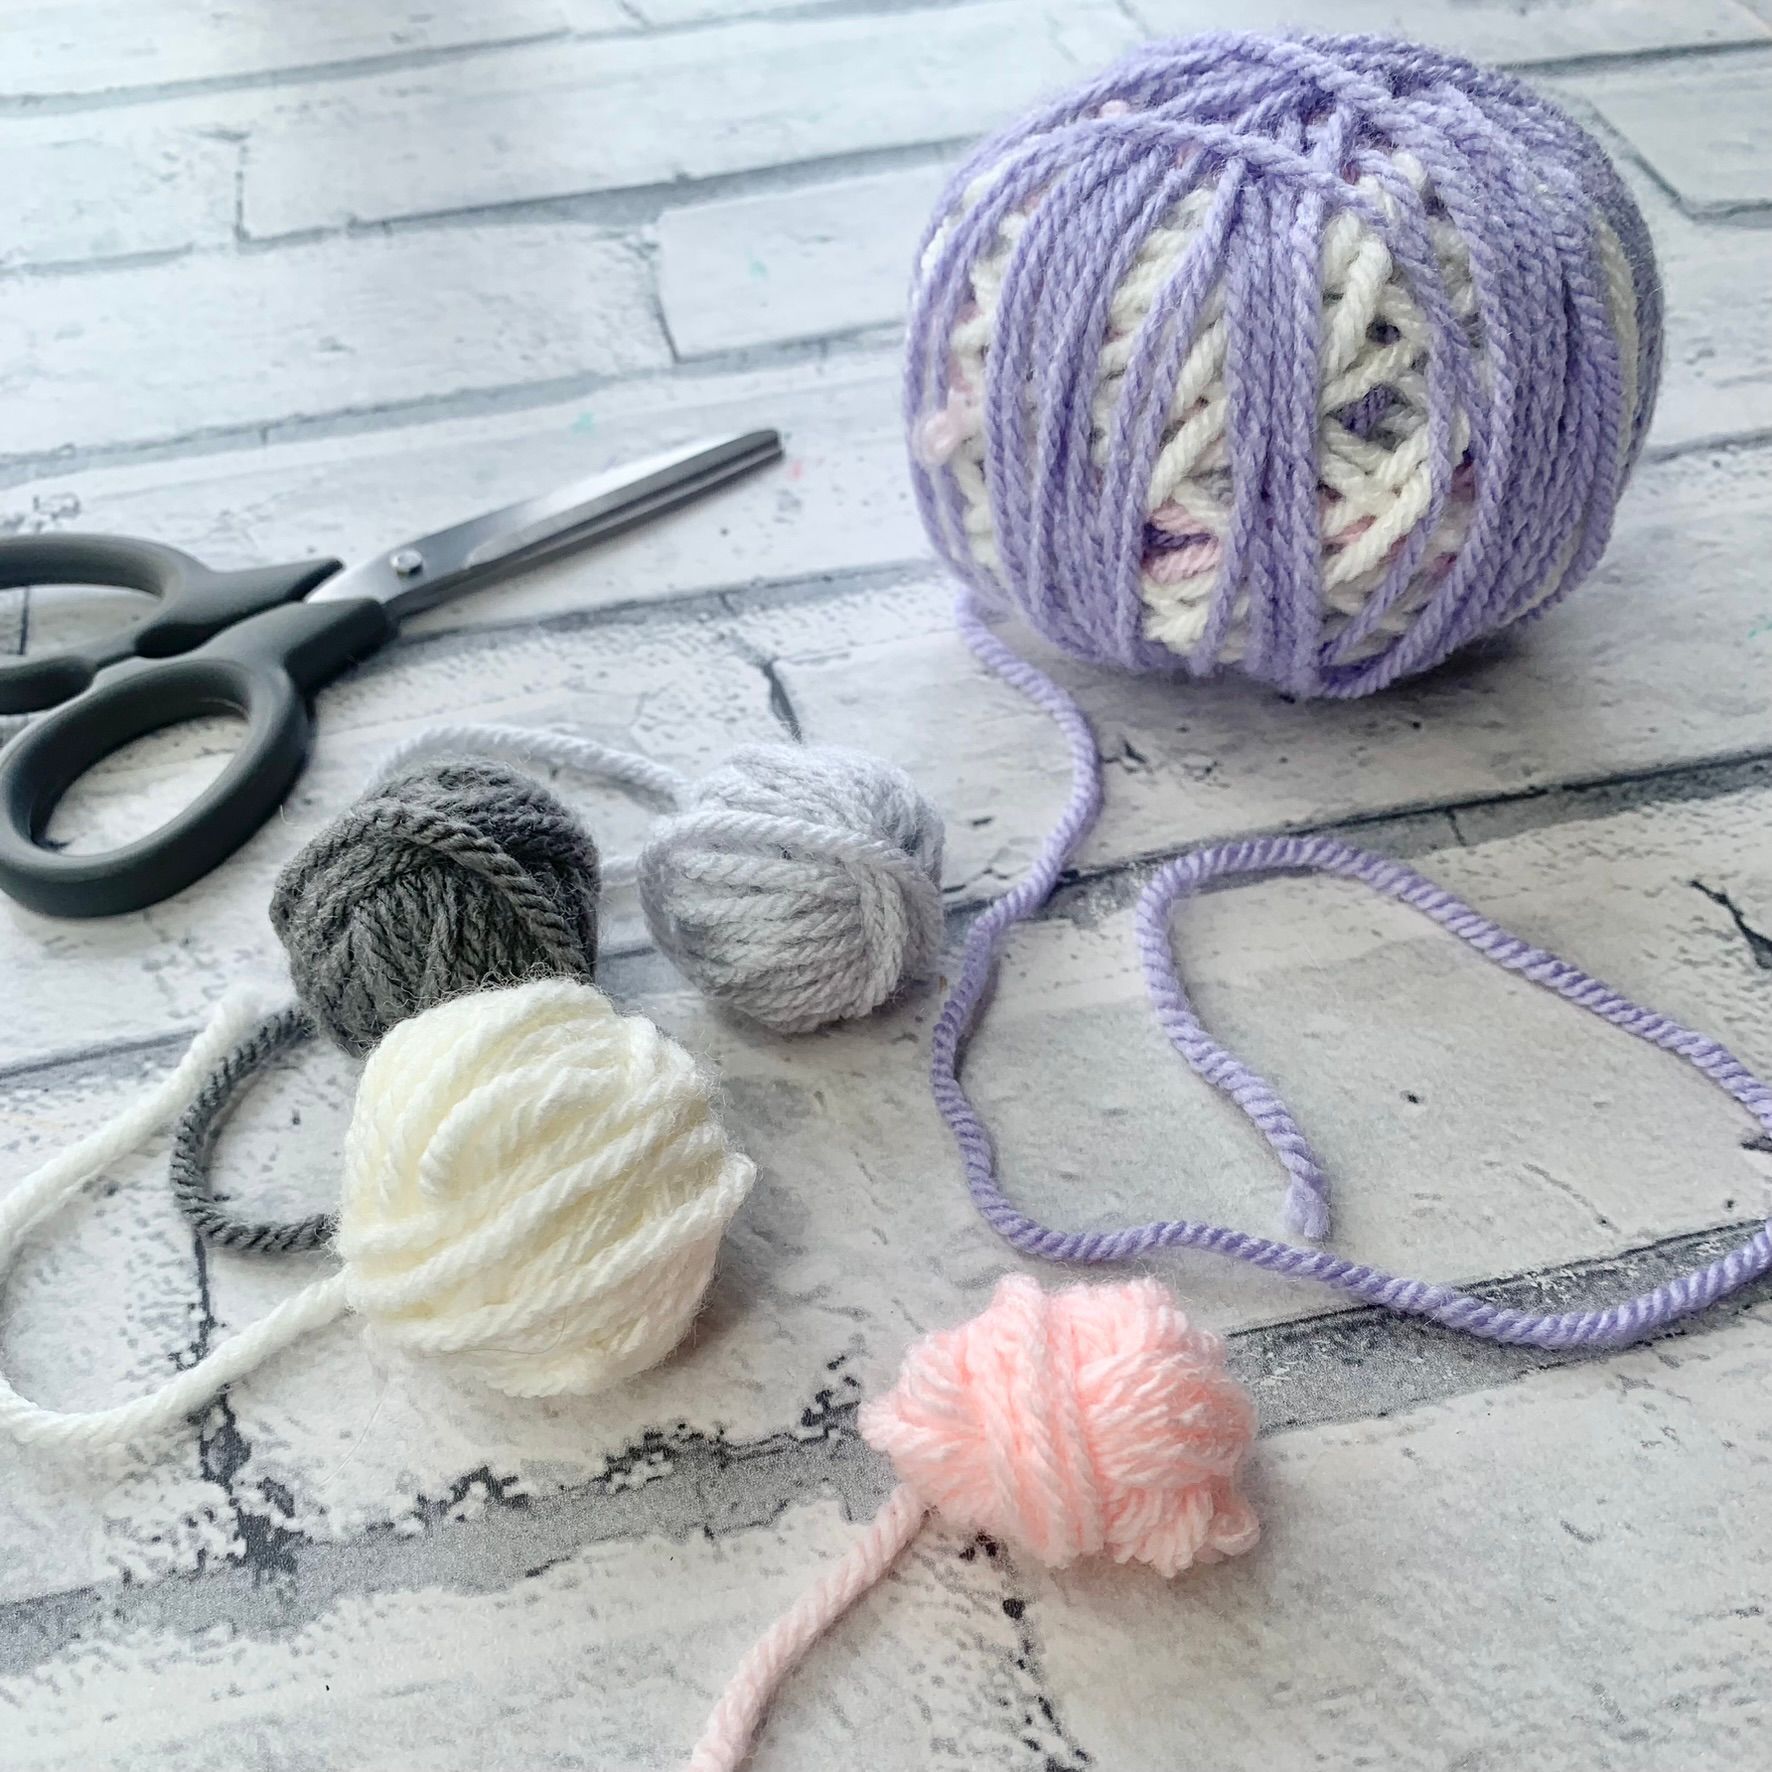
Yarn used in this tapestry crochet cushion
For this design, I used my much loved PaintBox Yarns, Simply Aran - this yarn has a price point of value yarn, but the quality of a much more expensive acrylic yarn.
It is normally recommended to use a cotton yarn when first trying tapestry crochet, as cotton does not stretch in the same way as cotton, but with a little care to avoid tightening the yarn too much as you work, even beginners can use acrylic yarn for tapestry crochet projects.
You can use any aran/worsted weight (size 4) yarn to make this pattern, just pick two contrasting colours to ensure that the image stands out.
How to crochet a love hearts tapestry crochet cushion | Pattern Details
Materials:
- Paintbox Yarns Simply Aran (100% acrylic; 184 yds/201 m per 3.5 oz/100 g)
- A - 2 x Stormy Grey
- B - 1 x Pearl Ballet Pink
- US Size H/8 (5.0mm) crochet hook
- US Size J/10 (6.0mm) crochet hook
- 12" pillow insert
- Yarn needle
Abbreviations
US Terms (UK in brackets)
st(s) - Stitches
ch - Chain
sl st - Slip stitch
sc (dc) - Single Crochet (double crochet)
RS - right side
WS - wrong side
Pattern Notes
- Whatever your skill level with crochet, it’s recommended to read through the pattern before beginning. Email [email protected] if you need any help completing the pattern.
- Beginning ch-1 does NOT count as stitch.
- Entire pattern is worked in sc.
- Follow written rows or chart as preferred.
- To change color: in stitch before colour change, insert hook, yo, pull up loop, drop 1st color, yo with new color, pull through all loops, continue with new color. *Make sure all yarn tails and carries are on the wrong side of work.
Gauge
- 15 sc and 16 rows = 4”/10 cm Adjust hook size if necessary to obtain gauge
Finished Size:
- 13” square, unblocked
How to crochet a Love hearts tapestry crochet cushion
Front Panel
Row 1 [RS]: With A and 5mm hook, ch 47, sc in 2nd ch from hook and in each across, turn - 46 sc
Rows 2-3: Ch 1, A 46, turn.
Rows 4-46: Follow chart for color changes or written instructions below chart.
Fasten off, weave in ends.
Love Hearts Tapestry Crochet Cushion Chart
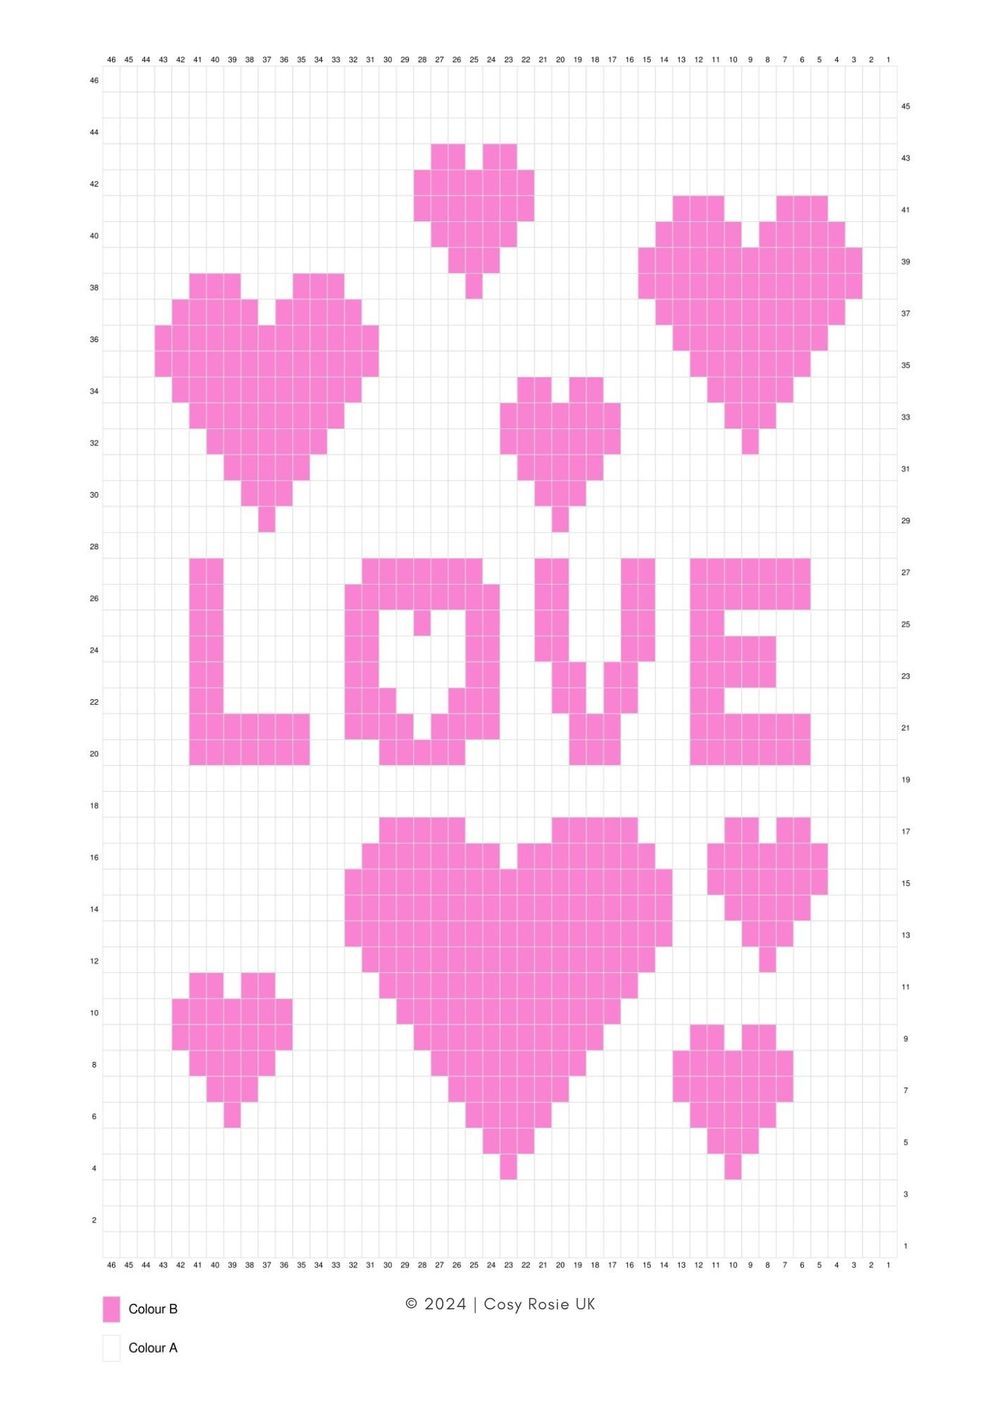
Love Hearts Tapestry Cushion Written Chart
Row 4: Ch 1, A 23, B 1, A 12, B 1, A 9, turn.
Row 5: Ch 1, A 8, B 3, A 10, B 3, A 22, turn.
Row 6: Ch 1, A 7, B 1, A 13, B 5, A 8, B 5, A 7, turn.
Row 7: Ch 1, [A 6, B 7] 2 times, A 11, B 3, A 6, turn.
Row 8: Ch 1, A 5, B 5, A 9, B 9, A 5, B 7, A 6, turn.
Row 9: Ch 1, A 7, B 2, A 1, B 2, A 5, B 11, A 7, B 7, A 4, turn.
Row 10: Ch 1, A 4, B 7, A 6, B 13, A 16, turn.
Row 11: Ch 1, A 15, B 15, A 6, B 2, A 1, B 2, A 5, turn.
Row 12: Ch 1, A 15, B 17, A 6, B 1, A 7, turn.
Row 13: Ch 1, A 6, B 3, A 4, B 19, A 14, turn.
Row 14: Ch 1, A 14, B 19, A 3, B 5, A 5, turn.
Row 15: Ch 1, A 4, B 7, A 2, B 19, A 14, turn.
Row 16: Ch 1, A 15, B 8, A 1, B 8, A 3, B 7, A 4, turn.
Row 17: Ch 1, A 5, B 2, A 1, B 2, [A 5, B 5] 2 times, A 16, turn.
Row 18: Ch 1, A 46, turn.
Row 19: Ch 1, A 46, turn.
Row 20: Ch 1, A 5, B 7, A 4, B 5, A 6, B 3, A 4, B 7, A 5, turn.
Row 21: Ch 1, A 5, B 7, A 4, B 3, A 4, B 4, A 1, B 4, A 2, B 7, A 5, turn.
Row 22: Ch 1, A 5, B 2, A 7, [B 3, A 3] 2 times, B 2, A 1, B 2, A 3, B 2, A 10, turn.
Row 23: Ch 1, A 7, B 5, A 3, B 2, A 1, B 2, A 3, B 2, A 5, B 2, A 7, B 2, A 5, turn.
Row 24: Ch 1, A 5, B 2, A 7, B 2, A 5, B 2, A 2, B 2, A 3, B 2, A 2, B 5, A 7, turn.
Row 25: Ch 1, A 10, B 2, A 2, B 2, A 3, [B 2, A 2] 2 times, B 1, A 2, B 2, A 7, B 2, A 5, turn.
Row 26: Ch 1, A 5, B 2, A 7, B 9, A 2, B 2, A 3, B 2, A 2, B 7, A 5, turn.
Row 27: Ch 1, A 5, B 7, A 2, B 2, A 3, B 2, A 3, B 7, A 8, B 2, A 5, turn.
Row 28: Ch 1, A 46, turn.
Row 29: Ch 1, A 19, B 1, A 16, B 1, A 9, turn.
Row 30: Ch 1, A 8, B 3, A 14, B 3, A 18, turn.
Row 31: Ch 1, A 17, B 5, A 12, B 5, A 7, turn.
Row 32: Ch 1, A 6, B 7, A 10, B 7, A 7, B 1, A 8, turn.
Row 33: Ch 1, A 7, B 3, A 6, B 7, A 9, B 9, A 5, turn.
Row 34: Ch 1, A 4, B 11, A 9, B 2, A 1, B 2, A 6, B 5, A 6, turn.
Row 35: Ch 1, A 5, B 7, A 18, B 13, A 3, turn.
Row 36: Ch 1, A 3, B 13, A 17, B 9, A 4, turn.
Row 37: Ch 1, A 3, B 11, A 17, B 5, A 1, B 5, A 4, turn.
Row 38: Ch 1, A 5, B 3, A 3, B 3, A 7, B 1, A 9, B 13, A 2, turn.
Row 39: Ch 1, A 2, B 13, A 8, B 3, A 20, turn.
Row 40: Ch 1, A 19, B 5, A 8, B 5, A 1, B 5, A 3, turn.
Row 41: Ch 1, A 4, B 3, A 3, B 3, A 8, B 7, A 18, turn.
Row 42: Ch 1, A 18, B 7, A 21, turn.
Row 43: Ch 1, A 22, B 2, A 1, B 2, A 19, turn.
Rows 44-46: Ch 1, A 46, turn.
Fasten off, weave in ends.
Continue to Back Panel.
Back Panel
Row 1 [RS]: With A and 6mm hook, ch 47, sc in 2nd ch from hook and in each across, turn - 46 sc
Rows 2-46: Ch 1, sc in each across, turn. Fasten off, weave ends.
Continue to Joining Panels.
Joining Panels
Join A in any corner, ch 1, working through both layers, *sl st in each across to corner, ch 1; repeat from * across next 2 sides, insert pillow form, working through both layers, sl st in each across to corner, ch 1, join.
Fasten off, weave ends.
Made it?
YAY - there's no better feeling than finishing a crochet project!!
Why not share a picture with me? You can head to the Your Projects page by clicking here or join the Cosy Rosie Community and share with us all so we can celebrate your project with you.
Pin it for Later

About the Autor
Hi, I'm Fiona, the hands behind Cosy Rosie Crochet - the place to learn to crochet as you make!
With over four years of hands-on experience leading in-person crochet workshops since 2018 and designing and publishing my own patterns since 2019, I bring a wealth of expertise of sharing crochet techniques.....

Cosy Rosie UK Crochet Blog