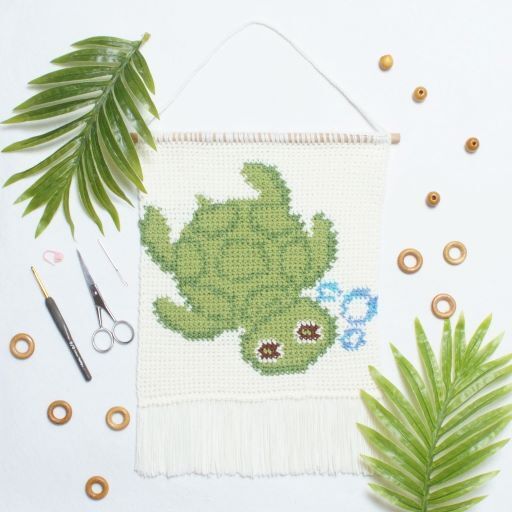
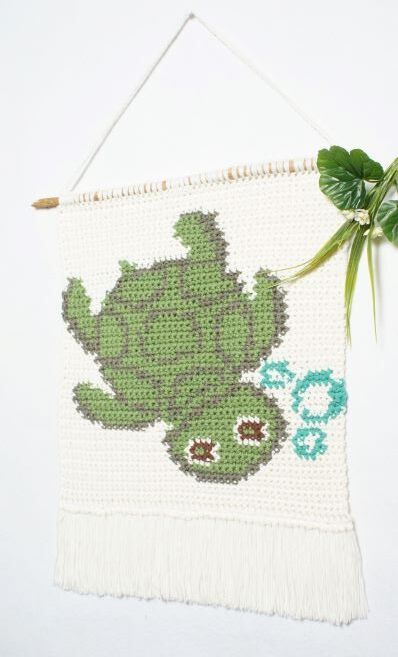
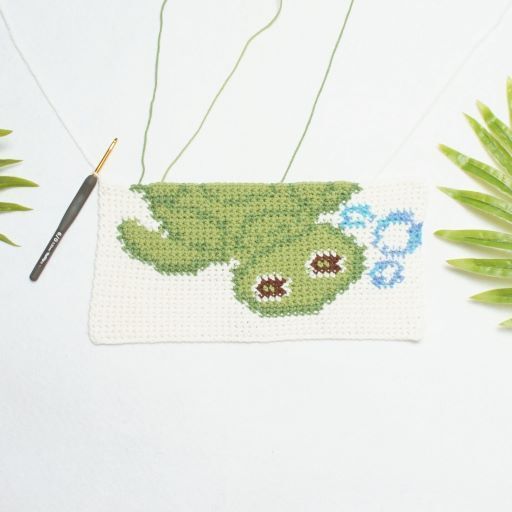
Crochet Sea Turtle Wall Hanging Pattern
Share your love of all things sea life, with this crochet sea turtle wall hanging pattern designed by Esraa Riyad Designs. Learn more about the intarsia and Fair Isle colour work techniques and how to crochet a flat turtle too.
Please note that some of the links in my blog are affiliate links. I may earn a small commission if you purchase via these links, but the price you pay is not affected
Crochet Sea Turtle Wall Hanging | Free Pattern
I am so excited to welcome our latest guest designer Esraa, from Esraa Riyad Designs who has created a sea life crochet wall hanging pattern for us to add a slash of tropical sea side fun to our homes.
This design uses 2 different colour work techniques:
- Intarsia
- Fair Isle
These techniques mean that this pattern is graded as Intermediate, but even beginners can master these techniques with little practice.
If you would like to try your hand with an easier intarsia pattern, have a peep at my
Show the Love Wall Hanging, which has a full video tutorial to help you manage your strands of yarn.
I will hand over to Esraa to take us through all the pattern details; have a good read through all the pattern notes to help with how to manage the colour changes.
Purchase the Printable PDF Pattern
You can purchase a printable copy of the Donatello Wall Hanging crochet pattern by Esraa Riyad Designs simply clicking the button below.
Use the coupon code ER20%OFF
and take 20% off all Esraa Riyad Designs between 14th & 20th June 2022
Hi I'm Esraa.
I’m naming the Donatello Wall Hanging after my little sea turtle that left us two years ago. I am a reptile hobbyist and have a special interest in sea turtles, so I thought that drawing a picture of him with my yarn & hook would be great.
My main focus in designing my patterns, is to make the design easy to implement in any color and yarn you prefer, there is no obligation to the gauge, and you will not have a problem in searching for a specific type or thickness of yarn or the appropriate hook size for the gauge... No restrictions, just choose your favorite yarn in a color that suits your home decor and go with the pattern written in an easy color abbreviation, so all you have to focus on is the correct number for each color.
So, are you ready to make this Sea Turtle Intarsia crochet wall hanging?
Donatello Wall Hanging | Sea Turtle Pattern
Skill Level: Intermediate
Finished Size:
Small - 10 x 10 inch / 25 x 25 cm (not including Fringes Or Hanging thread)
Medium - 13.7 x 13.7 inch / 35 x 35 cm (not including Fringes Or Hanging thread)
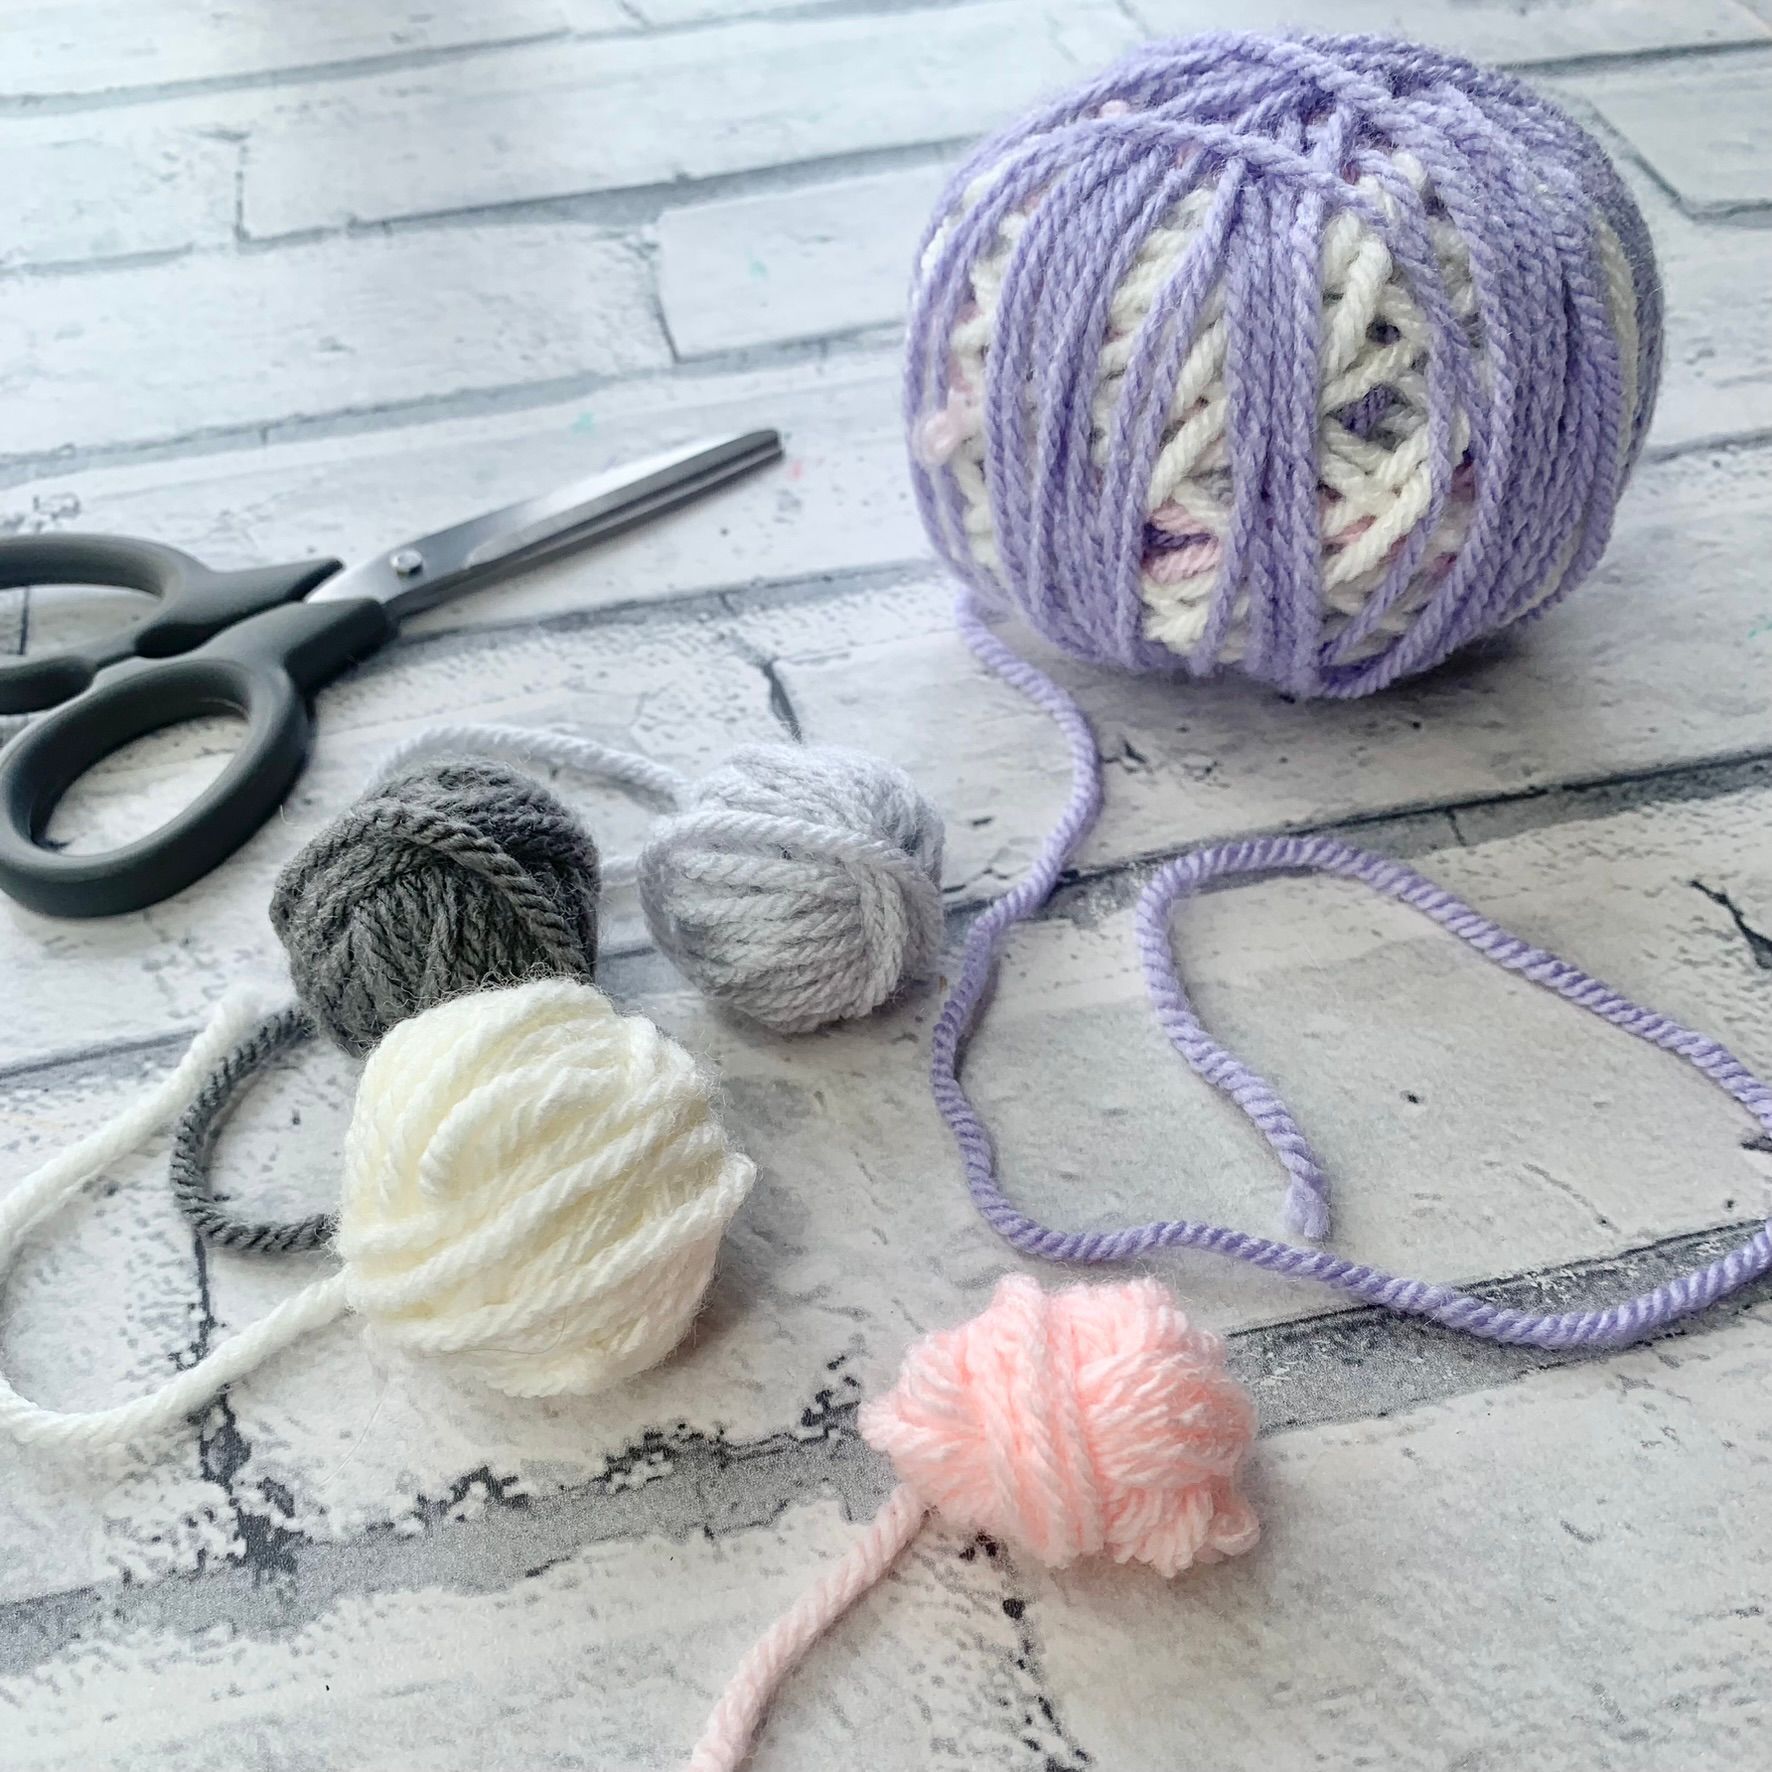
Materials:
Small
- 325 yard / 297 m Sport weight / Fine / #2 yarn
- 3.5mm crochet hook
Medium
- 722 yard / 660 m Sport / Fine / #2 yarn with two strands together
- 5m crochet hook
All Sizes
- Dowel or small tree branch
- Scissors
- Darning needle
Colour Abbreviations:
(A) = White
(B) = Dark Green
(C) = Green
(D) = Turquoise
(E) = Brown
Abbreviations - US Terms
(UK Terms in Bracket):
Ch Chain
St(s) Stitch(es)
Sc (Dc) Single Crochet (Double Crochet)
Gauge:
- Not essential for this pattern. Any yarn can be used for this pattern. Of course, the size will vary depending on the yarn used, hook size, and tension.
Pattern Notes:
- The Pattern is written in US terms
- The Wall Hanging is worked from the bottom up, in rows
- The Wall Hanging is worked in Single Crochet Stitch (Double Crochet)
- Turn at the end of each row
- The first stitch of each row should be placed into the same stitch as the turning chain
- Ch1 does not count as a stitch throughout the pattern
- The odd numbered rows are Right Side and the evenly numbered rows are Wrong Side
- The pattern is written as a color abbreviation
- for example, 10 (A) means 10 single crochets in the color White
- The color change is made with the final yarn over and pull-through of the last stitch before the color change
- For Example: with color A, insert hook in stitch, yarn over, pull up a loop, with color B, yarn over and draw through both loops on hook, proceed with color B stitches
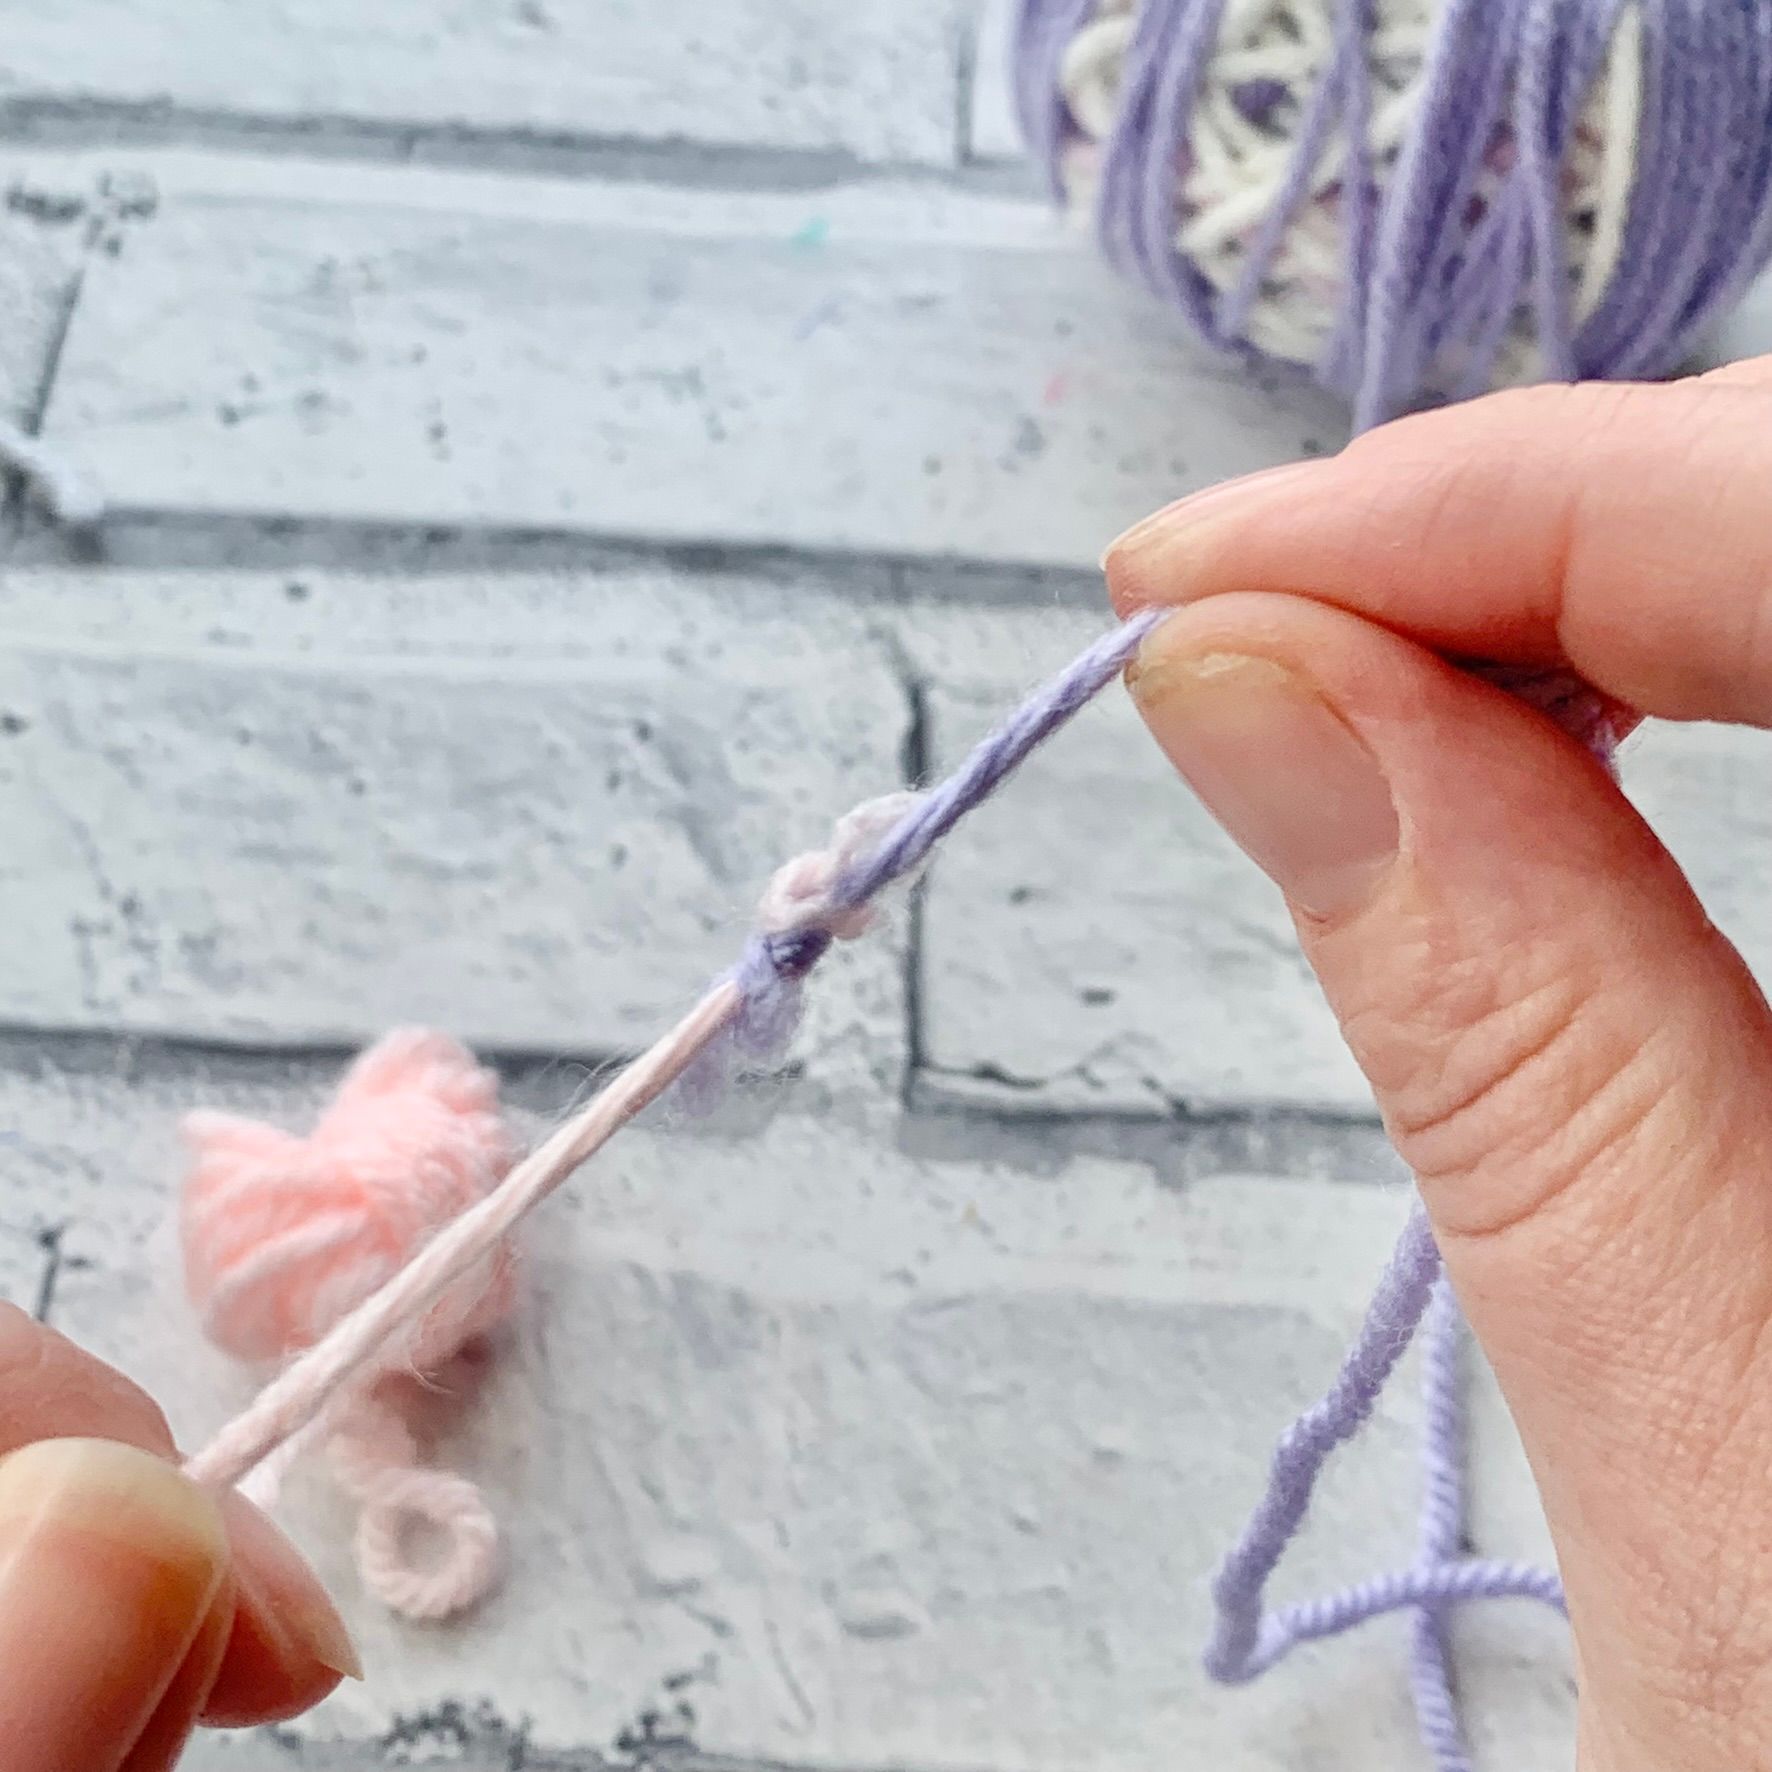
- The wall Hanging is worked up using the Intarsia Crochet method and the Fair Isle crochet method if needed, but remember you can choose your comfort method as you want
- For Intarsia, you will not carry the non-working yarn in the larger spaces between colours
- Let the yarn hang from the last stitch on the wrong side
- For Fair Isle the non-working yarn creates floats behind the work; used in the smaller spaces between colours
How to make this Sea Turtle Wall Hanging Pattern
Start with Foundation chain: With color (A), Ch 51, and turn.
Row 1: (A) 50. (50)
Row 2: (A) 50.
Row 3: (A) 50.
Row 4: (A) 50.
Row 5: (A) 50.
Row 6: (A) 25, (B) 9, (A) 16. (50).
Row 7: (A) 15, (B) 11, (A) 24.
Row 8: (A) 23, (B) 2, (C) 9, (B) 2, (A) 14.
Row 9: (A) 13, (B) 2, (C) 6, (A) 4, (B) 3, (A) 22.
Row 10:
(A) 21, (B) 2, (C) 1, (A) 1, (E) 4, (A) 1, (C) 6, (B) 2, (A) 12.

Row 11: (A) 4 , (D) 3 , (A) 4 , (B) 2 , (C) 7 , (A) 1 , (E) 1 , (C) 2 , (E) 1 , (A) 1 , (C) 2 , (B) 1 , (A) 21 .(50)
Row 12: (A) 21 , (B) 1 , (C) 2 , (A) 1 , (E) 4 , (A) 1 , (C) 8 , (B) 2 , (A) 2 , (D) 2 , (A) 1 , (D) 2 ,(A) 3.
Row 13: (A) 3 , (D) 1 , (A) 3 , (D) 1 , (A) 1 , (B) 2 , (C) 2 , (A) 4 , (C) 4 , (A) 4 , (C) 3 , (B) 1 , (A) 21.
Row 14: (A) 21 , (B) 2 , (C) 9 , (A) 1 , (E) 4 , (A) 1 , (C) 1 , (B) 2 , (A) 1 , (D) 2 , (A) 2 , (D) 1 , (A) 3.
Row 15: (A) 3 , (D) 4 , (A) 2 , (B) 2 , (C) 1 , (A) 1 , (E) 1 , (C) 2 , (E) 1 , (A) 1 , (C) 8 , (B) 3 , (A) 5 , (B) 6 , (A) 10.
Row 16: (A) 9 , (B) 8 , (A) 5 , (C) 1 , (B) 2 , (C) 7 , (A) 1 , (E) 4 , (A) 1 , (C) 1 , (B) 2 , (A) 9.
Row 17: (A) 2 , (D) 4 , (A) 3 , (B) 2 , (C) 2 , (A) 4 , (C) 8 , (B) 1 , (C) 3 , (A) 1 , (B) 5 , (C) 5 , (B) 3 , (A) 7.
Row 18: (A) 5 , (B) 3 , (C) 11 , (B) 1 , (C) 4 , (B) 3 , (C) 12 , (B) 2 , (A) 2 , (D) 1 , (A) 3 , (D) 2 , (A) 1.
Row 19: (D) 2 , (A) 5 , (D) 1 , (A) 2 , (B) 2 , (C) 10 , (B) 2 , (C) 2 , (B) 3 , (C) 1 , (B) 4 , (C) 9 , (B) 3 , (A) 4.
Row 20: (A) 4 , (B) 2 , (C) 8 , (B) 3 , (C) 2 , (B) 1 , (C) 1 , (B) 1 , (C) 2 , (B) 1 , (C) 2 , (B) 3 , (C) 7 , (B) 2 , (A) 3 , (D) 1 , (A) 5 , (D) 2.
Row 21: (D) 2 , (A) 5 , (D) 1 , (A) 4 , (B) 2 , (C) 4 , (B) 3 , (C) 3 , (B) 1 , (C) 2 , (B) 2 , (C) 1 ,(B) 1 , (C) 5 , (B) 2 , (C) 7 , (B) 2 , (A) 3 .(50).
Row 22: (A) 3 , (B) 1 , (C) 7 , (B) 2 , (C) 6 , (B) 1 , (C) 2 , (B) 1 , (C) 3 , (B) 2 , (C) 3 , (B) 2 , (C) 2 , (B) 2 , (A) 5 , (D) 2 , (A) 4 , (D) 2 .
Row 23: (A) 1 , (D) 6 , (A) 2 , (D) 4 , (A) 1 , (B) 4 , (C) 2 , (B) 2 , (C) 5 , (B) 1 , (C) 2 , (B) 1 , (C) 7 , (B) 2 , (A) 2 , (C) 4 , (B) 1 , (A) 3 .
Row 24: (A) 3 , (B) 1 , (C) 2 , (A) 4 , (B) 1 , (C) 7 , (B) 2 , (C) 2 , (B) 2 , (C) 6 , (B) 1 , (C) 2 , (A) 4 , (D) 1 , (A) 3 , (D) 1 , (A) 2 , (D) 4 , (A) 2 .
Row 25: (A) 8 , (D) 2 , (A) 2 , (D) 1 , (A) 3 , (B) 2 , (C) 1 , (B) 1 , (C) 4 , (B) 3 , (C) 4 , (B) 3 , (C) 5 , (B) 2 , (A) 9 .
Row 26: (A) 8 , (B) 1 , (C) 6 , (B) 2 , (C) 8 , (B) 6 , (C) 1 , (B) 4 , (A) 1 , (D) 4 , (A) 9 .
Row 27: (A) 13 , (B) 3 , (C) 1 , (B) 2 , (C) 15 , (B) 5 , (C) 2 , (B) 1 , (A) 8 .
Row 28: (A) 8 , (B) 4 , (C) 7 , (B) 4 , (C) 7 , (B) 2 , (C) 2 , (B) 1 , (C) 1 , (B) 2 , (A) 12 .
Row 29: (A) 11 , (B) 2 , (C) 2 , (B) 1 , (C) 3 , (B) 2 , (C) 3 , (B) 3 , (C) 4 , (B) 2 , (C) 4 , (B) 6 , (A) 7 .
Row 30: (A) 7 , (B) 1 , (C) 4 , (B) 2 , (C) 2 , (B) 1 , (C) 9 , (B) 1 , (C) 2 , (B) 1 , (C) 4 , (B) 2 , (C) 2 , (B) 2 , (A) 10 .
Row 31: (A) 10 , (B) 1 , (C) 3 , (B) 1 , (C) 5 , (B) 1 , (C) 2 , (B) 1 , (C) 9 , (B) 1 , (C) 2 , (B) 1 , (C) 5 , (B) 3 , (A) 5 .
Row 32: (A) 4 , (B) 4 , (C) 5 , (B) 1 , (C) 2 , (B) 1 , (C) 9 , (B) 1 , (C) 2 , (B) 1 , (C) 5 , (B) 1 , (C) 3 , (B) 2 , (A) 9 .
Row 33: (A) 9 , (B) 2 , (C) 3 , (B) 1 , (C) 5 , (B) 1 , (C) 2 , (B) 2 , (C) 8 , (B) 1 , (C) 2 , (B) 1 , (C) 5 , (B) 1 , (C) 1 , (B) 3 , (A) 3 .
Row 34: (A) 2 , (B) 3 , (C) 2 , (B) 1 , (C) 5 , (B) 1 , (C) 3 , (B) 1 , (C) 7 , (B) 1 , (C) 3 , (B) 1 , (C) 5 , (B) 1 , (C) 3 , (B) 2 , (A) 9 .
Row 35: (A) 9 , (B) 2 , (C) 3 , (B) 2 , (C) 3 , (B) 2 , (C) 3 , (B) 1 , (C) 7 , (B) 1 , (C) 3 , (B) 2 , (C) 4 , (B) 1 , (C) 3 , (B) 3 , (A) 1 .
Row 36: (A) 1 , (B) 2 , (C) 4 , (B) 1 , (C) 4 , (B) 1 , (C) 4 , (B) 2 , (C) 4 , (B) 3 , (C) 4 , (B) 3 , (C) 1 , (B) 1 , (C) 4 , (B) 2 , (A) 9 .
Row 37: (A) 9 , (B) 2 , (C) 4 , (B) 3 , (C) 3 , (B) 2 , (C) 4 , (B) 5 , (C) 5 , (B) 3 , (C) 1 , (B) 2 , (C) 4 , (B) 3 .
Row 38: (B) 1 , (C) 5 , (A) 2 , (B) 3 , (C) 3 , (B) 3 , (C) 9 , (B) 5 , (C) 4 , (A) 1 , (C) 3 , (B) 2 , (A) 9 .
Row 39: (A) 10 , (B) 1 , (C) 3 , (A) 2 , (B) 4 , (C) 3 , (B) 3 , (C) 5 , (B) 3 , (C) 1 , (B) 3 , (C) 3 , (A) 3 , (C) 5 , (B) 1 .
Row 40: (B) 1 , (C) 5 , (A) 3 , (C) 2 , (B) 2 , (C) 5 , (B) 2 , (C) 3 , (B) 2 , (C) 7 , (B) 2 , (A) 2 , (C) 3 , (B) 1 , (A) 10 .
Row 41: (A) 10 , (B) 2 , (C) 2 , (A) 3 , (B) 1 , (C) 8 , (B) 1 , (C) 2 , (B) 2 , (C) 7 , (B) 1 , (C) 1 , (A) 4 , (C) 5 , (B) 1 .
Row 42: (B) 2 , (C) 3 , (A) 6 , (B) 2 , (C) 7 , (B) 1 , (C) 2 , (B) 1 , (C) 6 , (B) 3 , (A) 3 , (B) 2 , (A) 12
Row 43: (A) 19 , (B) 1 , (C) 6 , (B) 1 , (C) 2 , (B) 1 , (C) 7 , (B) 1 , (A) 7 , (C) 3 , (B) 1 , (A) 1 .
Row 44: (A) 1 , (B) 1 , (C) 2 , (A) 8 , (B) 4 , (C) 4 , (B) 1 , (C) 2 , (B) 1 , (C) 6 , (B) 1 , (A) 19 .
Row 45: (A) 19 , (B) 8 , (C) 2 , (B) 6 , (C) 2 , (A) 10 , (C) 1 , (B) 1 , (A) 1 .
Row 46: (A) 12 , (C) 3 , (A) 3 , (C) 11 , (B) 2 , (A) 19 .
Row 47: (A) 19 , (B) 2 , (C) 4 , (A) 11 , (C) 2 , (A) 12 .
Row 48: (A) 25 , (C) 4 , (B) 2 , (A) 19 .
Row 49: (A) 19 , (B) 3 , (C) 4 , (A) 24 .
Row 50: (A) 23 , (C) 5 , (B) 2 , (A) 20 .
Row 51: (A) 20 , (B) 3 , (C) 5 , (A) 22 .
Row 52: (A) 22 , (C) 5 , (B) 2 , (A) 21 .
Row 53: (A) 21 , (B) 3 , (C) 5 , (A) 21 .
Row 54: (A) 21 , (C) 4 , (B) 3 , (A) 22 .
Row 55: (A) 24 , (B) 4 , (A) 22 .
Row 56: (A) 50 .(50).
Row 57: (A) 50 .
Row 58: (A) 50 .
Row 59: (A) 50 .
Row 60: (A) 50 .
After finishing the last row in your wall Hanging, DO NOT fasten off, continue on to adding branch/dowel:
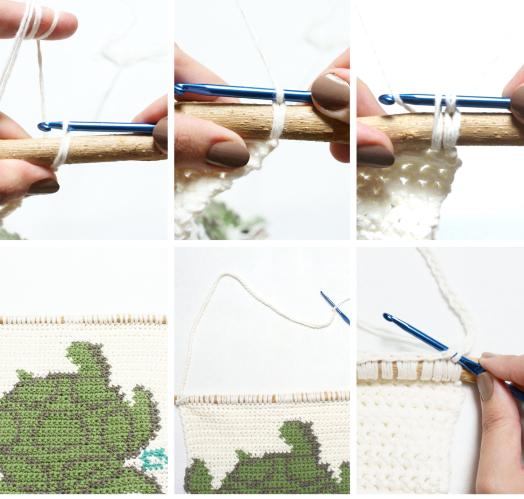
Adding the Dowel | Crochet Sea Turtle Wall Hanging
- Insert the hook into the first stitch and under the wood dowel, grab the yarn in the other hand.
- Yarn Over, then pull through the loop and repeat till you reach the last stitch
- Chain 70 chains to make the hanging Strap.
- Attach the last chain to the first chain on the dowel with a Slip Stitch.
- Fasten off and weave in any remaining ends
Attaching the Fringe
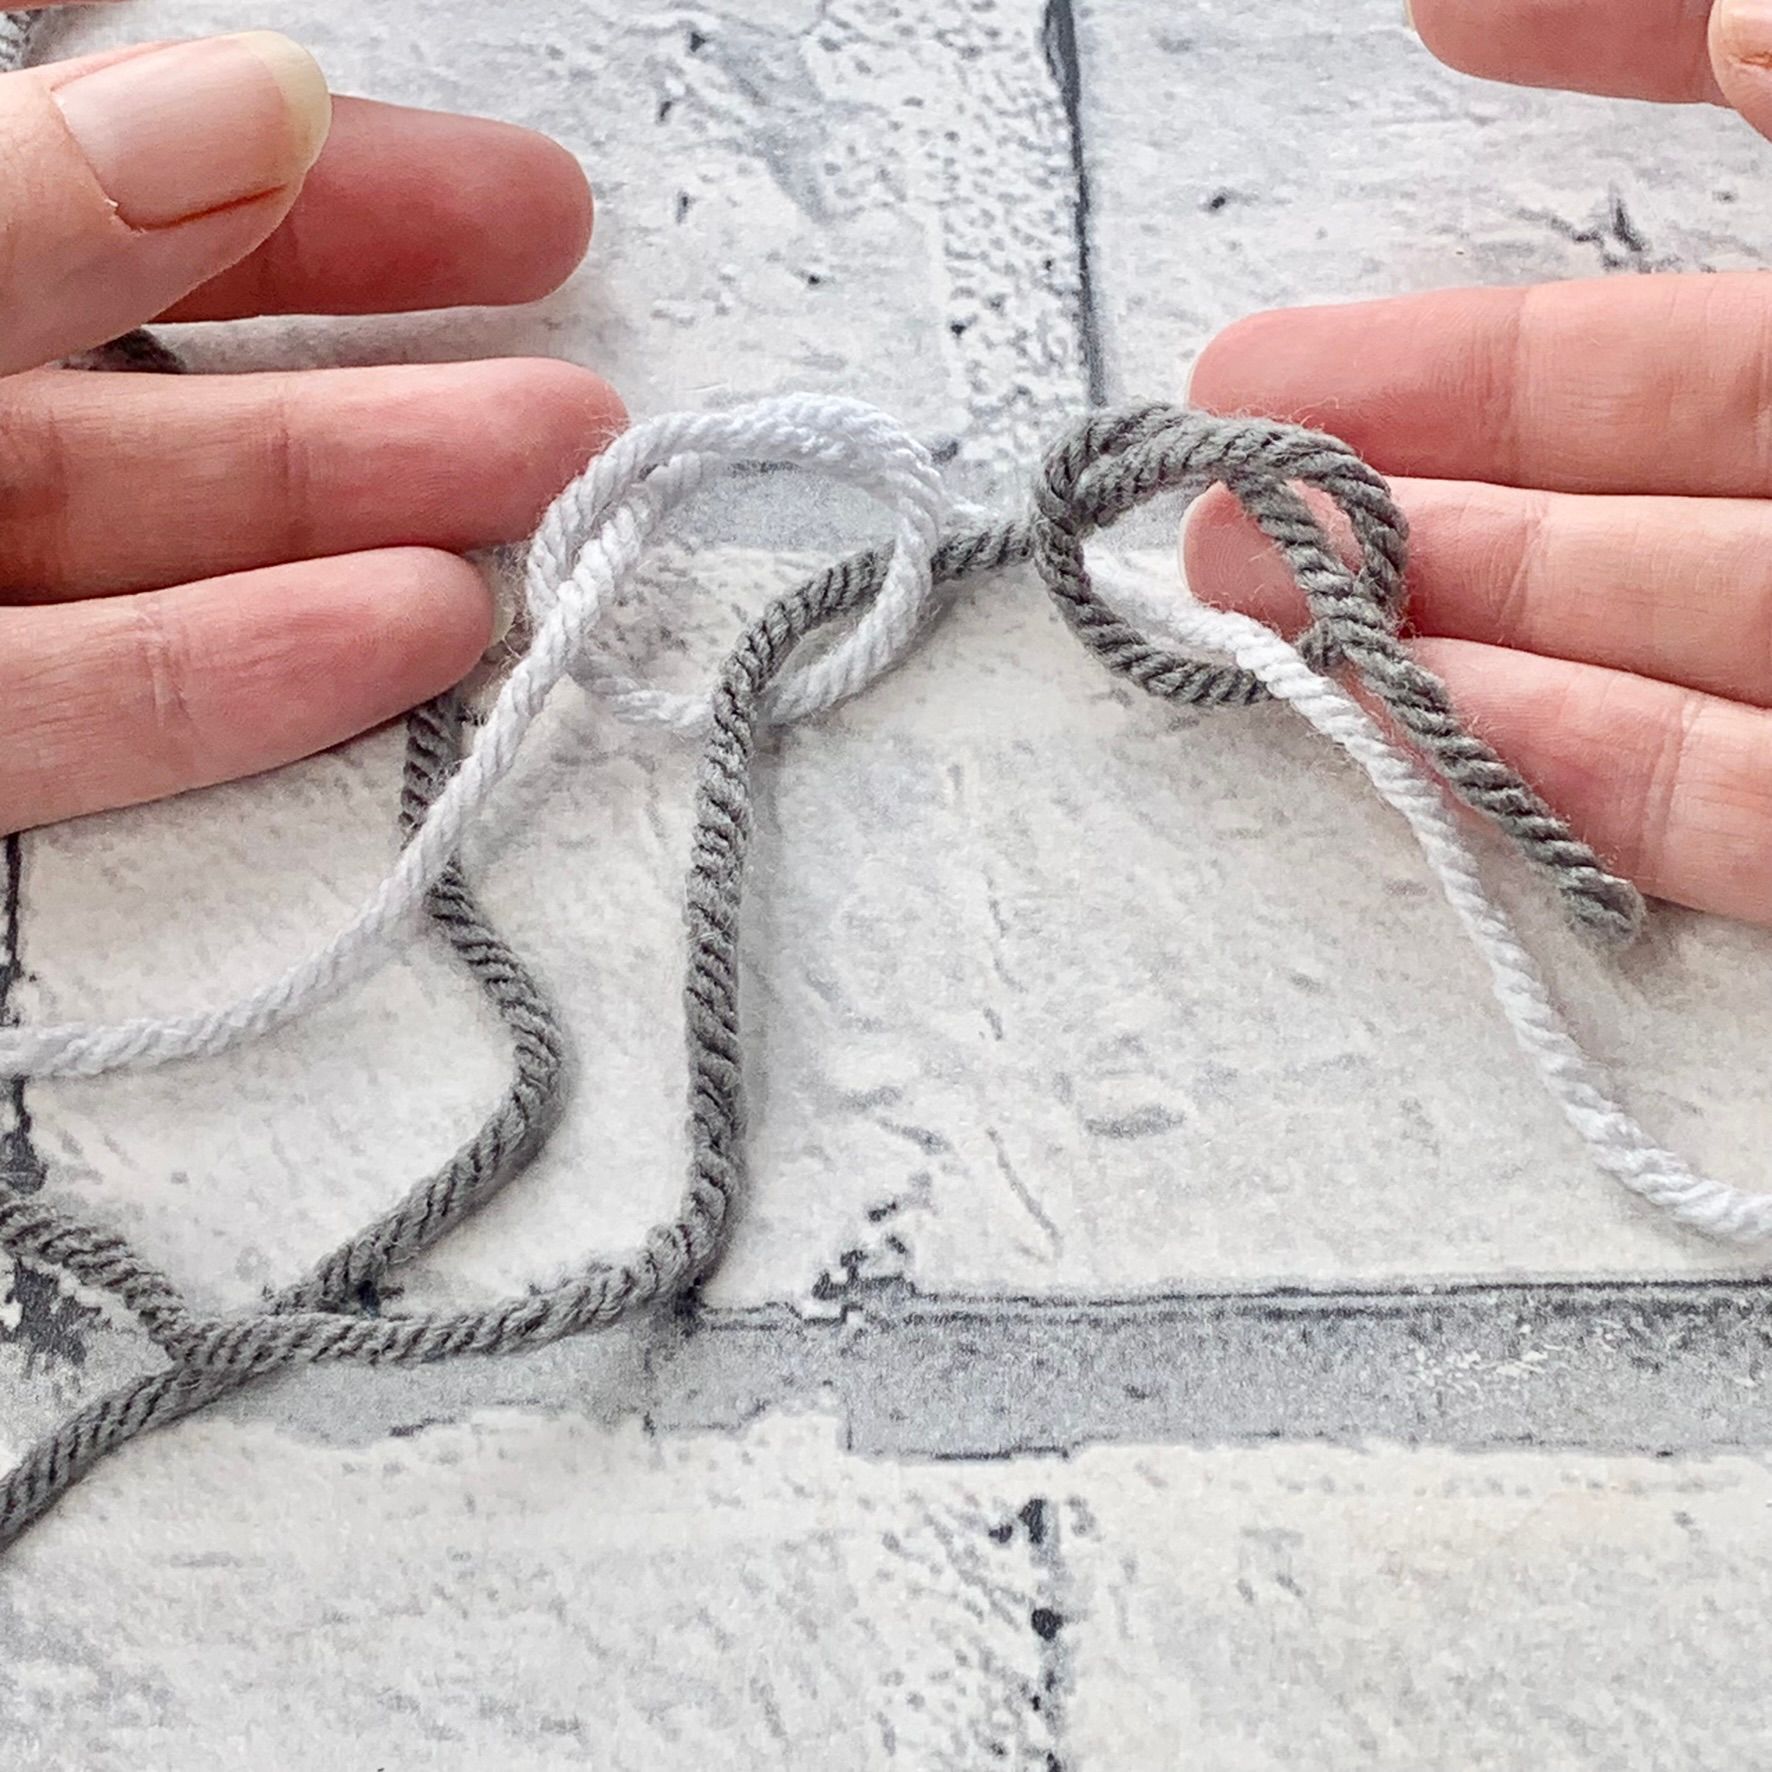
To Create the Fringe:
- cut 20 cm / 8-inch pieces of yarn in, you will need 2 strands to complete one Fringe.
To attach the Fringe:
- With 2 strands of yarn
- use a larger crochet hook
- insert the hook through the first foundation chain on the bottom of the wall hanging
- fold the 2 strands in half and loop the middle of the strands onto the crochet hook
- pull the loop of strands through the foundation chain and pull to tighten
- Use a wooden comb to straighten the fringe or lightly steam before cutting
Designer Information
I hope you've enjoyed making this crochet sea turtle wall hanging designed by Esraa.
If you have any questions about this pattern please email [email protected]
If you would like to see more of her amazing designs you can find her here:
Website: https://esraariyaddesigns.com/
Ravelry Shop: https://www.ravelry.com/stores/esraa-riyad-designs
Social Media: @esraariyad.designs
Don't forget to share a picture of your wall hanging into the community group so that we can celebrate your success with this pattern.
If you would like to purchase the printable colour chart and crochet pattern, click the button below to be taken to the designers Ravelry Shop:
The content of this pattern, details, and photos are property of “Esraa Riyad Designs”. Distribution, Copying, or sharing of this pattern is not permissible. Please feel free to use this pattern to create and sell, only with the credentials of the pattern given to “Esraa Riyad Designs”.
I'd love to see your product photos, please use hashtag #donatello_wallhanging and tag, or mention me @esraariyad.designs on Facebook and Instagram.
*This pattern and its images are copyright protected and the sole property of Fiona Field/Cosy Rosie UK 2022. Please do not redistribute, transfer, sell the pattern, or alter it to claim as your own. *

About the Autor
Hi, I'm Fiona, the hands behind Cosy Rosie Crochet - the place to learn to crochet as you make!
With over four years of hands-on experience leading in-person crochet workshops since 2018 and designing and publishing my own patterns since 2019, I bring a wealth of expertise of sharing crochet techniques.....


Cosy Rosie UK Crochet Blog