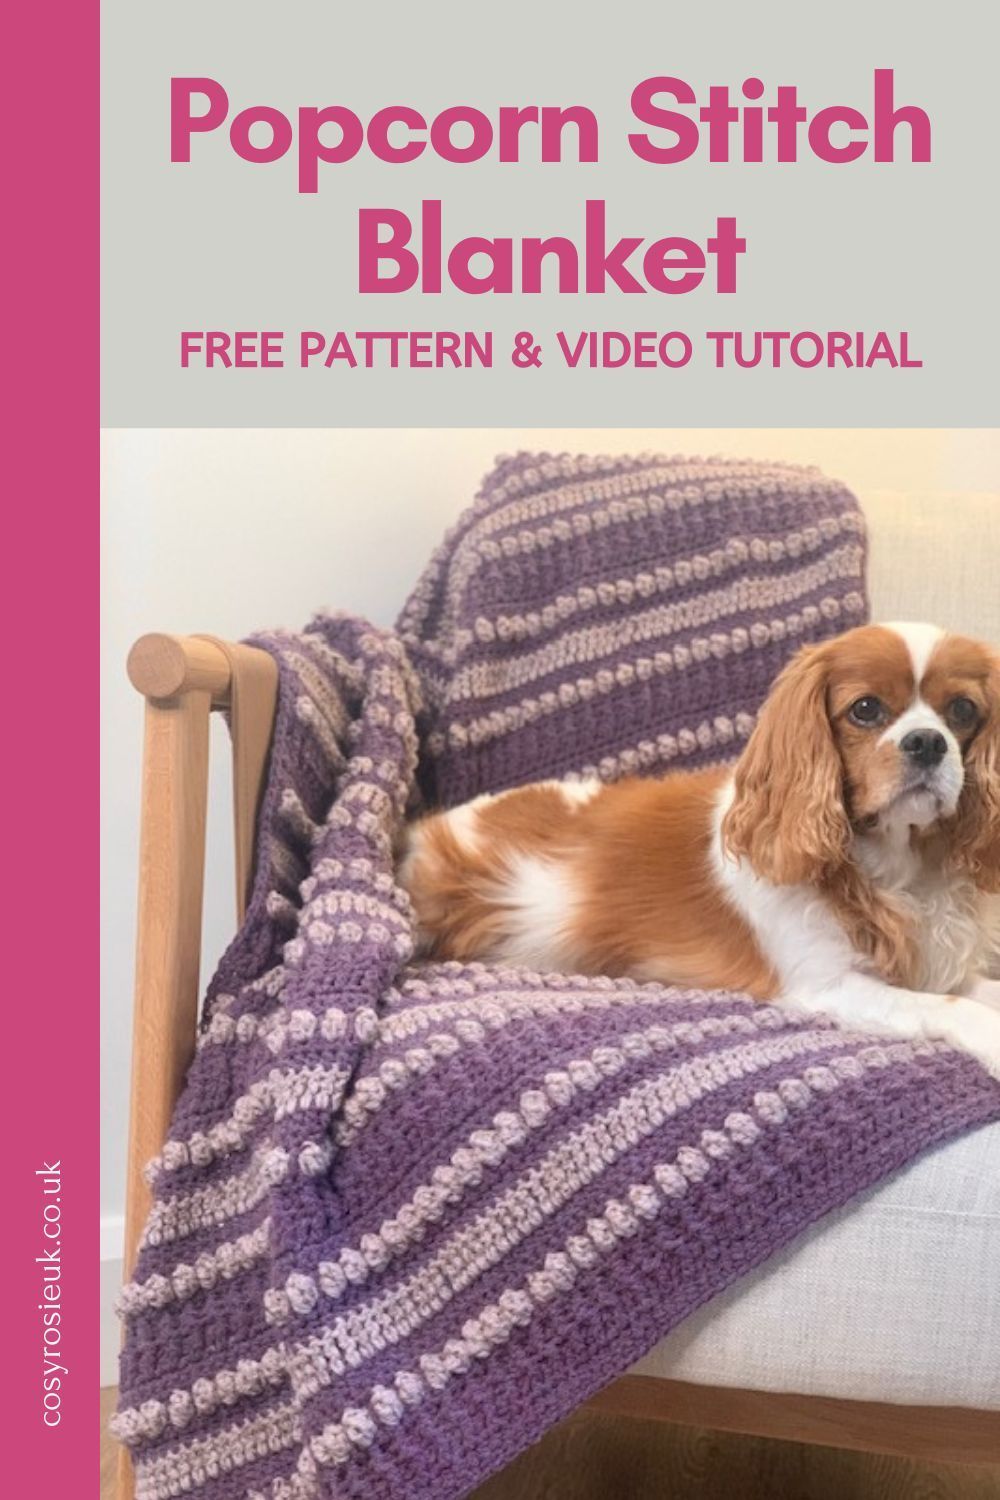
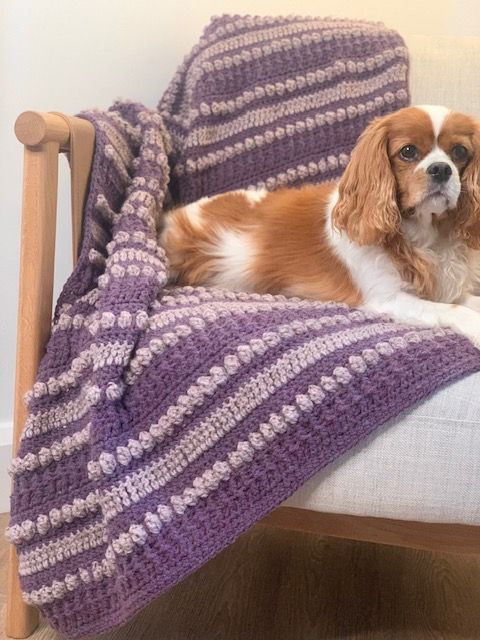
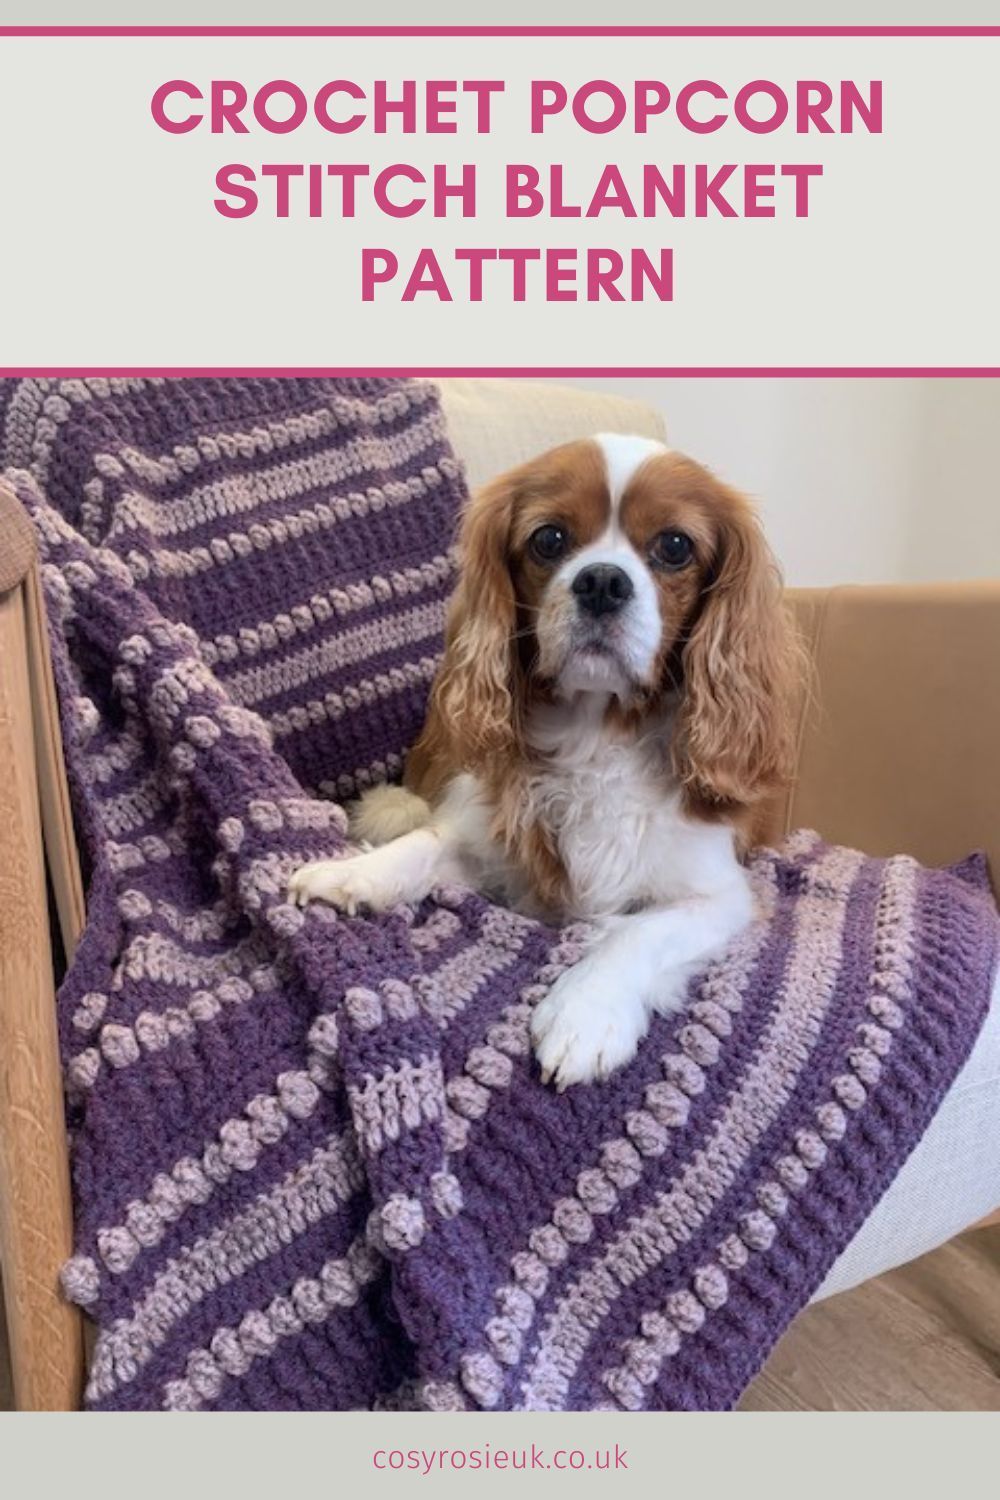
Crochet Popcorn Stitch Blanket
Create your own crochet popcorn stitch blanket with this free pattern to make a warm and cozy blanket. This pattern is written for 4 different sizes so you can make a popcorn stitch baby blanket, through to a large twin blanket too.
Popalicious Blanket | Popcorn stitch Crochet Pattern
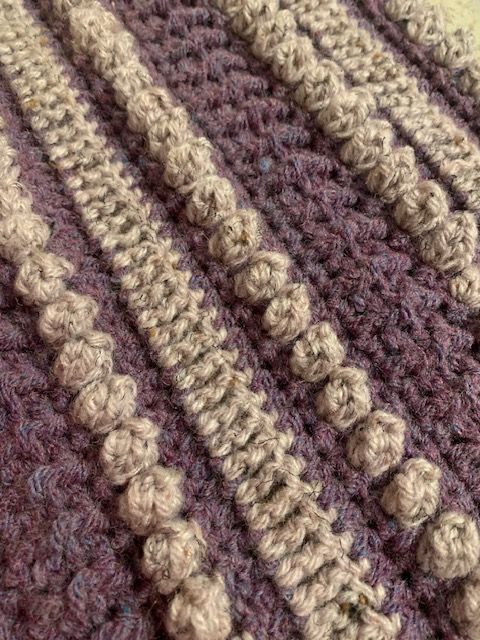
Using crochet textured stitches is one of the best way's to create unique crochet projects, and the use of contrasting colour really highlights those popcorn stitches.
Alongside the popcorn stitches, this blanket also makes use of post stitches to create another section fill of texture. In between those textured sections of the blanket pattern, you will also find taller than usual stitches which breaks up, and helps define the texture.
This intermediate level crochet pattern, is made easier with the crochet video tutorial, which shows you how to make each of the different stitches, walking you through all the colour changes too.
Pin this Pattern to make it later
4 sizes to choose from!
This free to view crochet pattern has been written for 4 different blanket sizes, so you can follow along to make the one that suits:
- Baby Blanket
- Lapghan
- Thow
- Twin
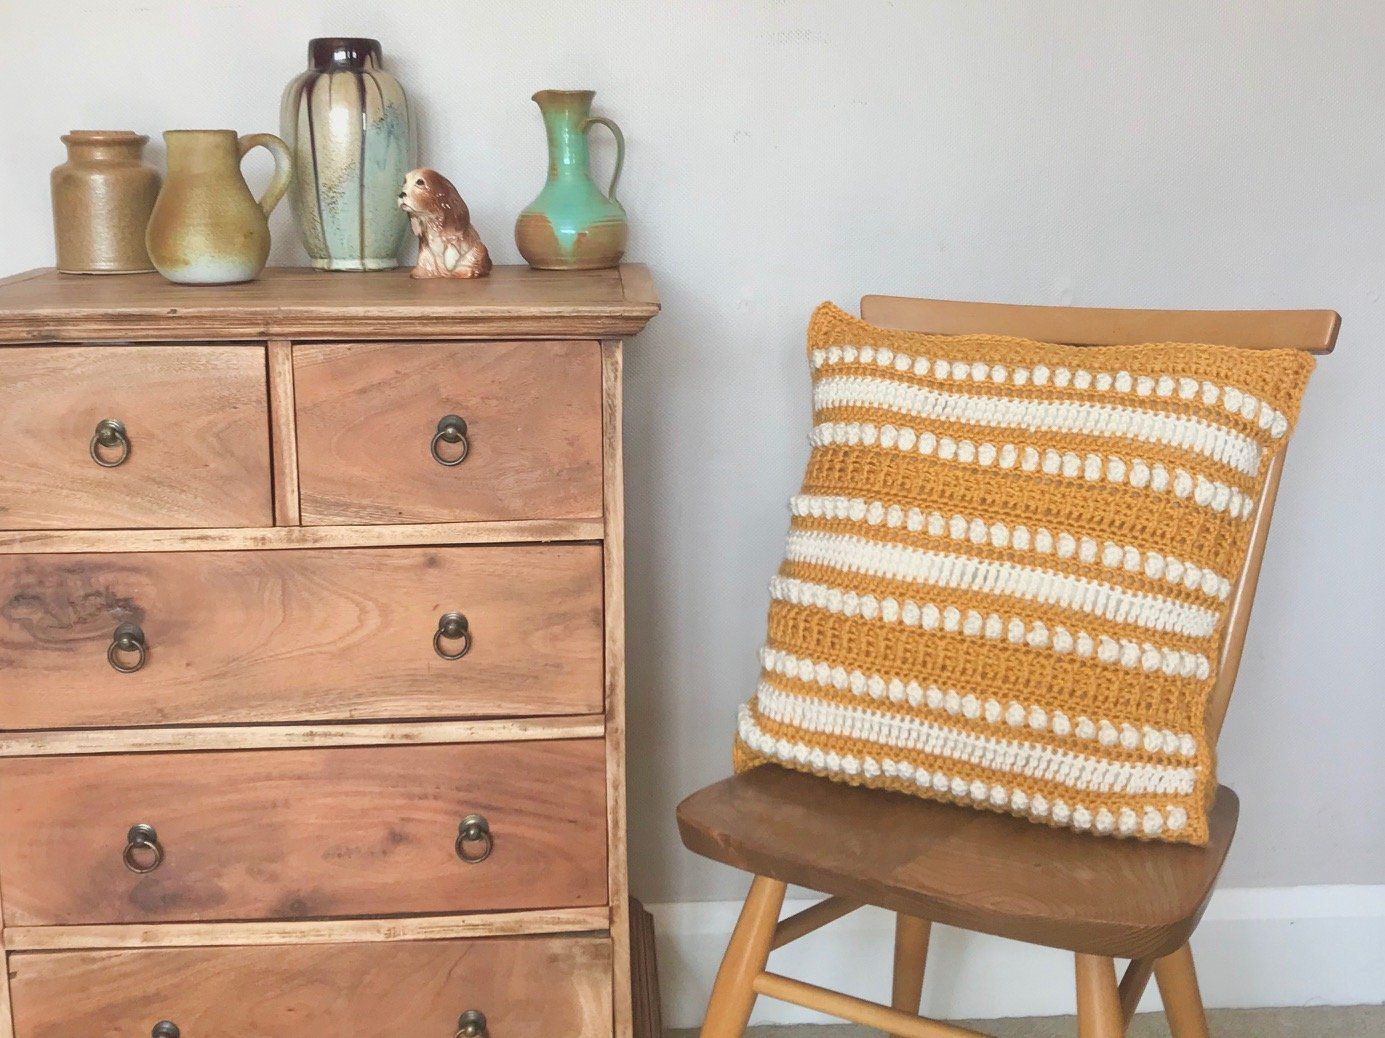
There is also a corresponding cushion pattern that you can see here that is perfect for those with living rooms that like to have their cozy accessories matching.
Purchase the Printable PDF Pattern
You can purchase a printable copy of this crochet beret pattern by Clicking the button below to purchase from your favourite retailer:
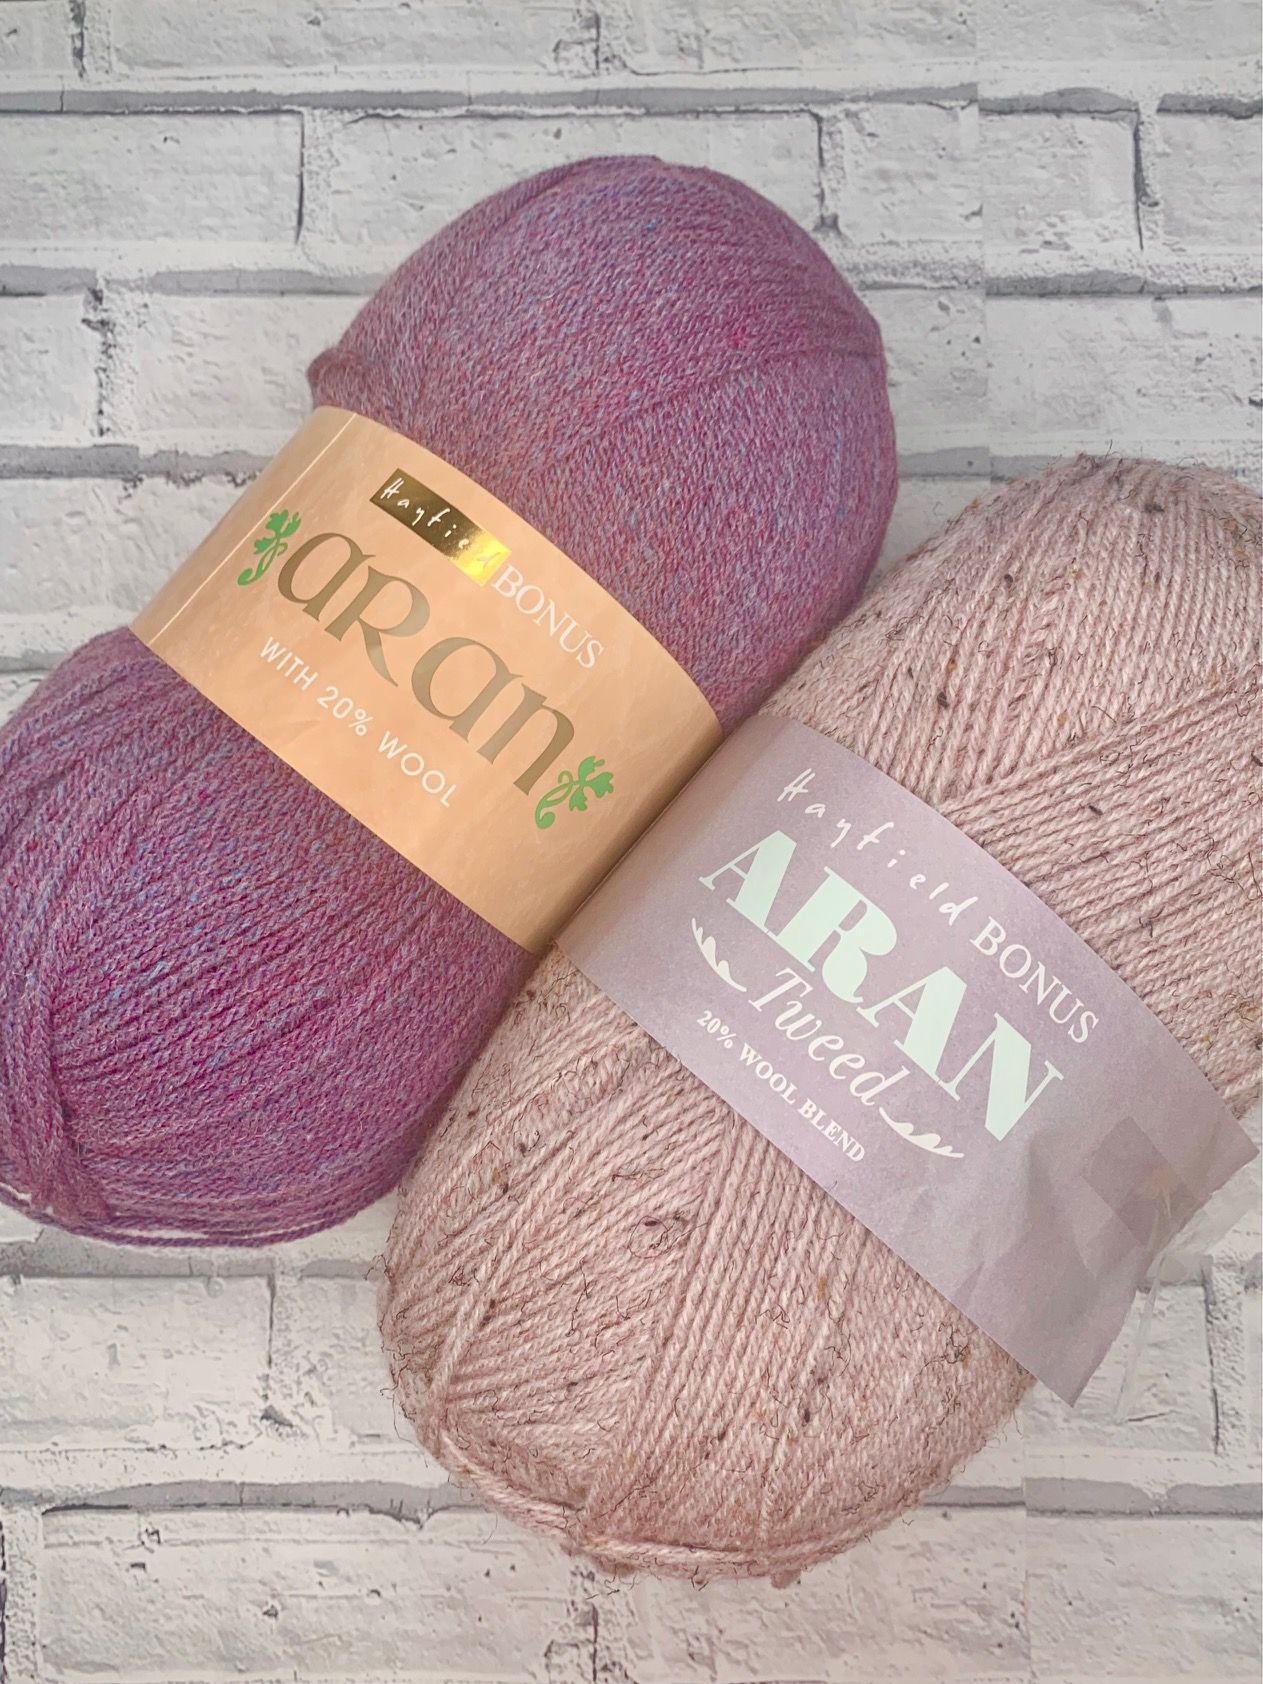
Yarn used in this crochet popcorn stitch blanket
This pattern can be made with any worsted/Aran weight yarn that like to work with. Normally, I choose to make blankets in soft, acrylic yarn, but I had the yarn I used in my stash for a number of years, with a plan of creating this blanket.
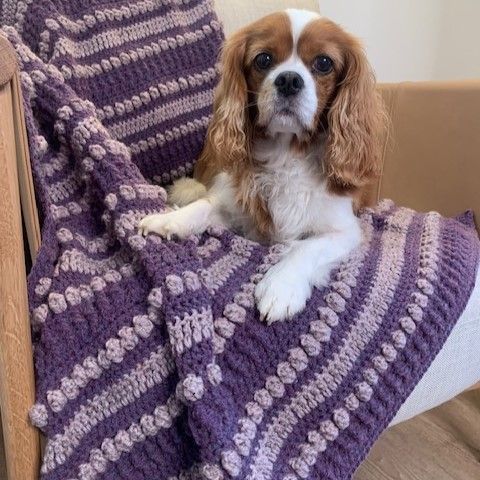
I used Hayfield Bonus Aran Tweed that is a 20% wool/80% acrylic blend. It's not the softest yarn, as the wool content can be felt, but as the blanket will be well used, and my dog already loves it, this yarn will be hard wearing and long lasting.
If I was creating a popcorn stitch baby blanket, I would opt for a yarn without tweed and definitely without wool. For a hard-wearing baby blanket, with this much texture, where I want to see the stitch definition and texture, I would choose a soft, 100% cotton, or a acrylic/cotton blend yarn. This would allow the blanket to be easy care, but still hard-wearing.
How to adjust the finished size of your blanket
- To adjust the finished width, increase the starting chain in multiples of 2.
- To adjust the finished length, each pattern repeat of rows 2-15 adds 4.75in.
Note - Adjusting the size of the width or number of row repeats will of course affect your yarn usage
Crochet Popcorn Stitch Blanket | Pattern Details
Materials:
- Any Worsted/Aran weight yarn (see Size Chart for required yarn amounts)
- Designer used Hayfield Bonus Aran Tweed with Wool 74% Acrylic, 20% Wool, 6% Viscose (400g, 840m)
- A - Plum (663)
- B - Berry (799)
- 5mm Crochet hook
- Tapestry needle
- Tape measure
- Scissors
.
Abbreviations
US Terms (UK Terms in brackets)
st(s) - Stitches
ch - Chain
sc (dc) - Single Crochet (double crochet)
hdc (htr) - Half double crochet (half treble crochet)
dc (tr) - double crochet (treble crochet)
fp hdc (fp htr) - front post half double crochet (front post half treble crochet)
bp hdc (bp htr) - back post half double crochet (back post half treble crochet)
pc - popcorn
RS - right sdie
WS - wrong side
Pattern Notes
- Whatever your skill level with crochet, I would always recommend reading through this pattern before beginning. Get in touch at [email protected] if you need any help completing the pattern.
- Beginning ch 1 DOES NOT count as stitch
- Beginning ch 3 DOES count as stitch
- Beginning ch 4 DOES count as stitch
- Take a moment to go through the pattern and highlight the stitch counts for the size being made, which will be written in order: Baby (Lapghan, Throw, Twin)
Finished Size:
See size chart above.
Gauge
- See Pattern for Gauge
Special Stitches
pc = Popcorn Stitch
- Work 4 double crochet into the same stitch.
- Pull up the loop of the last dc made and remove hook. Insert hook from front to back into the stitch of the 1st dc made in the group of 4.
- Secure the loop from the last dc made back onto the hook and pull it through the stitch.
- Chain 1 to secure.
Note - pc row is on the right side of your work.
tr = Treble Crochet
- Wrap the yarn around the hook twice then insert hook into the stitch, yarn over and bring yarn through the stitch.
- Yarn over, pull through 2 loops on your hook, 3 times.
fp hdc = Front Post half double crochet
- Yarn over hook (YO), insert hook around front of the post of the hdc of the previous row, YO, bring up loop, YO, pull through 3 loops.
bp hdc = Back Post half double crochet
- YO, insert hook around the back of post of the hdc of the previous row, YO, bring up loop, YO, pull through 3 loops.
Recommendations for making colour changes on Popcorn St row
To begin:
- Chain 3 in A
- Change to B
- Complete pc in B as described in Special Stitches
Continuing with Row:
- Complete ch 1 (to close pc) with A
- Complete next tr with A
- YO for 1st dc of 4dc group with B
- continue remainder of pc in B
- Repeat across row, ending last dc in A
Working the colour changes in this way will make all the stitches to be worked in on following row show in A. Ch-1 to be skipped with be in B.
Other colour change recommendations
Rows 7-9: Leave B joined after completion of Row 7, carry up B for use in Row 10
Row 9: Fasten off A, after completion of row
Row 10: Fasten off B, after completion of row
Row 13: Fasten off B, after completion of row
Pattern for Gauge
To check your gauge, follow this swatch pattern and measure your finished swatch. Your finished swatch should measure 5" tall and 6.5" wide.
Row 1. RS: With A, ch 22, hdc in 2nd ch from hook and each across, turn. (21 hdc)
Row 2. WS: Ch 1 (does not count), hdc in same and each across, turn.
Row 3: Ch 1, hdc in same, *fp hdc around next, bp hdc around next; repeat from * to last 2 sts, fchdc around next, hdc in last, turn. (2 hdc, 10 fp hdc, 9 bp hdc)
Row 4: Ch 1, hdc in same, *bp hdc around next, fp hdc around next; repeat from * to last 2 sts, bp hdc around next, hdc in last, turn. (2 hdc, 9 fp hdc, 10 bp hdc)
Row 5: Repeat Row 3.
Row 6: Ch 1, sc in same and each across, turn (21 sc)
Row 7: Ch 3 (counts as dc), *with B, pc in next, with A, dc in next; repeat from * to end, turn (11 dc, 10 pc)
Row 8: Continuing with A, ch 1, sc in same, *skip ch 1, sc in top of pc from previous row, sc in next; repeat from * across, turn (21 sc)
Row 9: Repeat Row 2.
Row 10: With B, ch 4 (counts as tr), tr in next and each across, turn. (21 tr)
Row 11: With A, repeat Row 2.
Row 12: Repeat Row 6.
Row 13: Repeat Row 7.
Row 14: Repeat Row 8.
Row 15: Repeat Row 6.
How to crochet a popcorn stitch blanket video tutorial
How to crochet a popcorn stitch blanket
Row 1. RS: With A, ch 110 (110, 164, 180), hdc in 2nd ch from hook and each across, turn - 109 (109, 163, 179) hdc
Row 2. WS: Ch 1 (does not count), hdc in same and each across, turn.
Row 3: Ch 1, hdc in same, *fp hdc around next, bp hdc around next; repeat from * to last 2 sts, fchdc around next, hdc in last, turn - 2 (2, 2, 2) hdc, 54 (54, 81, 89) fp hdc, 53 (53, 80, 88) bp hdc
Row 4: Ch 1, hdc in same, *bp hdc around next, fp hdc around next; repeat from * to last 2 sts, bp hdc around next, hdc in last, turn - 2 (2, 2, 2) hdc, 53 (53, 80, 88) fp hdc, 54 (54, 81, 89) bp hdc
Row 5: Repeat Row 3.
Row 6: Ch 1, sc in same and each across, turn -109 (109, 163, 179) sc
Row 7: Ch 3 (counts as dc), *with B, pc in next, with A, dc in next; repeat from * to end, turn - 55 (55, 82, 90) dc, 54 (54, 81, 89) pc
Row 8: Continuing with A, ch 1, sc in same, *skip ch 1, sc in top of pc from previous row, sc in next; repeat from * across, turn - 109 (109, 163, 179) sc
Row 9: Repeat Row 2.
Row 10: With B, ch 4 (counts as tr), tr in next and each across, turn - 109 (109, 163, 179) tr
Row 11: With A, repeat Row 2.
Row 12: Repeat Row 6.
Row 13: Repeat Row 7.
Row 14: Repeat Row 8.
Row 15: Repeat Row 6.
Rows 16 - 99 (127, 183, 253): Repeat Rows 2-15.
Row 100 (128, 184, 254) - 103 (131, 187, 257): Repeat Rows 2-5.
Row 104 (132, 188, 258): Repeat Row 2.
Fasten off, weave ends.
Continue to Edging.
Edging
Round 1: With RS facing, join in edge corner, ch 1, working along row ends, sc evenly to next corner - 131 (167, 239, 329) sc
Fasten off.
Repeat for other edge of blanket.
Fasten off, weave ends.
Made it?
YAY - there's no better feeling than finishing a crochet project!!
Why not share a picture with me? You can head to the Your Projects page by clicking here or join the Cosy Rosie Community and share with us all so we can celebrate your project with you.
Pin it for Later

About the Autor
Hi, I'm Fiona, the hands behind Cosy Rosie Crochet - the place to learn to crochet as you make!
With over four years of hands-on experience leading in-person crochet workshops since 2018 and designing and publishing my own patterns since 2019, I bring a wealth of expertise of sharing crochet techniques.....


Cosy Rosie UK Crochet Blog