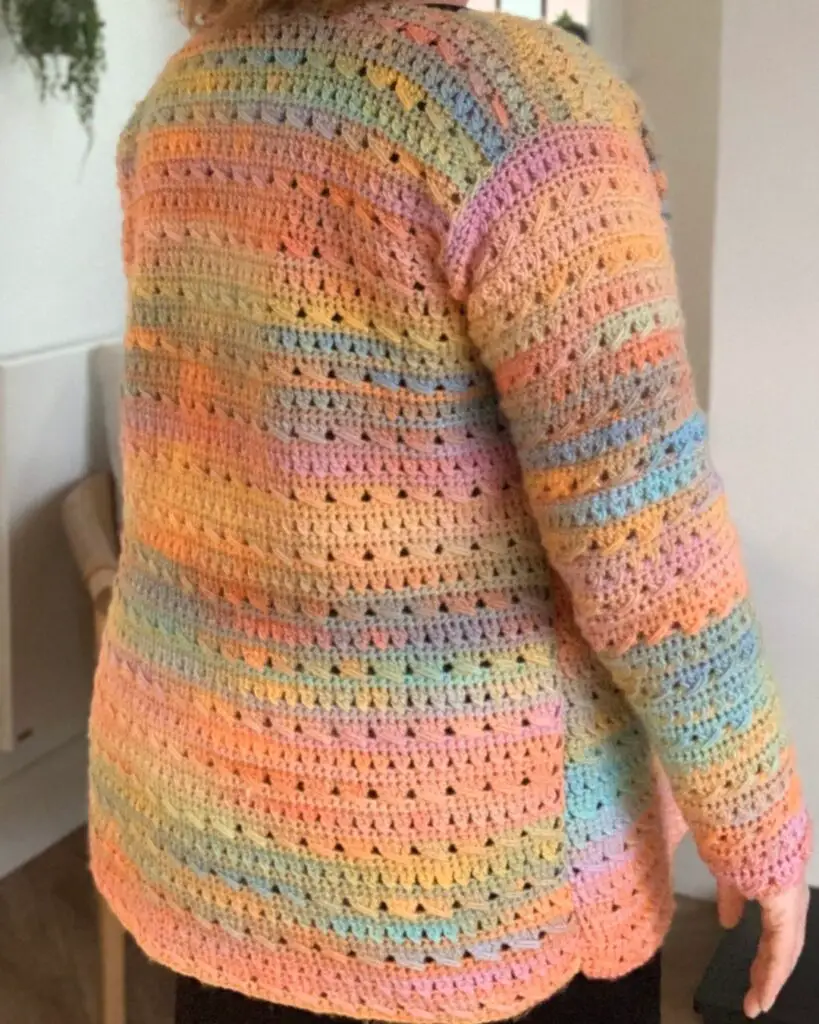
Back Panel Cable & Crossed Cardigan
The first part of the Cable & Crossed Cardigan to stitch up is the back panel that features those lightly textured stitches and sets the overall finished length for the whole pattern.

The first part of the Cable & Crossed Cardigan to stitch up is the back panel that features those lightly textured stitches and sets the overall finished length for the whole pattern.
Back Panel | Cable & Crossed Crochet Cardigan
Starting a new pattern is such a wonderful feeling – and we are starting to work on this pattern with the largest panel to tick off a huge chunk.
The back panel of the Cable & Crossed is the first part of the 5 sections to be made, before they are joined to create this cosy cardigan.

JOIN THE CAL
The Cable & Crossed Cardigan pattern will be releasing as a crochet along, with a different section of the pattern releasing each week.
There is never any pressure to keep up with the releasing of the pattern sections – but it can be fun to try! Below you will find a list of when the pattern elements will release.
Cable & Crossed CAL Schedule
- Make your swatch – click here for the pattern at the end of the article
- Back Panel – Click here
- Front Panel – Click here
- Left Panel V-neck – Click here
- Left Panel Square Neck – Click here
- Right Panel V-Neck – Click here
- Right Panel Square neck – Click here
- Sleeves – Click here
- Joining – Click here
Each pattern section will have it’s own video tutorial to help you complete your cardigan with absolute confidence.
What size are you making?
Before you start stitching your back panel, double check the size you are making on the event page, where you can see both the size chart and the schematic to confirm you will be happy with the finished size.
Take a moment to go through the pattern and note where the stitch counts for your size will be written – they will be in the following size order:
- XS (S, M, L, XL, 2XL, 3XL, 4XL, 5XL)
Where – (the dash)is used, this means no stitches are worked for this size and you should continue on to the next part of the pattern, as directed. You will find this used in the pattern sections for the neckline options and the sleeves.

Pattern Details | Woman’s Crochet Cardigan Pattern
Skill Level: Advanced Beginner/Intermediate
Materials:
- Aran weight yarn – see Size chart for estimated yarn amounts
- I used Sirdar Jewelspun Aran (200g /500m, 100% acrylic) in shade Setting Sun
- 5.5mm Crochet Hook
- Scissors
- Tapestry needle
- Stitch Markers x 6
Optional
- Hook & eye closing
Abbreviations – US TERMS
st(s) – stitches
ch – chain
sc – single crochet
sc2tog – single crochet 2 stitches together
fsc – foundation single crochet
dc – double crochet
dc2tog – double crochet 2 stitches together
cable – cable stitch
dec cable – decrease cable stitch
cdc – crossed double crochet
RS – right side
WS – wrong side
YO – yarn over
Get the Printable Pattern
If you prefer to print your crochet patterns, you can purchase from any of my pattern shops for an instant download to print and save this pattern.
Pattern Notes
- Get in touch if you need any help completing the pattern – [email protected]
- This pattern is worked 5 parts, from bottom up, sewn together using mattress stitch worked in to the back loop only
- Back panel
- Front panels x 2
- Sleeves x 2
- ch 1 at the beginning of the rows DO NOT count as a stitch.
- ch 3 at the beginning of the rows DOES count as a stitch.
- Take a moment to go through the pattern and highlight the stitch counts for your size which will be written in size order. e.g XS (S, M, L, XL, 2XL, 3XL, 4XL, 5XL). Where – is used, this means no stitches are worked for this size
Special Stitches
fsc -foundation single crochet
Click here for a video explaining how to crochet a foundation single crochet
- Skip the next stitch
- dc into next 3 stitches
- YO, insert hook into skipped stitch
- Pull up loop to height of dc
- (YO, pull through two loops), 2 times to complete stitch
dec cable – decrease cable stitch
- Skip the next st
- dc into next
- dc2tog (YO, insert hook into next, YO, bring up loop, YO pull through first 2 loops) 2 times, YO, pull through remaining 3 loops
- YO, insert hook into skipped stitch
- Pull up loop to height of dc
- (YO, pull through two loops), 2 times to complete stitch
- Skip the next stitch
- dc into next
- dc into skipped stitch working in front of previous dc
Gauge
16 sts and 10 rows = 4 inches (10cm) in pattern using a 5.5mm hook. Use a larger or smaller crochet hook to obtain the correct tension.
See below for pattern for gauge.
Pattern for Back Panel | Cable & Crossed Cardigan
Foundation Row: Ch 67 (75, 83, 91, 95, 107, 115, 123, 131), sc in 2nd ch from hook and in each ch across, turn – 66 (74, 82, 90, 94, 106, 114, 122, 130) sc
Or fsc 66 (74, 82, 90, 94, 106, 114, 122, 130)
Row 1. RS: Ch 3 (counts as dc), cable across row to last, dc in last, turn – 2 dc, 16 (18, 20, 22, 23, 26, 28, 30, 32) cables
Row 2: Ch 1 (does not count), sc in each across, turn – 66 (74, 82, 90, 94, 106, 114, 122, 130) sc
Row 3: Ch 3, cdc across to last, dc in last, turn – 2 dc, 32 (36, 40, 44, 46, 52, 56, 60, 64) cdc
Row 4: Repeat Row 2
Hip length
Rows 5-40 (40, 36, 36, 36, 36, 36, 32, 28): Repeat Rows 1-4 a further 9 (9, 8, 8, 8, 8, 8, 7, 6) times
Tunic Length
Rows 5-56 (56, 52, 52, 52, 52, 52, 48, 44): Repeat Rows 1-4 a further 13 (13, 12, 12, 12, 12, 12, 11, 10)
Mid Thigh Length
Rows 5-68 (68, 64, 64, 64, 64, 64, 60, 56): Repeat Rows 1-4 a further 16 (16, 15, 15, 15, 15, 15, 14, 13) times
Continue to Shaping the Armholes
Shaping the Armholes
Row 1: With RS facing, join in 9th (9th, 13th, 13th, 13th, 13th, 17th, 17th, 17th) st, *ch 3 (counts as dc), cable 12 (14, 14, 16, 17, 20, 20, 22, 24) times, dc in next st, turn, leave remaining sts unworked – 2 dc, 12 (14, 14, 16, 17, 20, 20, 22, 24) cables
Row 2: Ch 1, sc in each across, turn – 50 (58, 58, 66, 70, 82, 82, 90, 98) sc
Row 3: Ch 3, cdc across row to last, dc in last, turn – 2 dc, 24 (28, 28, 32, 34, 40, 40, 44, 48) cdc
Row 4: Repeat Row 2
Rows 5-16 (16, 20, 20, 20, 20, 20, 24, 28) : Repeat Rows 1-4, beginning at * in Row 1, a further 3 (3, 4, 4, 4, 4, 4, 5, 6) times.
Fasten off, weave ends and block to size
Continue to Front Panel
What’s Next?
The next part of the pattern is to create the front panels up to shaping the armholes, before you continue on to creating the neckline of your choice.