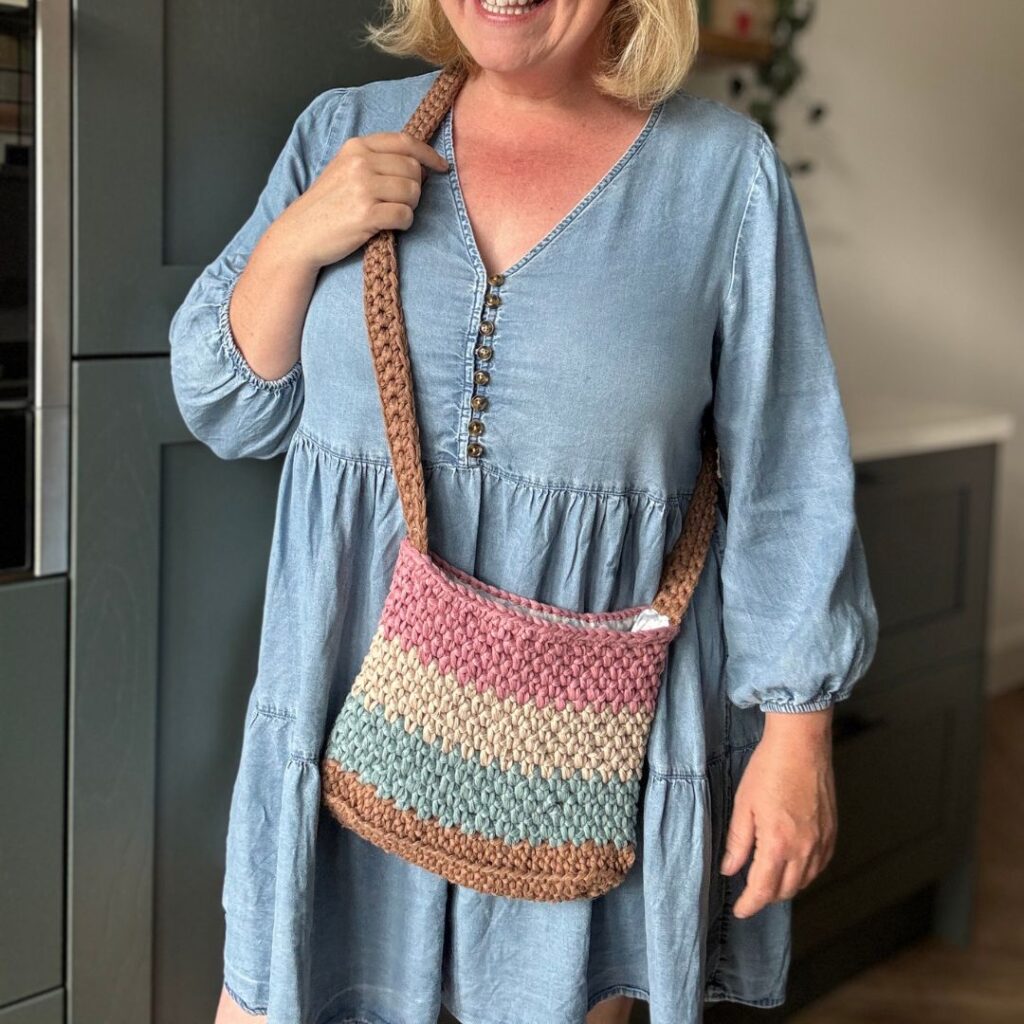
Easy Linen Stitch Crochet Bag
Are you looking for a simple crochet project that’s both stylish and practical? This easy crochet bag pattern is the perfect choice—ideal for beginners, crafted using the linen stitch (also known as the moss stitch), and complete with a step-by-step YouTube video tutorial to guide you through every stitch.
Easy Crochet Bag Pattern for Beginners
Whether you’re making your very first bag or looking for a relaxing project, this pattern will have you finishing your own crochet crossbody bag in no time.
What Is the Linen Stitch?
The linen stitch (sometimes called the moss stitch or woven stitch) is one of the easiest crochet stitches for beginners. It creates a dense, woven-like texture that’s perfect for bags because it holds its shape well and has very little stretch.
With the added lining recommended for this bag, your finished project will be well used for years to come, without the risk of it stretching out of shape.
Get the Free Crochet Pattern Below
Ready to get started? Scroll down to view the free crochet bag pattern using the linen stitch and follow along with the video tutorial. You’ll be carrying your handmade bag in no time!
Why You’ll Love This Crochet Bag Pattern
- Beginner-friendly — no complex techniques!
- Uses the beautiful and textured linen stitch (aka moss stitch)
- Quick to make with a minimalist design
- Free video tutorial included
- Perfect for market bags, everyday totes, or handmade gifts
Pro Tip for Beginners
If you’re new to crochet, don’t worry—this is a step-by-step crochet bag pattern with clear instructions and visuals. And the linen stitch repeat is easy to memorize, making it a relaxing project for unwinding with your yarn and hook.
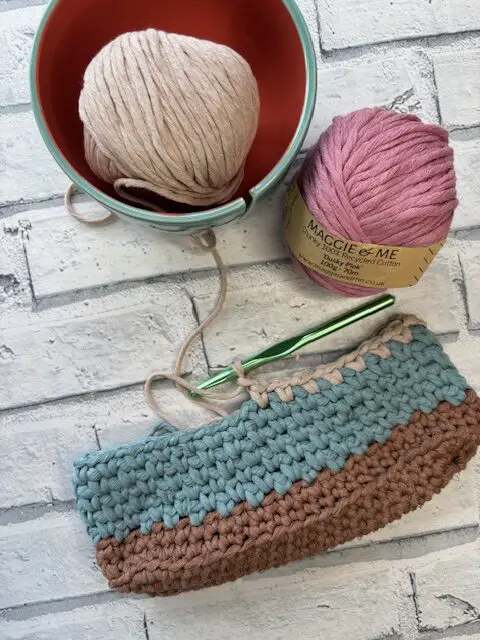
What You’ll Need – Project Materials
- 155m Chunky weight 100% cotton
- Designer used Maggie & Me Chunky 100% Recycled Cotton (100g/70m) in 4 colours:
- A – Mushroom – 65m
- B – Sage – 30m
- C – Oatmeal – 30m
- D – Dusky Pink – 30m
- Designer used Maggie & Me Chunky 100% Recycled Cotton (100g/70m) in 4 colours:
- 8mm hook
- 1 stitch marker
- Needle for chunky yarn
Lining Materials:
- fabric measuring 11.5″ by 22″
- sewing thread to match lining
- sewing needle
- 18cm magnetic bag clip
- 7″ x 1″ (18cm) cotton webbing
Sustainable Yarn Choice: Maggie & Me Chunky
For this project, I used Maggie & Me Chunky 100% Recycled Cotton in four gorgeous colours. This yarn is soft, chunky, eco-friendly, and ideal for creating a sturdy crochet bag with great structure.
🧡 Special offer for readers: Get 15% off your Maggie & Me yarn order with the code:
COSYROSIE15 at checkout! 🧡
What better excuse do we need to stock up on a lovely yarn while we support sustainable crafting.
Pro tip: This yarn’s chunky weight works beautifully with the linen stitch, creating a strong but flexible bag you can use every day.
Pattern details – Easy Linen Stitch Crossbody Bag
Pattern Notes:
- Please read through the entire pattern before beginning, regardless of skill level. Please contact me ([email protected]) if help is needed to understand any part of pattern.
- The body of the bag is worked in continuous rounds and only joined where specified. It is recommended to place a stitch marker in the first stitch of the round and move the marker up with each round worked
- The handle is worked in turned rows and sewn on to the bag
- Beginning ch 1 does not count as stitch
- There is a photo tutorial to assist with lining the bag
- Cotton webbing is added in the top fold of the lining to support the magnet
Abbreviations – US Terms
- ch – chain
- st(s) – stitch(es)
- sl st – slip stitch
- sc – single crochet
- BLO – work into the back loop of the stitch only
- RS – right side
Special Stitches
Linen stitch = sc, ch 1 into the same st or ch-sp
Finished Size
- 9.5″ (24cm) wide by 7.5″ 19cm) tall, base is 2″ (2.5cm) wide
- 108cm length handle – this will lightly stretch with use
Crochet Bag Video Tutorial
Need a little visual help? Scroll down for the full video tutorial that walks you through:
- Starting the foundation chain
- Working the linen stitch pattern
- Joining colors for a bold striped look
- Shaping and finishing your bag
Whether you’re a visual learner or just like watching things come together, this tutorial has you covered:
How to make this Easy Linen Stitch Crochet Bag
Round 1 (RS): With A, Ch 21, working into the back bump of the chain, sc in 2nd from hook, place marker in first st and move up with each round, sc in next 18 ch, 3 sc in last ch, rotate to work in other side of beginning ch, sc in next 18 ch, 2 sc in last ch, DO NOT JOIN – 42 sc
Round 2: 2 sc in next st, sc in next 18, 2 sc in next 3 sts, sc in next 18, 2 sc in next 2 sts – 48 sc
Round 3: 2 sc in next st, 2 sc in next st, sc in next 18 sts , 2 sc in next 6 sts, sc in next 18 sts, 2 sc in next 4 sts, JOIN – 60 sc
Round 4: Ch 1, working into BLO around, sc in each st around, DO NOT JOIN – 60 sc
Round 5: Ch 1, sc in each around – 60 sc
Round 6: With B, Ch 1, [sc, ch 1 in next st, skip next st] around to last st, [sc, ch 1] in last st – 31 Linen st
Rounds 7-11: skip next sc, [sc, ch 1] into each ch-1 sp around – 31 linen st
Rounds 12-17: With C, repeat Round 7
Rounds 18-23: With D, repeat Round 7
Round 24: Place st marker into each side edge st to mark handle position (there should be an even number of ch-1 sps and sts between markers), [sc, ch 1] into each ch-1 sp around to ch-1 sp before the first marked st, leave remaining sts unworked, continue to Round 25
Round 25: Sc into each st and ch-1 sp around replacing st markers, sl st to join to marked st, fasten off
Continue to Handle
Handle Pattern
Row 1: Leaving a long tail. ch 100, working into back bump of ch, sc in 2nd ch and each ch across, turn – 99 sc
Rows 2-3: Ch 1, sc in each across, turn – 99 sc
Fasten off with a long tail, weave ends.
- Position small handle edge inside the bag edge, aligning 2nd row of handle with the marked st
- repeat for other small handle edge
- using long tail, sew handle to body of bag, working through back of bag sts to hide yarn used to sew handle on
Continue to Lining or if not adding a magnet close, continue to Optional Button Closure
Optional Button Closure
Optional Button Closure – not required if placing magnet closure
With the RS facing, lay flat and locate the middle stitch across the top of the bag by counting in from the side edge and marking 16th stitch, count across to next side to check 15 sts remaining to next side edge, join yarn in marked st, ch 14, sl st to same
Sew button on RS of other side of bag body
Fasten off, weave ends
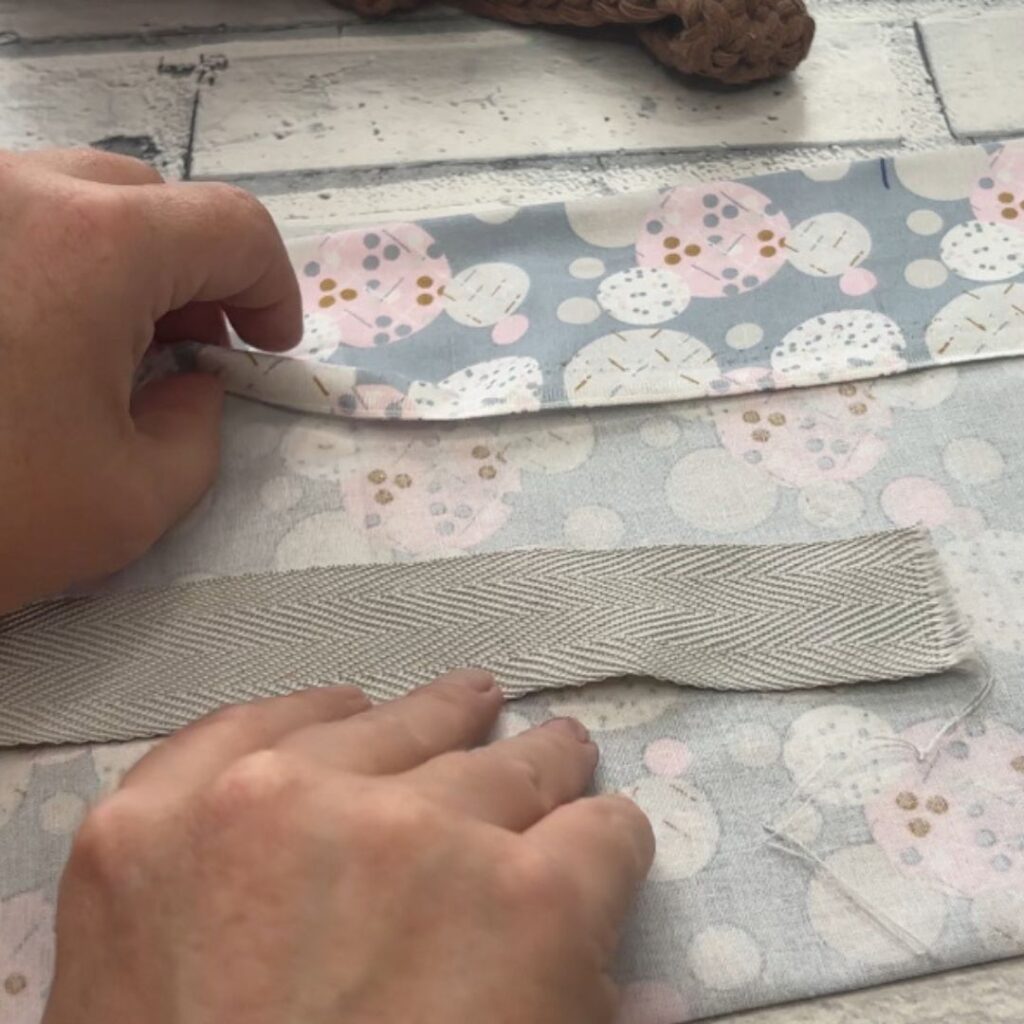
Add a Lining to Your Bag
Take your handmade crochet bag to the next level with a clean, structured fabric lining! I’ve put together a separate tutorial that shows you how to sew a box-style lining that fits this bag perfectly.
Whether you’re adding a lining for strength or style this step is 100% worth it, and much easier than you think! Read on to see some additional steps on how to add a bag magnet closing to your box-stype lining:
Click here to read the full box lining tutorial
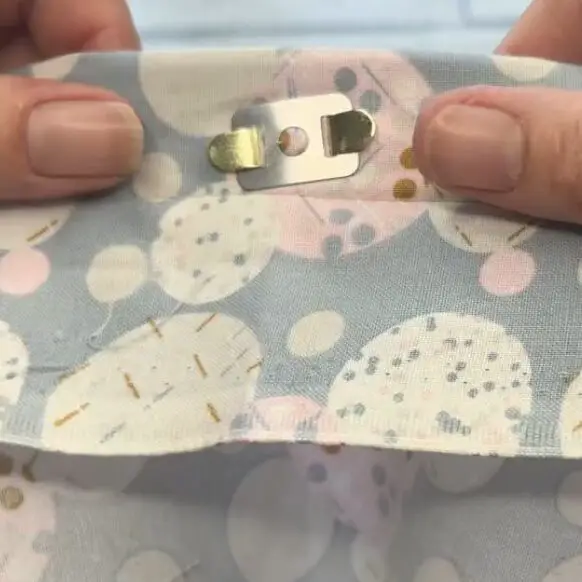
Adding the Magnet
The addition of cotton webbing with ensure that the magnet does not damage the fabric used in the lining:
- Ensure the folded top down covers the cotton webbing when creating the boxed lining
- Position the cotton webbing under the top fold, in the centre of top opening and sew around the opening edge, 1″ down from the opening to secure the webbing in place
- Fold the side seams together and mark the centre point of the lining on the wrong side (outside) of the bag lining on each side
- Align the magnet grommet with the centre mark on the lining and mark the grommet side openings
- Cut a small opening for each grommet opening
- Push the magnet arms through the openings and secure the grommet in place on each side of the lining
Attach the Lining
- Insert the lining into the bag, with non-patterned side of the fabric against the inside of the bag
- Line up the seams with the centre of the handles
- Line up the top of the lining to the top of the bag
- Pin the lining into place
- Sew the lining to the bag