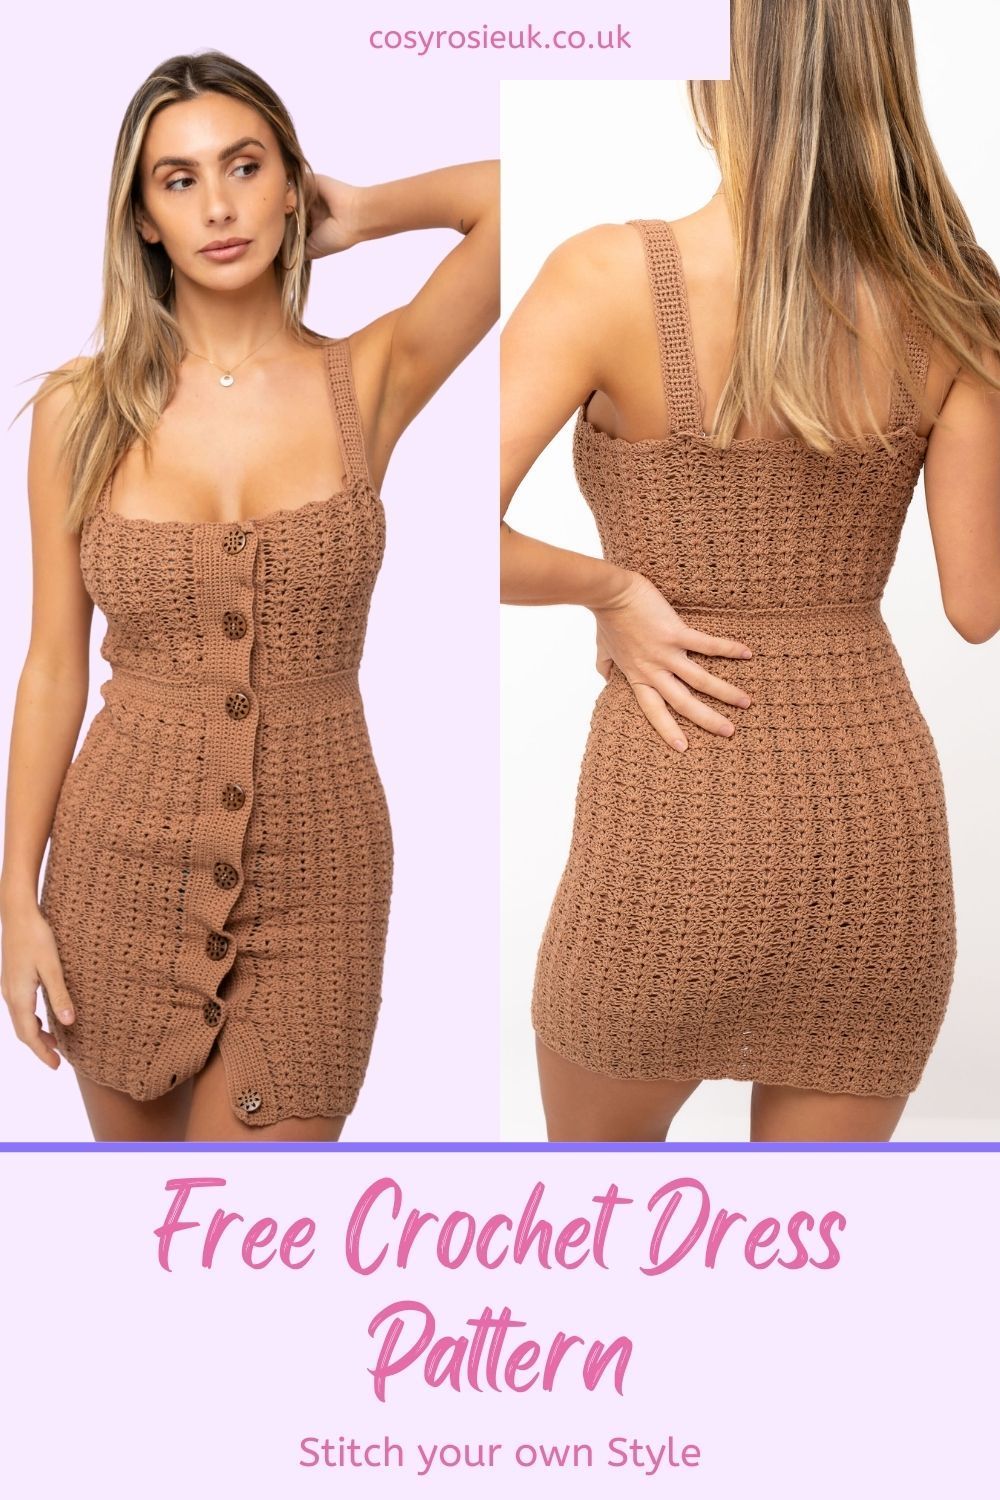
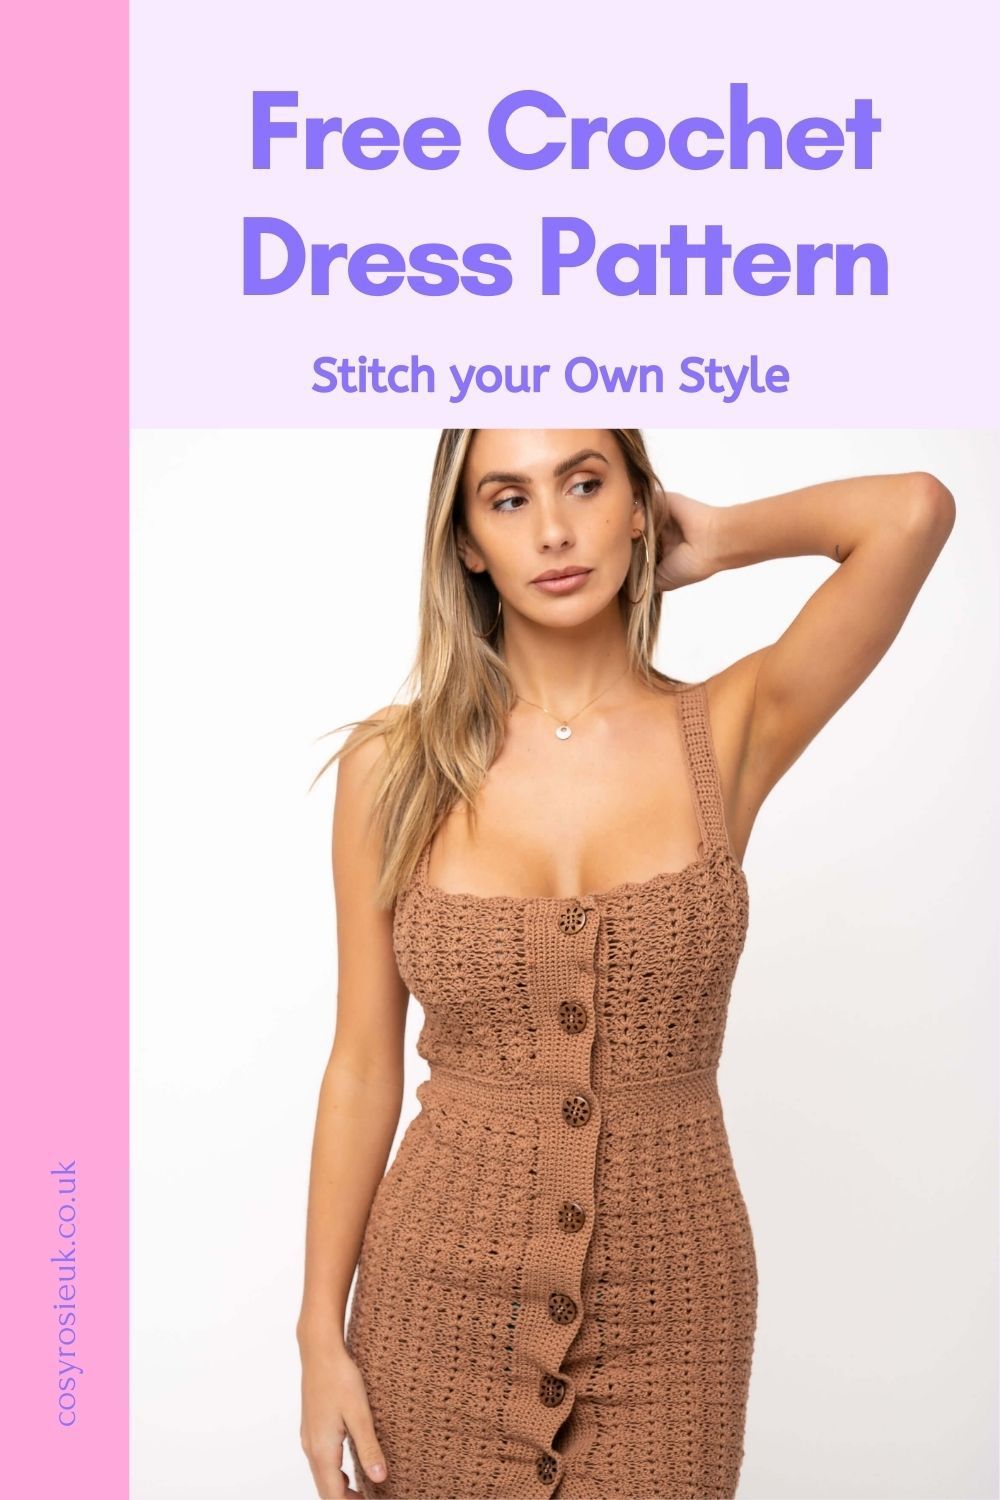
Free Crochet Dress Pattern
Create a form fitting dress which is perfect for every body with this free crochet dress pattern and stitch up your own style.
This crochet summer dress pattern is written for 9 sizes (XS-5XL) and is fully customisable for your perfect fit.
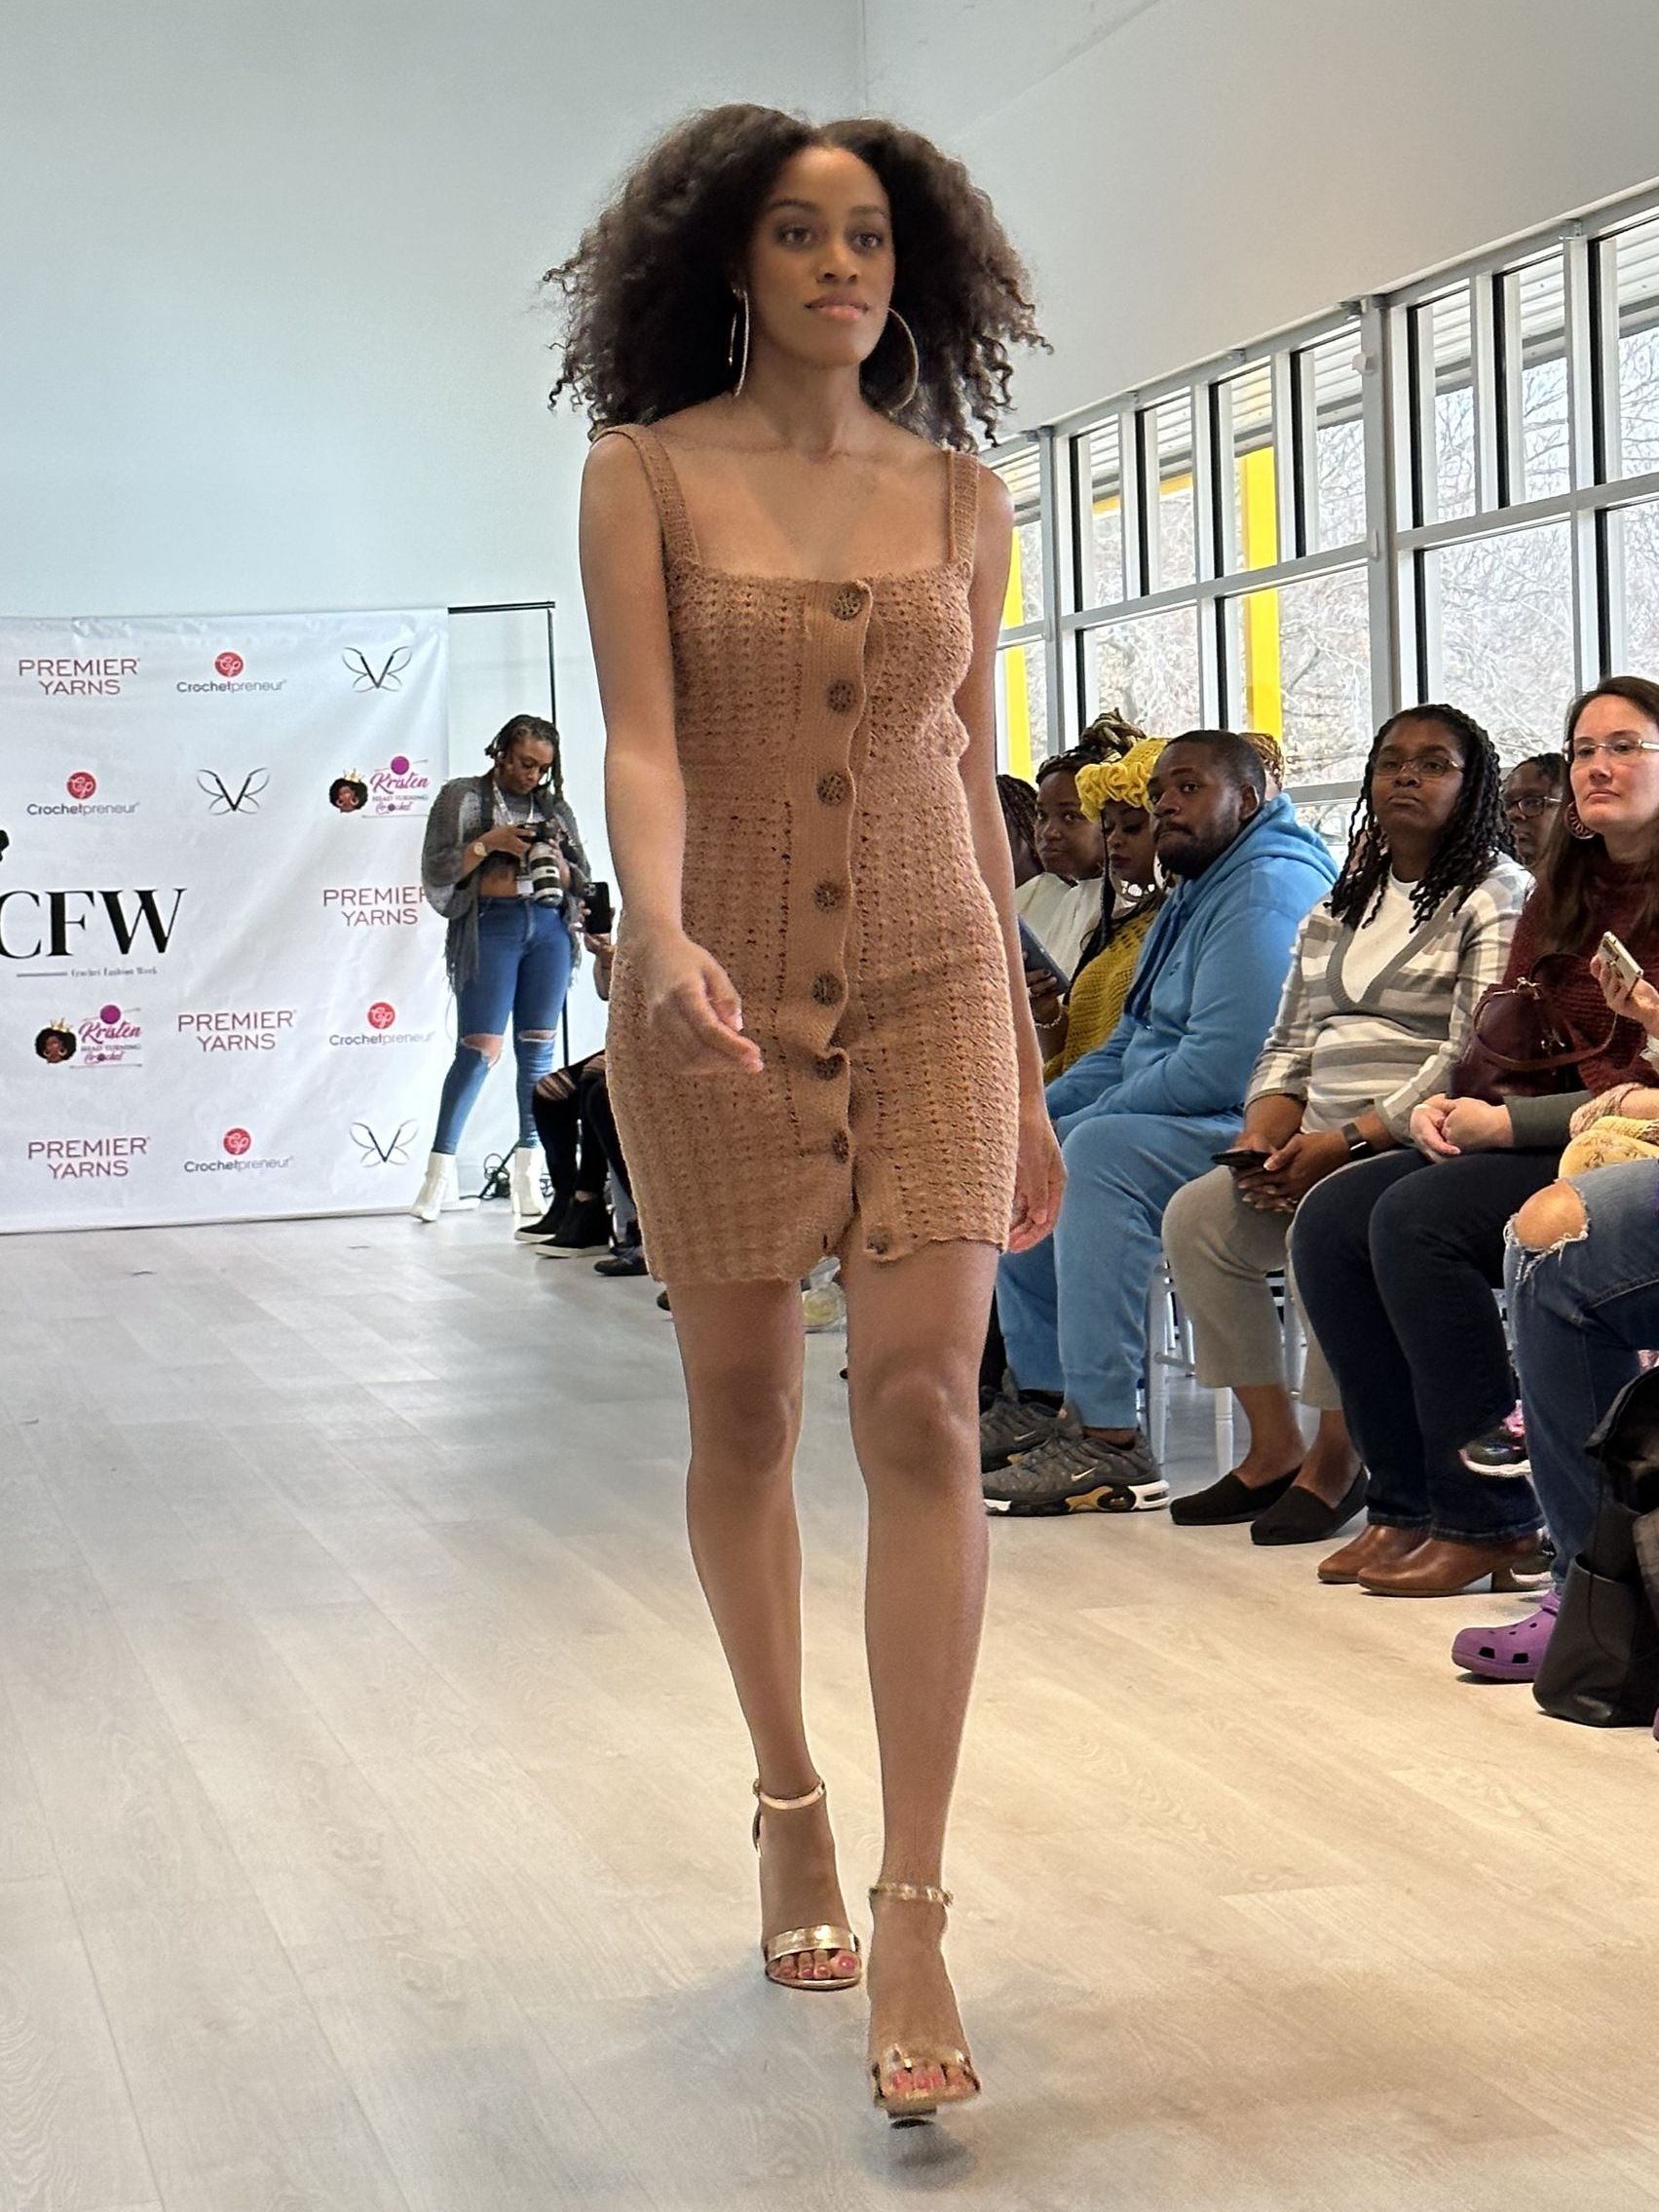
Summer Crochet Dress Pattern | Free Crochet Pattern
The All Buttoned Up Dress is a perfectly form fitting dress that you can create in your own unique shape and size.
The recommended yarn, size 3/DK weight cotton, is the perfect fibre to stitch up a summer dress, but for a cooler weather and a warmer wear, you can create this dress in your preferred animal or synthetic fiber such as acrylic.
This dress was inspired by the All Buttoned Up Vest that released in Summer 2021 and is the 2nd pattern in the collection to release with another winging is way for release shortly – both pictured below.
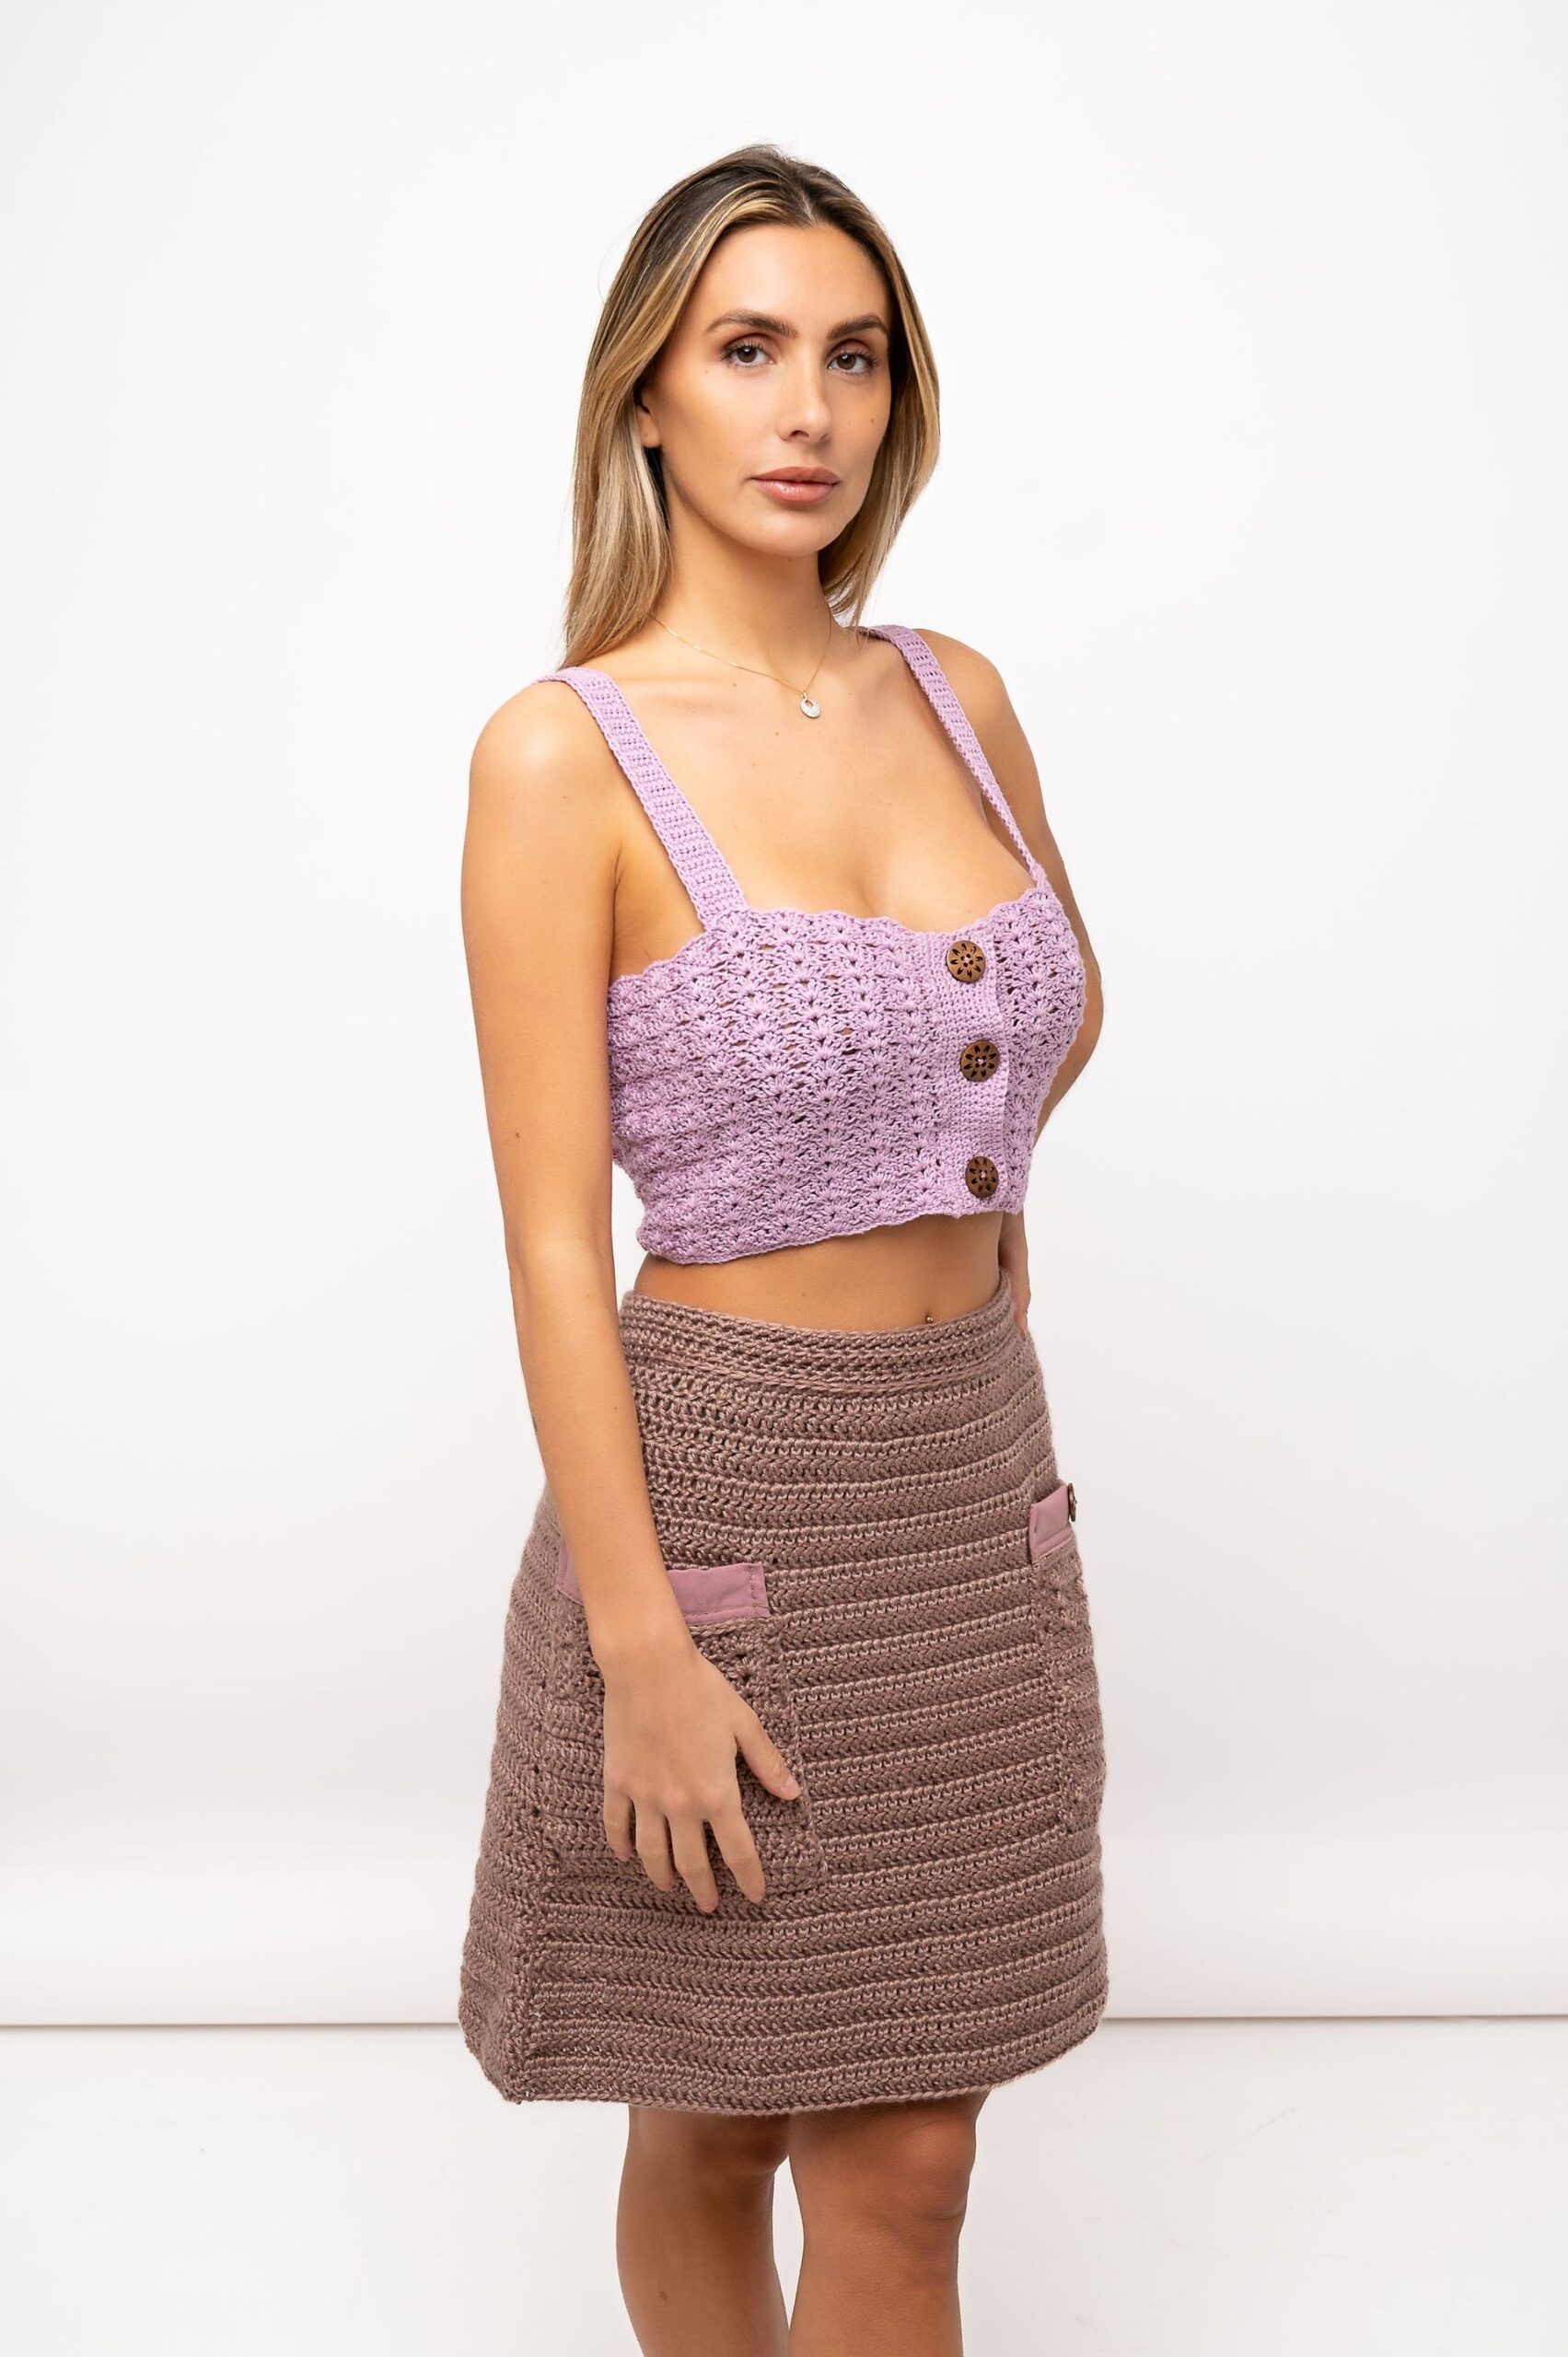
The vest pattern is a beginner friendly pattern as it has no shaping or sewing required to join the panels, only to secure the straps.
You can see the full pattern for the vest by clicking here. It’s a smaller version of this pattern that will allow you to master the Closed Scallop stitch that features through out this collection along with practicing the button band element.
Read on to find out more about how you can create your own perfect fit dress…
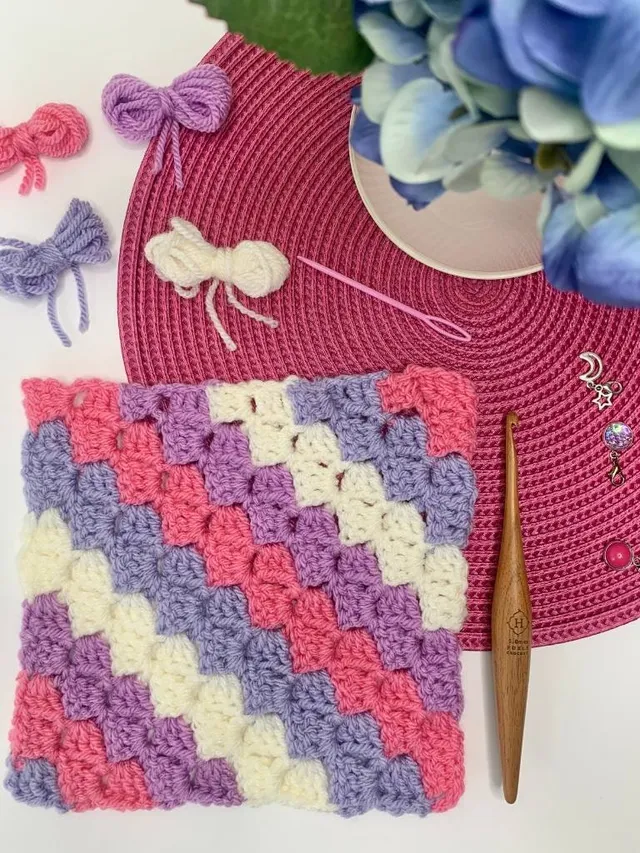
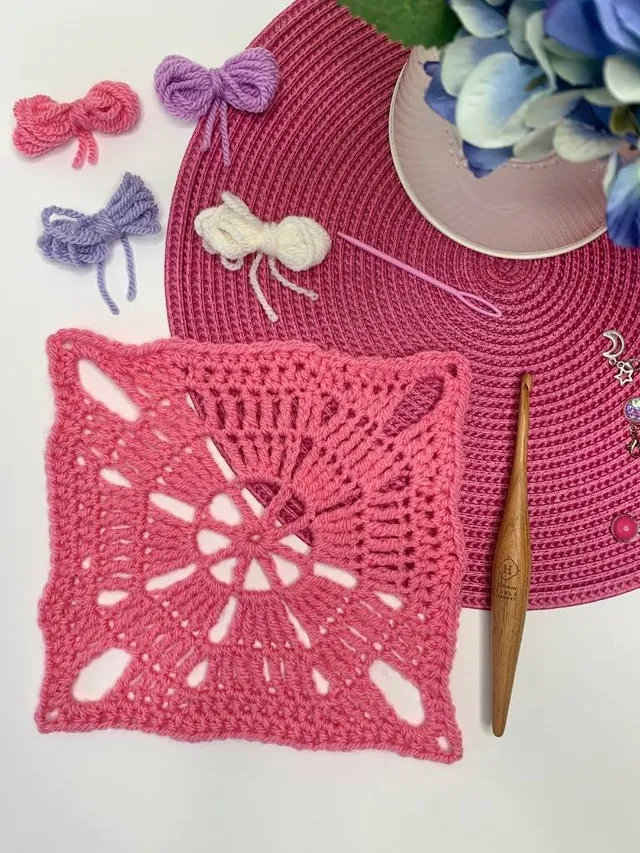
Pin this Pattern for Later!
Purchase the Printable PDF Pattern
You can purchase the printable PDF from one of my pattern stores. Simply choose your favourite retailer and click the button to make your purchase
How to create your own Perfect Form Fitting Dress
This dress is designed to showcase to your own shape using your own measurements for the perfect fit.
Each section of the pattern can be made to the size you need it to be:
- if you are one size bigger in the hips than your bust, no problems, make the size that will fit
- Need to increase the waist size – chose one of the 3 options for the waist band that will give you the best fit!
- Want to make the skirt longer – simply increase the number of rows in the bottom panel as you stitch it up
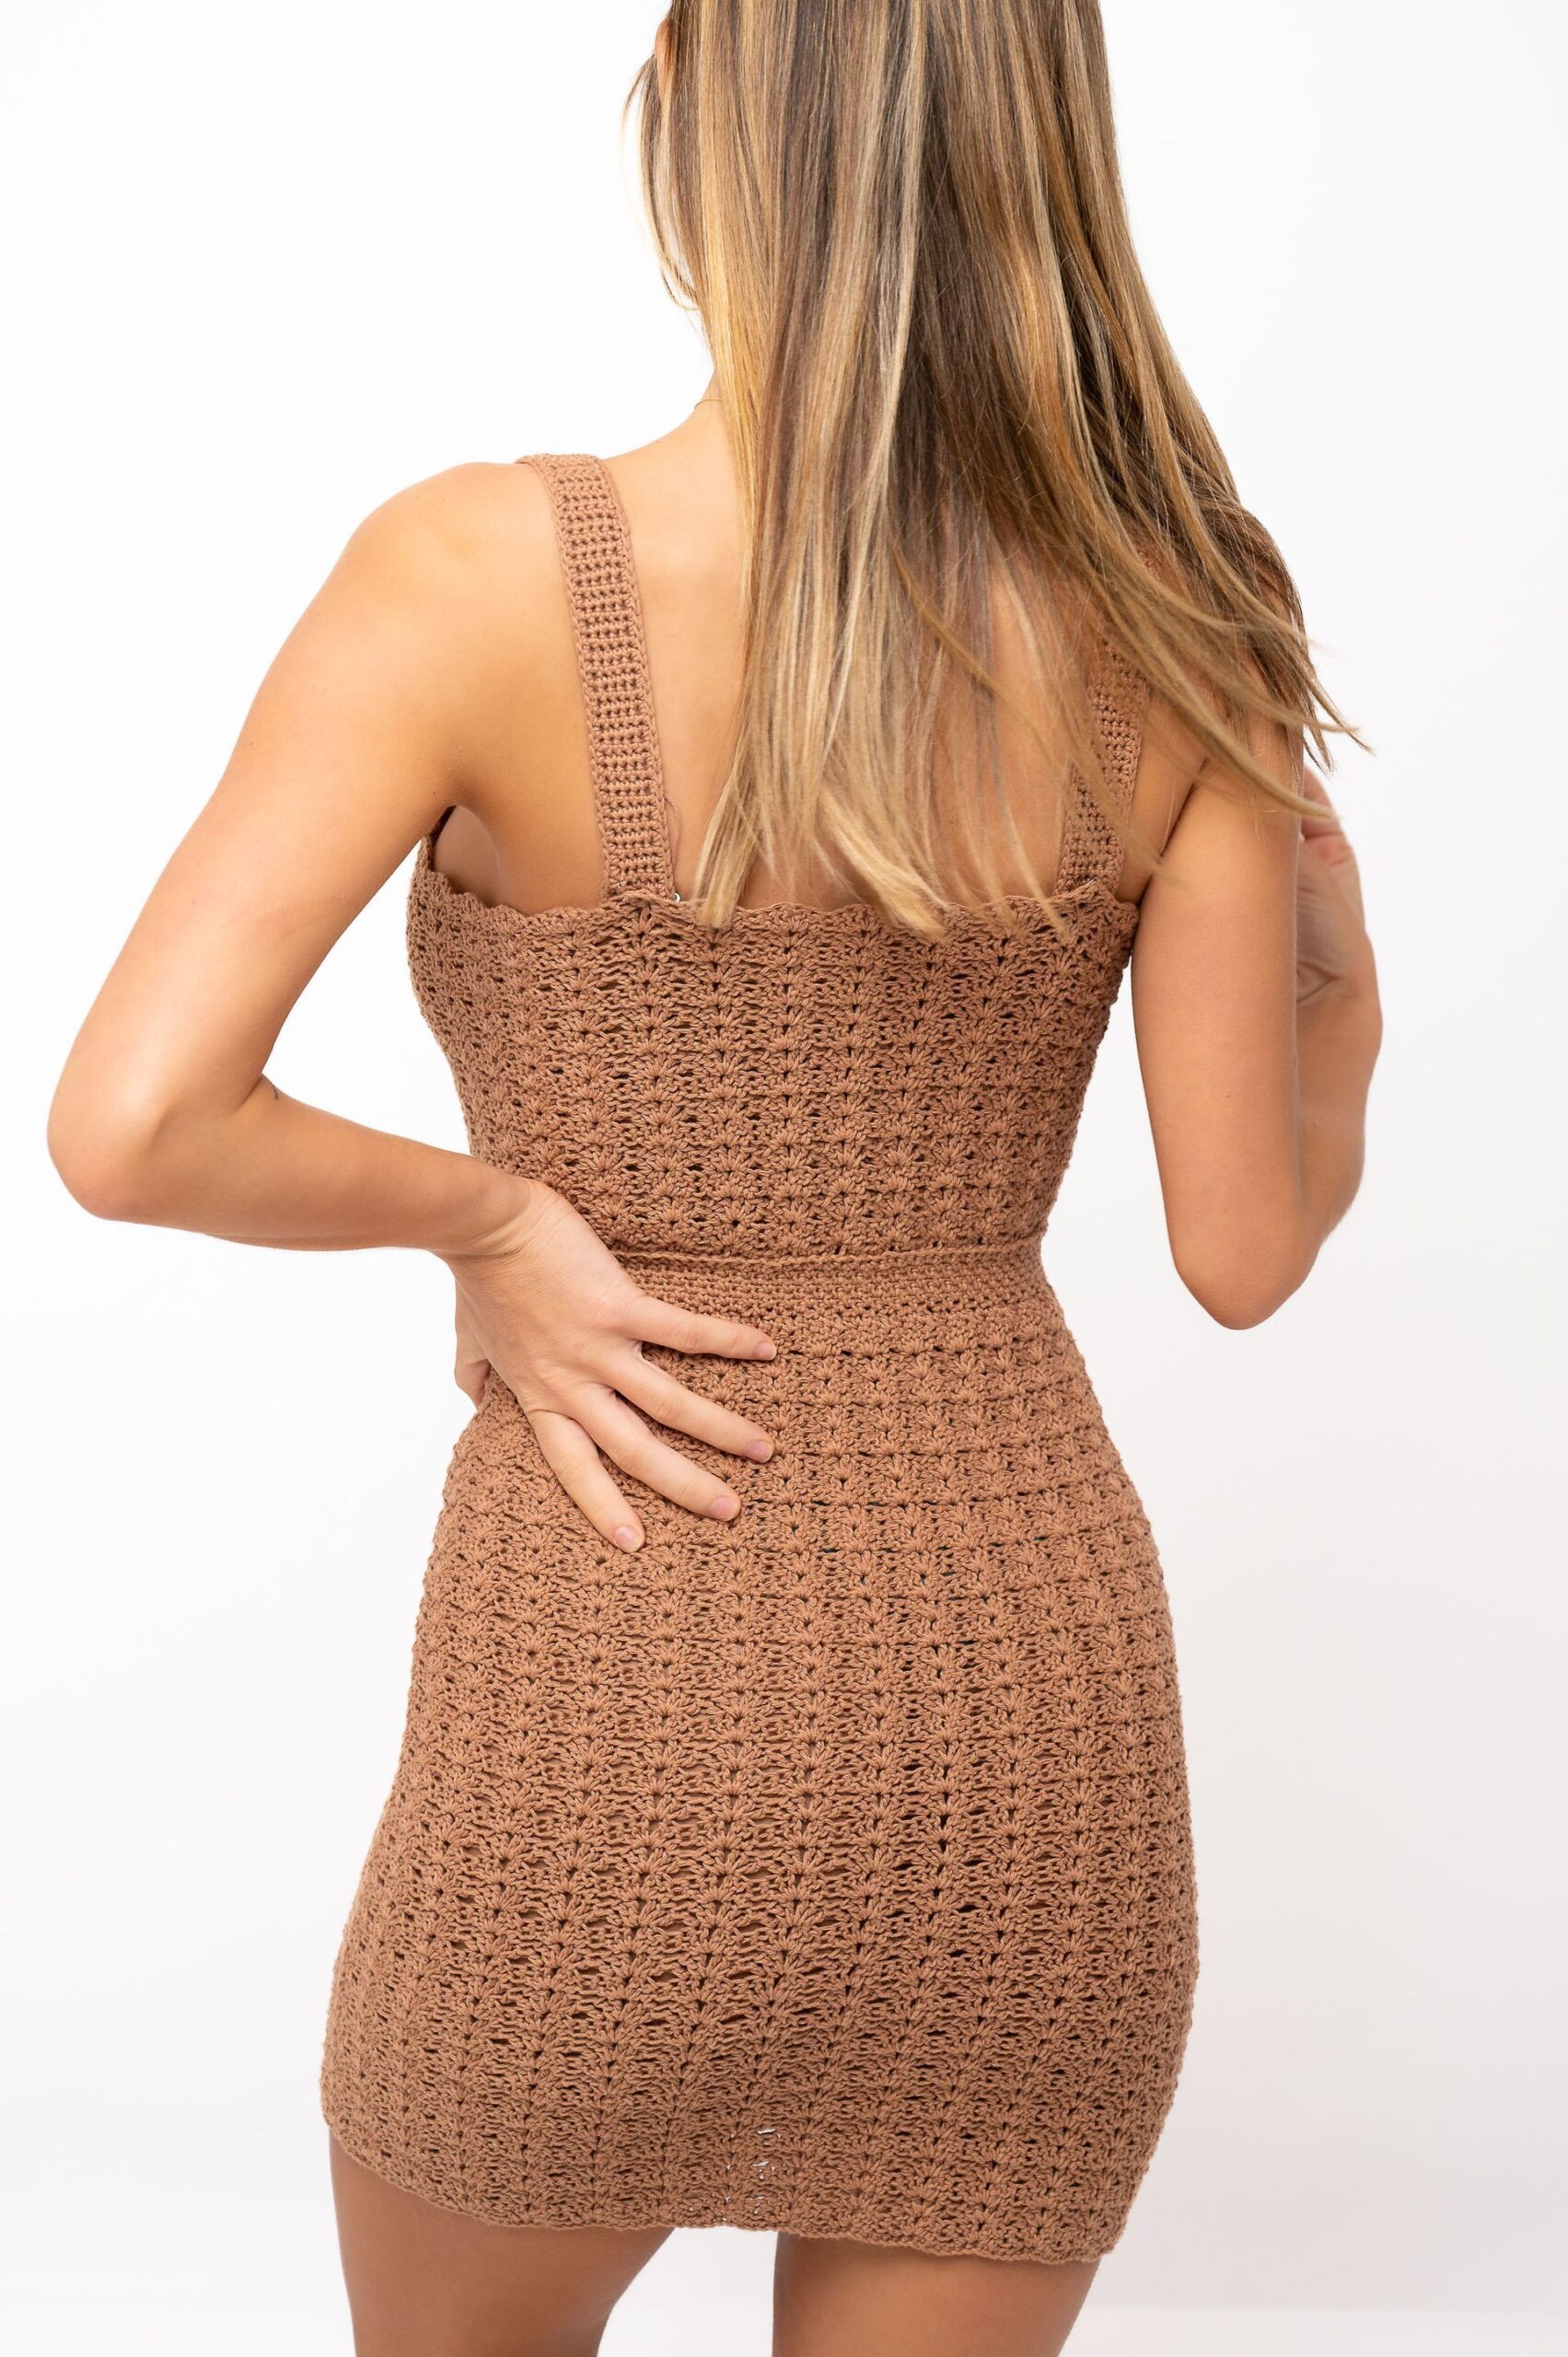
The number of way’s you can customise your own dress are many indeed – including the strap positioning.
As you can see from one of my testers photos below, they crossed the straps at the back for a different look – what a neat idea!

Sizing and Fit of this Free Crochet Dress Pattern
It’s important to take accurate measurements before starting your All Buttoned Up Dress to ensure a great fit.
Click here to learn more about how to measure yourself to confirm which size you need to make for each section.
You will need to know the following sizes and compare them to the chart to make the size you need
- Hip measurement for the bottom panel
- Bust measurement for the top panel
- Waist measurement to select which waist option to make – details below

The size chart advises that if you’d prefer to create a slightly looser fit of the dress, simply go up 1 size than your measurements indicate.
As mentioned above, there are 3 different waist options to allow you to create a better fit.
There are 3 waistband options to create your custom fit
Option 1
- Total Waistband measurement including 2” from button band = 23 (26, 28, 32, 36, 39, 42, 45, 48)”
Option 2
- Total Waist Measurement including 2” from button band = 25 (28, 30, 34, 38, 41, 44, 47, 50)”
Option 3
- Total Waist Measurement including 2” from button band = n/a (n/a, 33, 38, 41, 44, 48, 51, 51)”
Once you’ve confirmed which size you will be making for each part of the pattern, get ready to stitch up your custom fit dress, ready to wear your project with pride!
Pattern Details
Materials
- 100% Cotton DK (size 3) yarn
- I used PaintBox Yarns Simply Cotton (50g/125m) in shade: Soft Fudge
- 4mm Crochet Hook
- Scissors
- Tapestry needle
- Stitch Markers (optional)
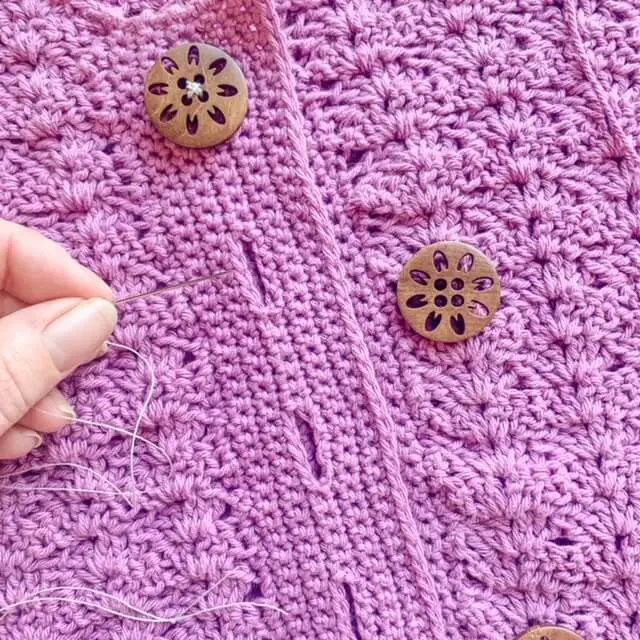
- Buttons
- 8 – 1 inch buttons
Skill Level – Intermediate
Pattern notes
- Get in touch if you need any help completing the pattern.
- This pattern is worked bottom up in rows to firstly create the main panel before working on the waistband to the top.
- The top panel is worked bottom up in rows and then sewn onto the waistband.
- The buttonhole panels are then worked onto the edge of the panel.
- The straps are worked separately before sewing on.
- Ch1 at the beginning of the rows DO NOT count as a stitch.
- Ch3 at the beginning of the rows DOES count as a stitch.
- Take a moment to go through the pattern and highlight the stitch counts for your size which will be written in size order. e.g XS (S, M, L, XL, 2XL, 3XL, 4XL, 5XL)
Abbreviations
US terms (UK in brackets)
St(s) – Stitch9es)
Ch – Chain
Ch Sp – Chain space
Sc (dc) – Single crochet (double crochet)
Hdc (Htr) – Half double (treble) crochet
Dc (Tr) – Double (treble) crochet
Wdc2Tog (wtr2tog) – Wide double (treble) crochet 2 together
RS – Right side
WS – Wrong side
Special Stitches
Wide Double Crochet 2 Together (Wdc2tog)
- YO, insert hook into stitch, yo, pull up loop
- YO, pull through 2 loops on hook (2 loops on hook)
- Skip 3 stitches
- YO, insert hook into next stitch, yo, pull up loop,
- YO, pull through 2 loops on hook (3 loops on hook)
- YO, pull through 2 loops on hook (2 loops on hook)
- YO, pull through 2 loops on hook to complete the stitch.
Gauge
3.5 repeats and 9 rows = 4 inches (10cm) in pattern repeat a 4mm hook. Use a larger or smaller crochet hook to obtain the correct tension.
Bottom Panel | Free Crochet Dress Pattern
Row 1: Ch 140 (158, 170, 200, 224, 266, 284, 302) sc in 2nd ch from hook and each ch across, turn. 139 (157, 169, 199, 223, 241, 265, 283, 301) sc
Row 2: Ch 3 (counts as st), skip next, dc in next (counts as wdc2tog), shell in next, *starting in next wdc2tog, shell in next; repeat from * across to last 3, starting in next and ending in last, wdc2tog, turn. 23 (26, 28, 33, 37, 40, 44, 47, 50) shells, 24 (27, 29, 34, 38, 41, 45, 48, 51) dc
Row 3: Ch 3, skip next, dc in next (counts as wdc2tog), shell in next ch-1 sp, *starting in next, wdc2tog, shell in next ch-1 sp; repeat from * across to last 3, starting in next and ending in last, wdc2tog, turn.
Rows 4-40: Repeat Row 3.
Skirt will measure 20”. To increase Skirt length, Repeat Row 3 until desired length.
Continue to Waistband.
Waistband
Waistband Option 1 (measurement including 2” from button band = 23 (26, 28, 32, 36, 39, 42, 45, 48)”
Row 1: Ch 3 (counts as dc), skip same, *working in next shell, hdc in next, sc in next, skip ch-1 sp, sc in next, hdc in next, dc in top of wdc2tog; repeat from * across, turn. dc 25 (28, 30, 34, 38, 41, 45, 47, 50) dc, 46 (52, 56, 64, 72, 78, 84, 90, 96) hdc, 46 (52, 56, 64, 72, 78, 84, 90, 96) sc.
Row 2: Ch 1, sc in same, *ch 1, skip next, sc in next; repeat from * across, turn. 60 (67, 72, 85, 95, 102, 112, 120, 127) sc, 58 (65, 70, 83, 93, 100, 110, 118, 125) ch-1 sps
Row 3: Ch 1, sc in same, sc in next ch-1 sp, *ch 1, skip next, sc in next ch-1 sp; repeat from * across to last, sc in last, turn.
Row 4: Ch 1, sc in same, *ch 1, skip next, sc in next ch-1 sp; repeat from *across to last, sc in last, turn.
Rows 5-6: Repeat Rows 3-4.
Row 7: Ch 1, working in each st and ch-sp, sc in each across. 116 (131, 141, 166, 186, 201, 221, 236, 251) sc
Fasten off, leaving long tail for sewing.
Continue to Top Panel.
Option 2 – Row 1 is different for each size (Measurement including 2” from button band = 25 (28, 30, 34, 38, 41, 44, 47, 50)”
XS Row 1: Ch 3 (counts as dc), [hdc in next, sc in next, skip ch-1 sp, sc in next, hdc in next, dc in top of wdc2tog] 2 times, *hdc in next, sc in next, sc in next ch-1 sp, sc in next, hdc in next, dc in top of wdc2tog, hdc in next, sc in next, skip ch-1 sp, sc in next, hdc in next, dc in top of wdc2tog; repeat from * across to last, dc in last, turn.
Continue to All Sizes.
S Row 1: Ch 3 (counts as dc), hdc in next, sc in next, sc in next ch-1 sp, sc in next, hdc in next, dc in top of wdc2tog, *hdc in next, sc in next, skip ch-1 sp, sc in next, hdc in next, dc in top of wdc2tog, hdc in next, sc in next, sc in next ch-1 sp, sc in next, hdc in next, dc in top of wdc2tog; repeat from * across to last, dc in last, turn.
Continue to All Sizes.
M: Row 1: Ch 3 (counts as dc), hdc in next, sc in next, sc in next ch-1 sp, sc in next, hdc in next, dc in top of wdc2tog], *hdc in next, sc in next, skip ch-1 sp, sc in next, hdc in next, dc in top of wdc2tog, [hdc in next, sc in next, sc in next ch-1 sp, sc in next, hdc in next, dc in top of wdc2tog] 2 times; repeat from * across to last, dc in last, turn.
Continue to All Sizes.
L: Row 1: Ch 3 (counts as dc), *[hdc in next, sc in next, skip ch-1 sp, sc in next, hdc in next, dc in top of wdc2tog] 2 times, hdc in next, sc in next, sc in next ch-1 sp, sc in next, hdc in next, dc in top of wdc2tog; repeat from * 10 times, hdc in next, sc in next, skip ch-1 sp, sc in next, hdc in next, dc in top of wdc2tog, dc in last, turn.
Continue to All Sizes.
XL: Row 1: Ch 3 (counts as dc), hdc in next, sc in next, sc in next ch-1 sp, sc in next, hdc in next, dc in top of wdc2tog, [hdc in next, sc in next, skip ch-1 sp, sc in next, hdc in next, dc in top of wdc2tog] 30 times, hdc in next, sc in next, sc in next ch-1 sp, sc in next, hdc in next, dc in top of wdc2tog, dc in last, turn.
Continue to All Sizes.
2XL: Row 1: Ch 3 (counts as dc), *hdc in next, sc in next, sc in next ch-1 sp, sc in next, hdc in next, dc in top of wdc2tog, [hdc in next, sc in next, skip ch-1 sp, sc in next, hdc in next, dc in top of wdc2tog] 3 times; repeat from * 10 times, dc in last, turn.
Continue to All Sizes.
3XL: Row 1: Ch 3 (counts as dc), [hdc in next, sc in next, skip ch-1 sp, sc in next, hdc in next, dc in top of wdc2tog] 2 times, *hdc in next, sc in next, sc in next ch-1 sp, sc in next, hdc in next, dc in top of wdc2tog, [hdc in next, sc in next, skip ch-1 sp, sc in next, hdc in next, dc in top of wdc2tog] 3 times; repeat from * 9 times, hdc in next, sc in next, sc in next ch-1 sp, sc in next, hdc in next, dc in top of wdc2tog, [hdc in next, sc in next, skip ch-1 sp, sc in next, hdc in next, dc in top of wdc2tog] 2 times, dc in last, turn.
Continue to All Sizes.
4XL: Row 1: Ch 3 (counts as dc), *hdc in next, sc in next, sc in next ch-1 sp, sc in next, hdc in next, dc in top of wdc2tog, [hdc in next, sc in next, skip ch-1 sp, sc in next, hdc in next, dc in top of wdc2tog] 4 times; repeat from * 9 times, hdc in next, sc in next, sc in next ch-1 sp, sc in next, hdc in next, dc in top of wdc2tog, hdc in next, sc in next, skip ch-1 sp, sc in next, hdc in next, dc in top of wdc2tog, dc in last, turn.
Continue to All Sizes.
5XL: Row 1: Ch 3 (counts as dc), [hdc in next, sc in next, skip ch-1 sp, sc in next, hdc in next, dc in top of wdc2tog] 2 times, *hdc in next, sc in next, sc in next ch-1 sp, sc in next, hdc in next, dc in top of wdc2tog, [hdc in next, sc in next, skip ch-1 sp, sc in next, hdc in next, dc in top of wdc2tog] 4 times; repeat from * 9 times, hdc in next, sc in next, sc in next ch-1 sp, sc in next, hdc in next, dc in top of wdc2tog, [hdc in next, sc in next, skip ch-1 sp, sc in next, hdc in next, dc in top of wdc2tog] 2 times, dc in last, turn.
Continue to All Sizes.
Option 2 – All Sizes
Row 2: Ch 1, sc in same, *ch 1, skip next, sc in next; repeat from * across, turn.
Row 3: Ch 1, sc in same, sc in next ch-1 sp, *ch 1, skip next, sc in next ch-1 sp; repeat from * across, turn.
Row 4: Ch 1, sc in same, *ch 1, skip next, sc in next ch-1 sp; repeat from * across, turn.
Rows 5-6: Repeat Row 3-4.
Row 7: Ch 1, working in each st and ch-sp, sc in each across.
Fasten off, leaving long tail for sewing.
Option 3 (Measurement including 2” from button band = n/a (n/a, 33, 38, 41, 44, 48, 51, 51)”
Row 1: Ch 3 (counts as dc), *hdc in next, sc in next, sc in next ch-1 sp, sc in next, hdc in next, dc in top of wdc2tog; repeat from * across to last, dc in last, turn. (xx, xx, 169, 199, 223, 241, 265, 283, 301)
Row 2: Ch 1, sc in same, *ch 1, skip next, sc in next; repeat from * across, turn. (xx, xx, 86, 101, 113, 122, 134, 143, 152 sc and xx, xx, 84, 99, 111, 120, 132, 141, 150 ch-1 sps)
Row 3: Ch 1, sc in same, sc in next ch-1 sp, *ch 1, skip next, sc in next ch-1 sp; repeat from * across, turn.
Row 4: Ch 1, sc in same, *ch 1, skip next, sc in next ch-1 sp; repeat from * across, turn.
Rows 5-6: Repeat Row 3-4.
Row 7: Ch 1, sc each across. 116 (131, 141, 166, 186, 201, 221, 236, 251) sc
Fasten off, leaving long tail for sewing.
Top Panel | Free Crochet Dress Pattern
Row 1: Ch 140 (158, 170, 200, 224, 242, 266, 284, 302), sc in 2nd ch from hook and each ch across, turn, 139 (157, 169, 199, 223, 241, 265, 283, 301) sc
Row 2: Ch 3, skip next, dc in next (counts as wdc2tog), shell in next, *starting in next wdc2tog, shell in next; repeat from * across to last 3, starting in next and ending in last, wdc2tog, turn. 23 (26, 28, 33, 37, 40, 44, 47, 50) shells, 24 (27, 29, 34, 38, 41, 45, 48, 51) dc
Row 3: Ch 3, skip next, dc in next (counts as wdc2tog), shell in next ch-1 sp, *starting in next, wdc2tog, shell in next ch-1 sp; repeat from * across to last 3, starting in next and ending in last, wdc2tog, turn.
Rows 4-16 (16, 16, 18, 18, 20, 20, 22, 22): Repeat Row 3.
Top should measure 8 (8, 8, 9, 9, 10, 10, 11, 11)”.
Fasten off, weave in ends.
Continue to Sewing Together.
Sewing Together
With RS facing, sew Top to waistband.
Designer used Mattress Stitch. Distribute stitches evenly to allow for differing stitch counts.
Fasten off, weave in ends.
Continue to Button Panel.
Button Panel
Row 1: Ch 1, working in row ends, place 2 sc in each row end across, turn.
Rows 2-10: Ch 1, sc in each across, turn.
Fasten off, weave in ends.
Continue to Button Placement
Button Placement
To help work out the number of stitches between each button hole, place buttons evenly spaced across length of the button panel.
The example provided is based on a total length of 29” dress using 8 – 2cm buttons.
If you are using smaller sized buttons, you will need more than the buttons suggested, adjust the distance between stitches, noting the number of sts covered by the buttons to adjust the size of the buttonhole.
Example:
- mark the edges of the buttons with pins to count the stitches where the buttons are placed and the stitches between each of the buttons.
- Stitches for Buttons: 5 sts = Ch 5 for button hole
- Between Buttons: 12 sts = 12 stitches between button holes
For 8 buttons, leave 3 stitches before placing 1st button, with 5 sts covered by the button, leave 12 sts before placing the next button, repeat for remaining buttons, leaving 4 stitches at the bottom.
NOTE: DO NOT sew buttons on until Buttonhole Panel is completed.

Buttonhole Panel Cont.
With RS facing, reattach yarn in the corner to work down the other RS side of the dress.
Row 1: Ch 1, working in row ends, place 2 sc in each row end across, turn.
Row 2-5: Ch 1, sc in each across, turn.
Row 6: Ch 1, sc in same, sc in next 3, *ch 5, skip 5, sc in next 12; repeat from * across to last 4, sc in last 4, turn. (8 buttonholes)
Rows 7-11: Ch 1, sc in each across, turn.
Fasten off, weave in remaining ends.
Sew on Buttons
Place Buttonhole Panel over the button side to check button placement is central to buttonholes, sew buttons in place.
Continue to straps
Straps
Make 2
Designers straps measured 17 inches with a gentle stretch after row 80.
The strap length can be adjusted by increasing or decreasing the number of rows.
Pin your 1st strap to your top and try it on to ensure you are happy with the length before repeating the same pattern for your 2nd strap.
Row 1: Ch 6, sc in 2nd ch from hook and in each ch across, turn. (5 sc)
Rows 2-80: Ch 1, sc in each st across. Turn. (5 sc)
To edge the strap and prevent overstretching during wearing, we will work a Sc into each st the end of each row.
Row 81: Working down the length of the strap, in row ends, sc in each across to last, (sc, ch 1, sc) in last, rotate to work across starting ch, sc in each across to last, (sc, ch 1, sc) in last, rotate to work across row ends, sc in each across to last, sl st to join to 1st of Row 80.
Fasten off, weave in ends.
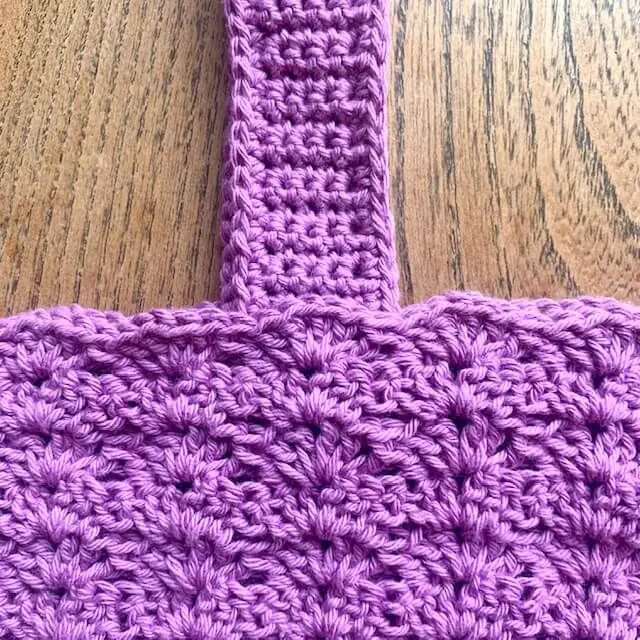
Placing the Straps
Before sewing your straps in place, pin both straps and try on your top to ensure they are placed evenly.
Designer placed placed them on the 4th shell counting out out from the button panel.
Place the button panel in the middle and fold the straps in half placing the ends to correspond to the front placement.
To check the placement matches for both straps, count the shells between each strap, along the underarm area, to ensure the number of shells match.
Once you are happy with your placement, sew the straps in place under a shell, into the last row.
Weave in remaining ends.
Ready to get making?
You can purchase the printable PDF from one of my pattern stores. Simply choose your favourite retailer and click the button to make your purchase:
Pin this Pattern for Later