How to change colours in corner to corner
Learn how to change colour in corner to corner crochet while you reduce the number of end you need to weave at the end of your project.
Please note that some of the links in my blog are affiliate links. I may earn a small commission if you purchase via these links, but the price you pay is not affected
Corner to Corner Crochet Techniques
Traditional corner to corner crochet is also know as C2C crochet and it’s worked using “blocks” of 3 US double crochet stitches, worked into chain 3 spaces which are joined with a slip stitch.
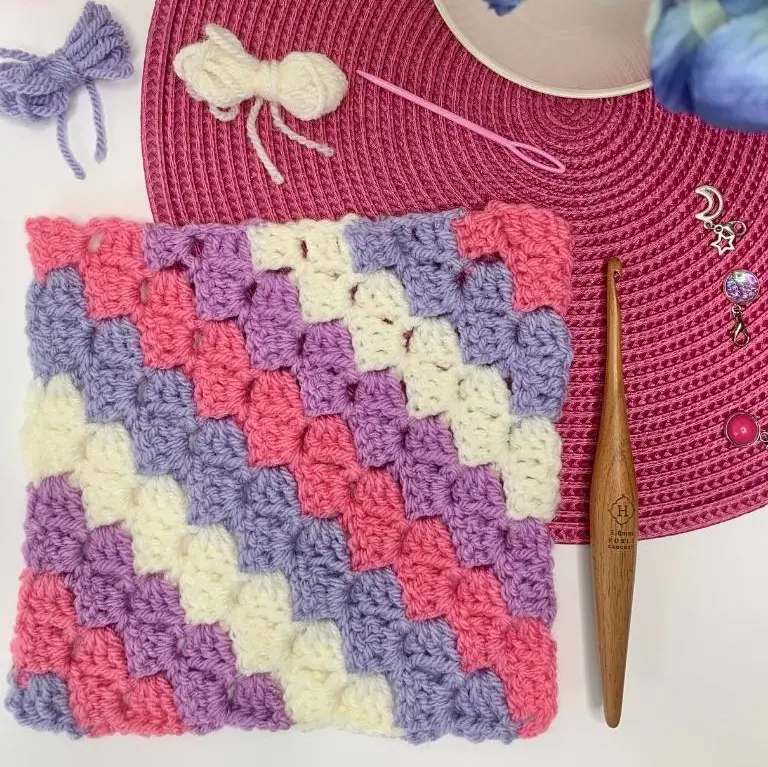
Corner to corner crochet can also use different crochet stitches in the same technique of working out from 1 corner to create a square, a rectangle or many other shapes.
Corner to corner crochet can also be used to create pictures using a graph that uses the blocks or tiles as pixels with colour-work – it’s a great way to convert pictures into crochet patterns.
If you’re ready to increase your C2C crochet skills learn how to change colours in corner to corner crochet, you’ll learn the top tips on making the smoothest colour transitions and create a masterpiece.
Changing colour in corner to corner crochet can feel a little overwhelming as it’s done differently that standard colour changes in other crochet techniques.
Regardless of whether you are following a colour graph or the written instructions, you’re going to find out how to move on from simply using variegated yarn in your corner to corner crochet projects, and learn how to change colour in your corner to corner crochet with confidence.
There are some simple rules and techniques that will create colour changes that will prevent those changes being seen by anyone – even you!
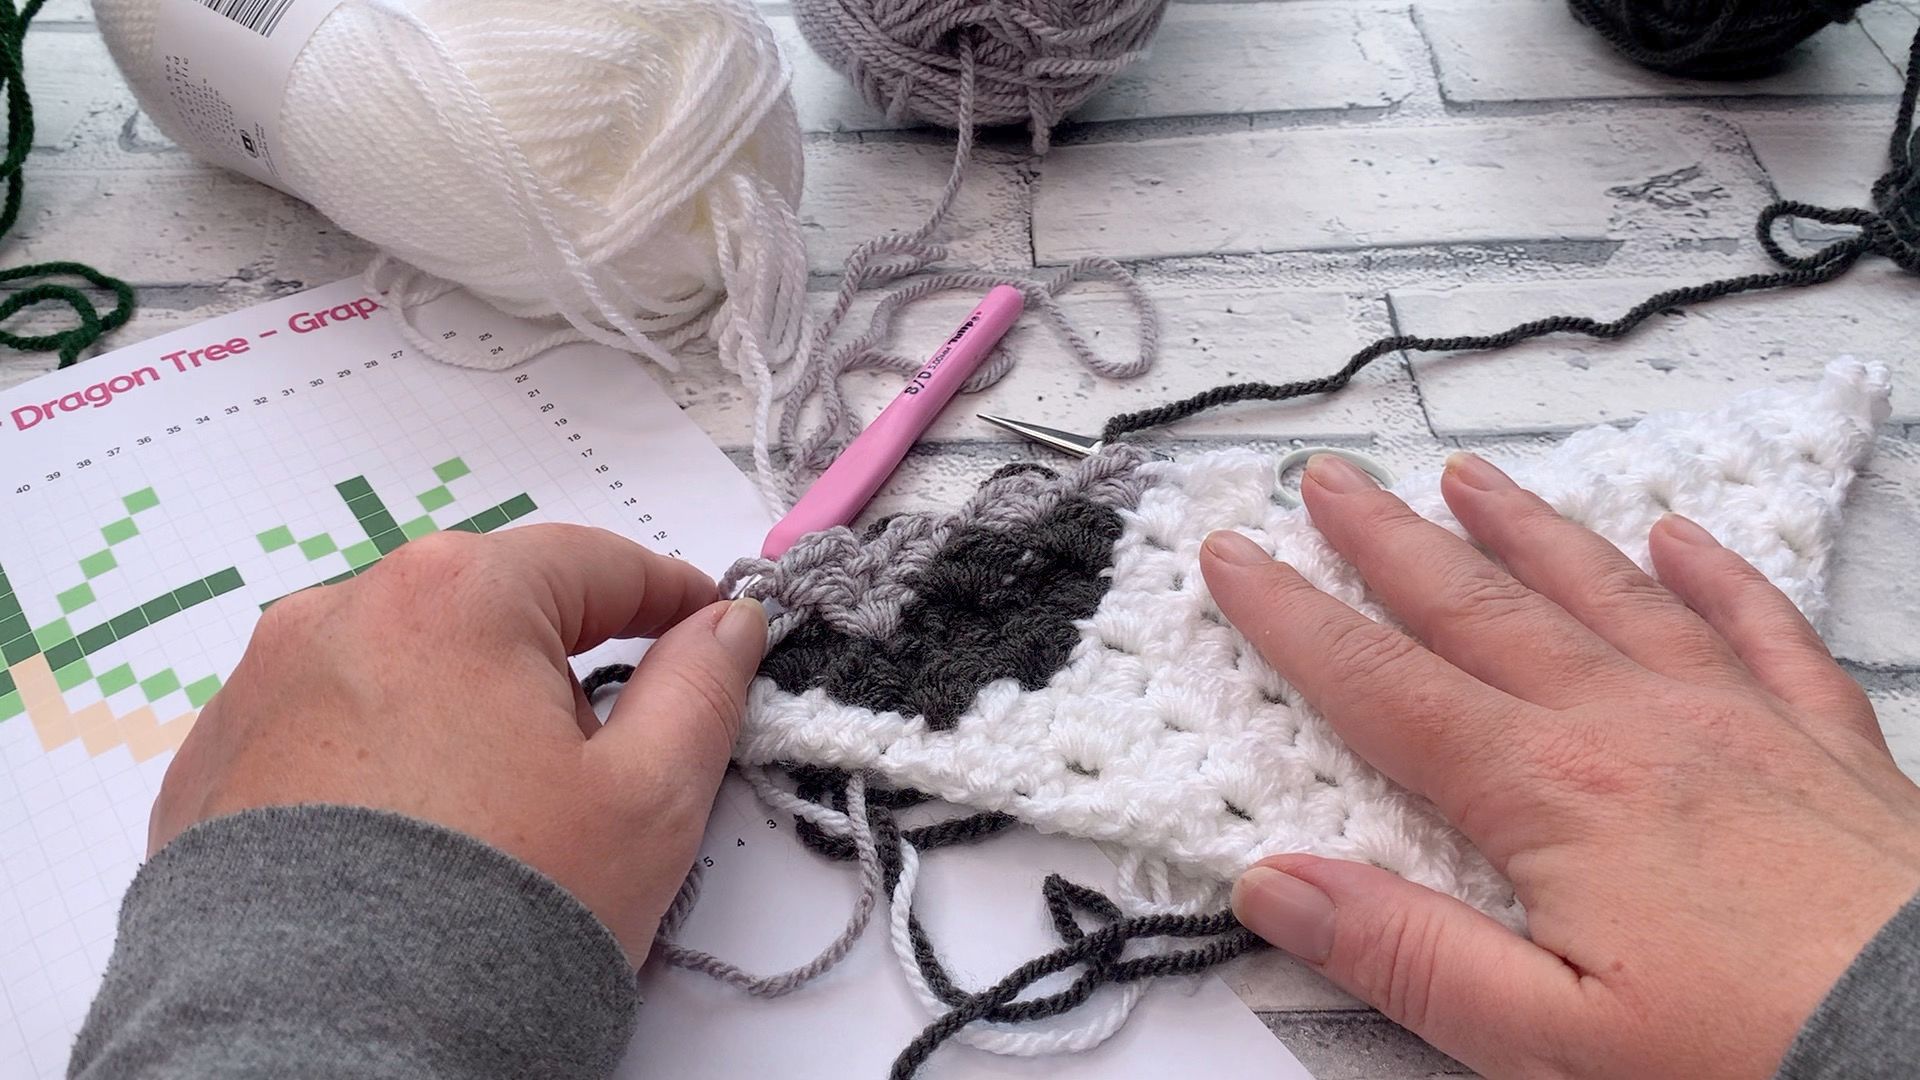
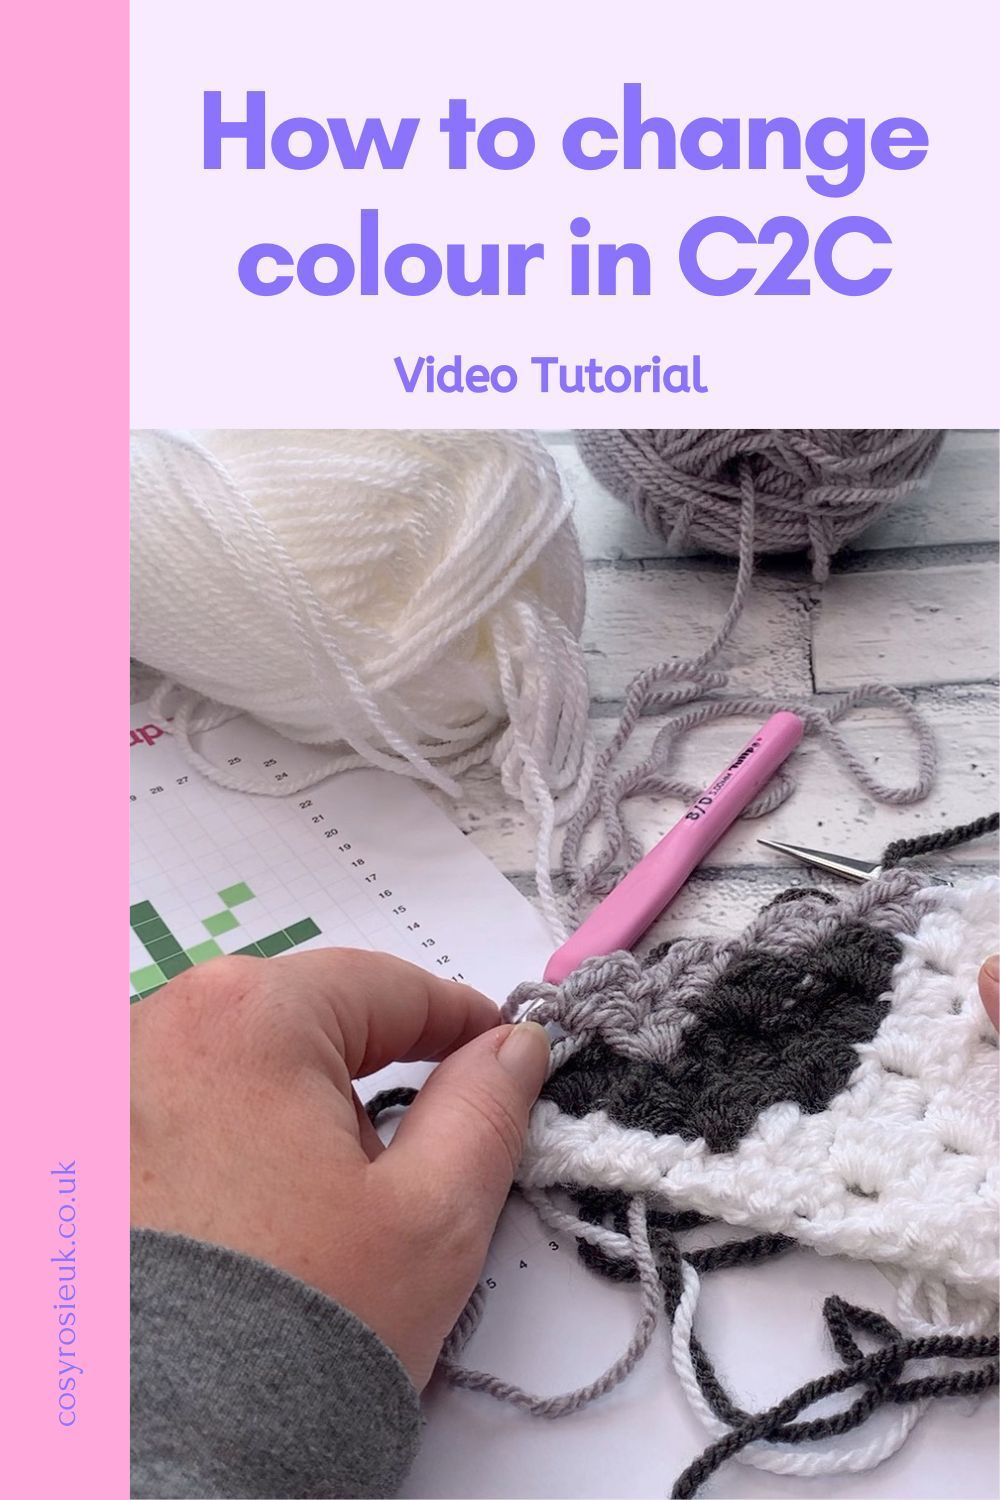
How to change colour in corner to corner crochet video tutorial
How to change colours in corner to corner crochet inside the row
When changing colour in the middle of a corner to corner row, the best way to change colours is to add your new colour in the slip stitch when joining the block to the next.
By changing colour as the blocks are joined, the colour change will not be seen and practically invisible.
How to minimise the number of ends to weave in
If you want to minimise the number of ends in your project, I recommend that you do not fasten off the previously used colour straight away as it may be needed in the same place or near-by in the next row.
You can even carry the unworked colour along your with the new colour if it is needed later in the row you are working.
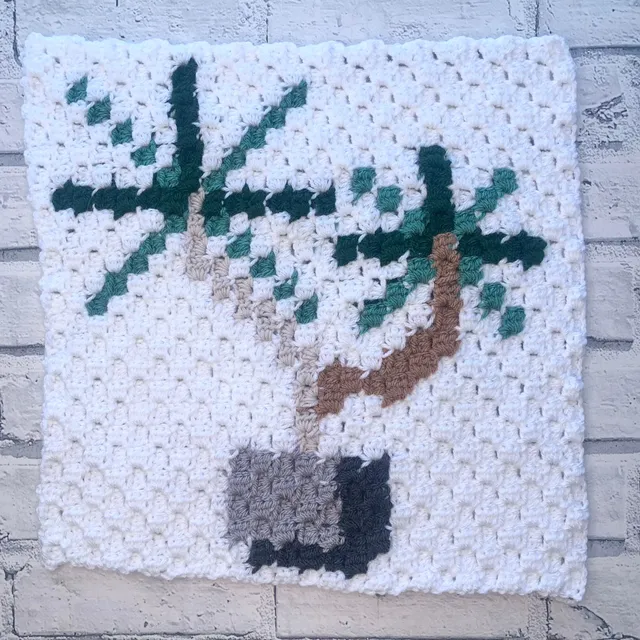
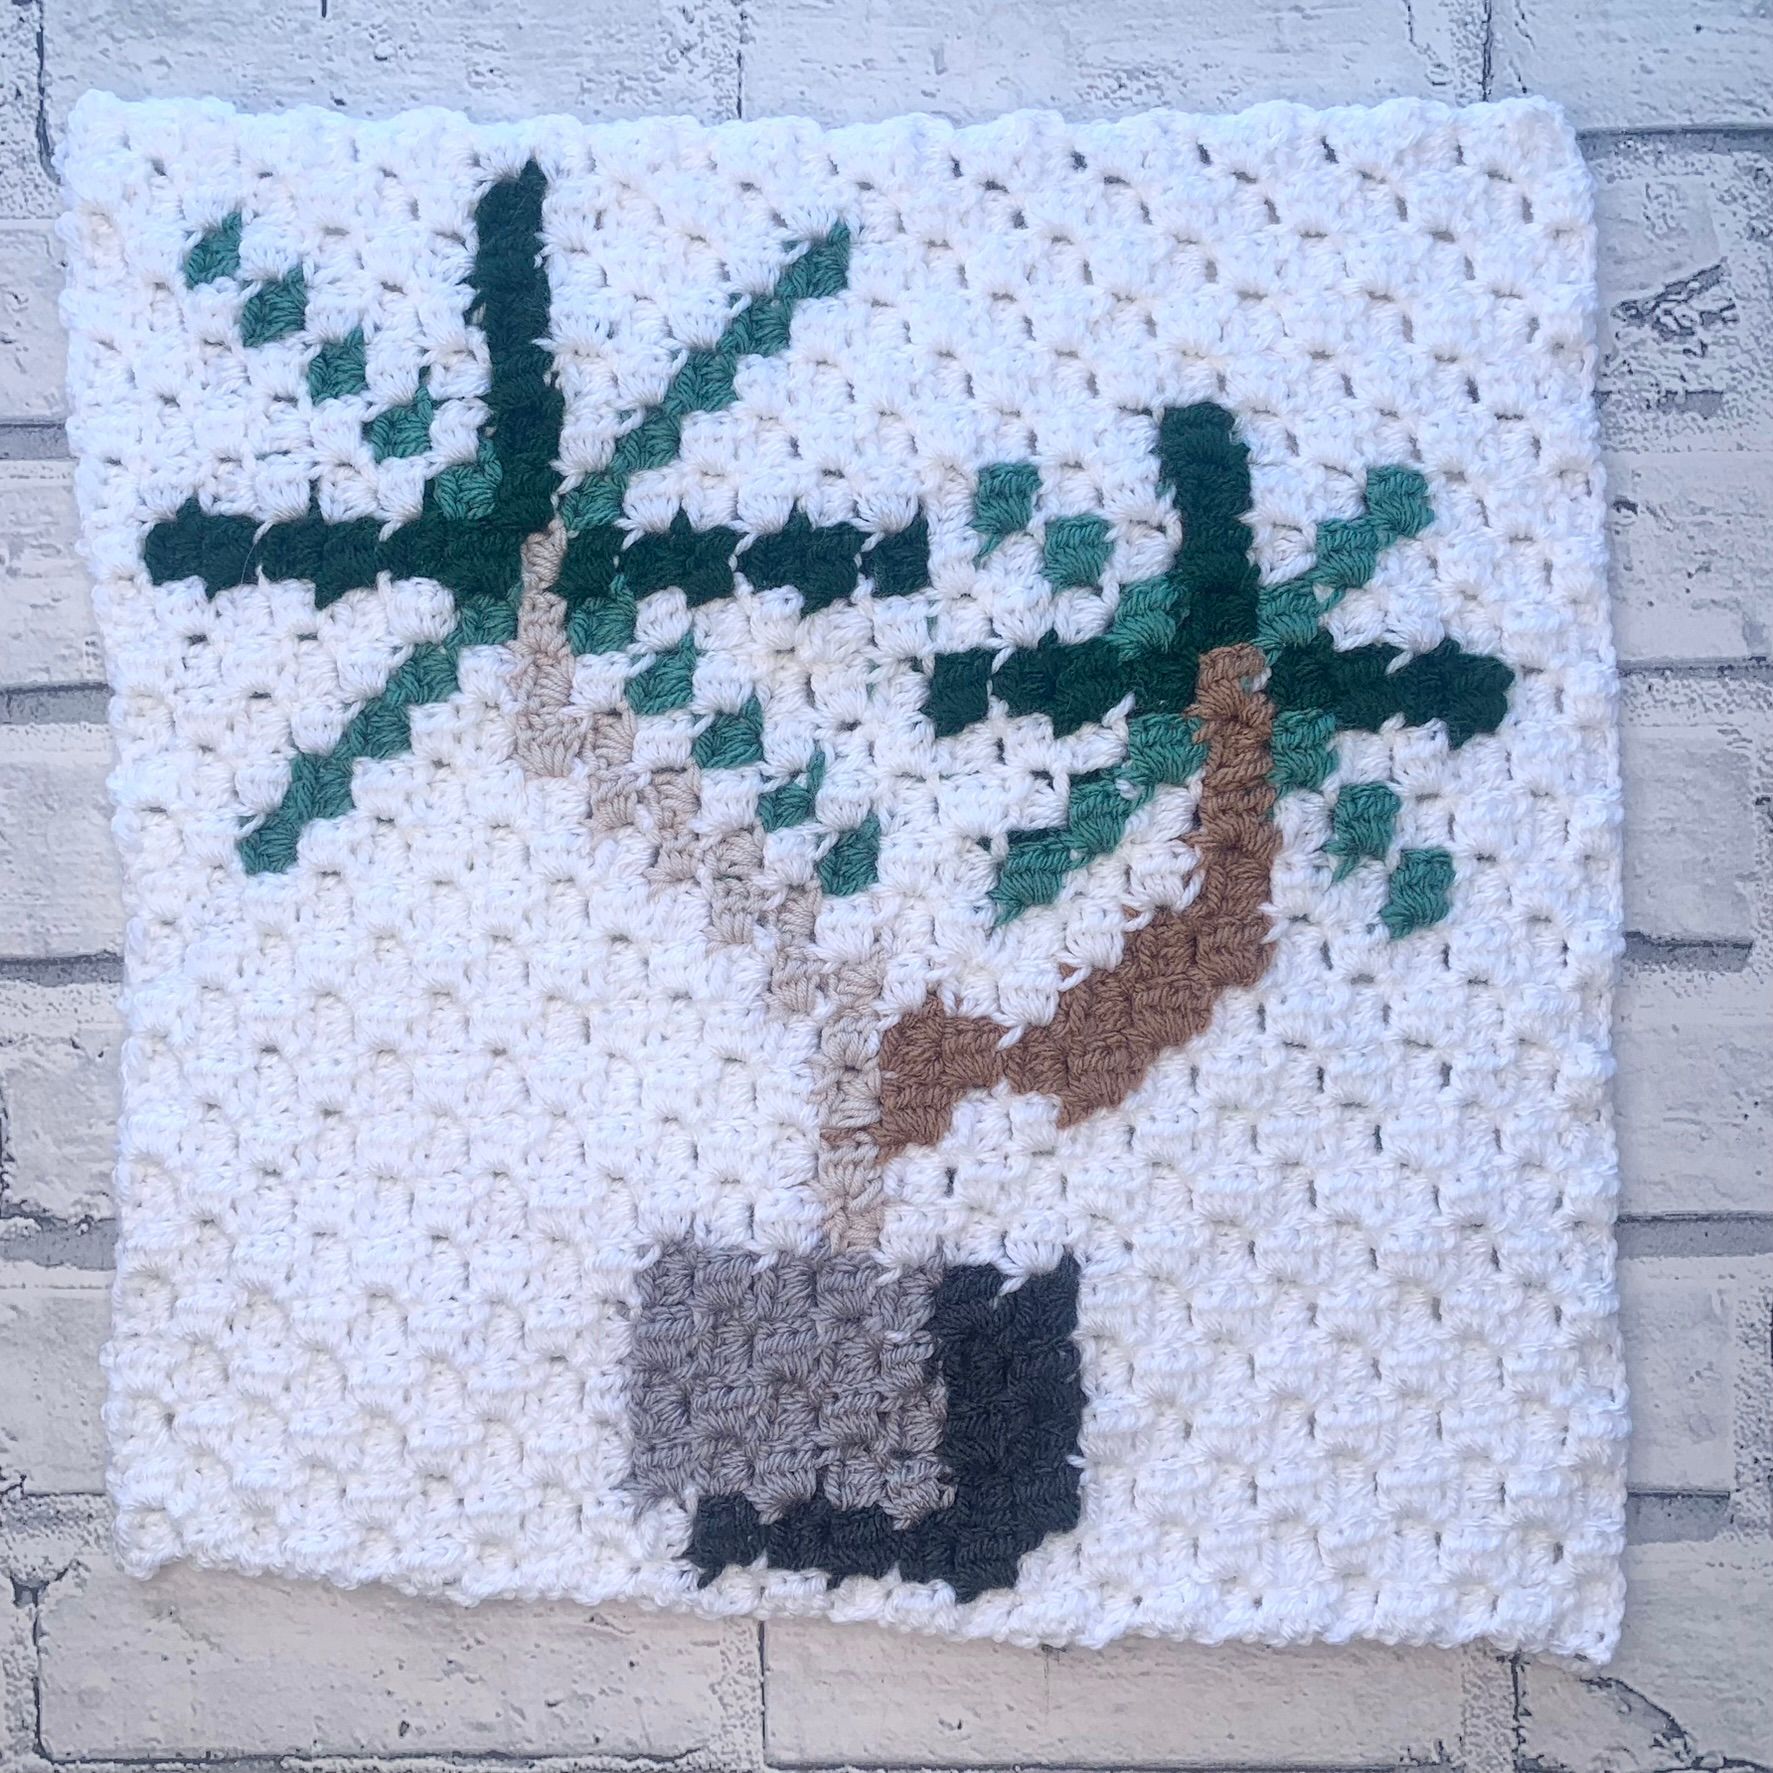
My Madagascar Dragon Tree C2C Crochet Plant Pattern recommends that you carry the main, white colour throughout the project to reduce the number of ends to be woven in at the end of the project.
When carrying the unworked row, take care that you are not creating an uneven tension which may cause your project to pucker or for loose yarn to show too.
You can even work in a colour change from 1 row below by carefully carrying up the required colour in the last stitch of the block before the colour change.
If you’re colour isn’t quite where you need it, simple ensure there is enough yarn for you to crochet over to where the yarn is as shown in the video tutorial.
If this feels like it’s overly complicated, feel free to cut your yarn and reattach when you slip stitch for the colour change – remember this is your project and if you don’t hate weaving ends, you may find you prefer the finished look without carrying your yarn. I’ll always carry as much as I can as weaving ends is my least favourite way to spend my time.
When to Weave those ends | Corner to Corner Techniques
I always recommend weaving as you go, working over the ends where possible before weaving in. With possibility of multiple colour changes and various colours being used in a project, it might not always be possible to carry the yarn.
If you have a high number of colour changes in your project, you are also likely to have a high number of ends – simply weave as you work up your project!
No one wants to get to the end of a project and realising that you have an hour of weaving ahead of truly being finished.
Weave with caution though – double check that all your colour changes have been completed correctly before you begin to weave those ends – take a moment to compare your project to the graph and count those tiles if required to be doubly sure you’ve not made any mistakes.
If you are confident that there are no mistakes, you can weave in the ends that are 4-5 rows under where your currant crochet row.
Try to match the colour being weaved to where you are weaving in to hide more of the colour changes. You can also use your ends to sew over any colour change joins that you are not happy that could be seen from the right side of your projects.
How to change colours at the end of a row in corner to corner crochet
If you are simply changing colours at the end of your rows in corner to corner crochet, you need to be aware which end block you are working; either an increase or a decrease block or tile.
Changing colour when working the Increase Block
When you are adding more blocks on your project and still increasing, fasten off the colour you are using after completing the final block in the row using a chain one to secure.
Add the new colour with a slip stitch and then make your beginning chain to create the increase tile or block with a chain 6 (or as stated in the pattern) in the new colour for the row.
Picture below is an example of how this will look.
Changing colour when working the Decrease Block
When you begin to decrease to either create a square or a rectangle, that you need to change colours after you have created the slip stitches across the top of the previous tile or block.
Once you have slip stitched across the top of the previous block, you can slip stitch into the chain space with the new colour required to begin your new row in the new colour.
How to prevent your yarn from tangling?
When you are using multiple different colours in one project, it’s best to find a way of preventing a yarn tangle – nothing makes me more angry than yarn in a mess while I am working with it.
There are so many different ways for you to manage ALL those strands of yarn. Here are some great ideas:
- Use Bobbins
- Bobbins will allow you to create smaller balls of yarn in the various colours you are using for the different sections of the pattern. You can secure the bobbin close to the project when that colour is not in use, but there is always a risk that for those larger colour sections that you may run out before your colour section ends.
- You can even create your own bobbin holder to keep all those colours in order! 1DogWoof will show you how to make your own modular crochet bobbin holder for less than $10.
- Flip it both ways!
- If you normally turn your crochet like a page in a book after eery row, to prevent your yarn getting too tangled, simply turn your project the other way at the end of alternate rows. This will “undo” and untangle your yarn so you can continue on with your yarn.
Patterns to practice changing colours in Corner to Corner
Join the Plants With Yarn Crochet Along! This corner to corner blanket pattern features 12 different corner to corner squares that will allow you to put this crochet skill to good use!
The crochet along is free to join in with and take part – all the corner to corner charts will be free to view on the different designers websites as they are released.


If you’d like to get your hands on all 12 different graphs along with the written instructions on how to crochet these corner to corner blanket squares, click the button below and purchase the full crochet along pattern today.