How to Crochet a Chain
Once you’ve made your slip knot, the next step in starting a crochet project is to make the foundation chain as stated in your crochet pattern. This tutorial will take you through exactly how to crochet a chain and also how to count them.
Crochet a Chain | How to Crochet for Beginners
Learning how to crochet a chain is not only essential for the foundation of your crochet projects, they are also used to turn your project to work before starting the next row along with being used in combination with other stitches throughout a crochet pattern.
When chains are used as part of a stitch pattern, they create spaces between the stitches. If you’re familiar with crochet granny squares, the gaps that you can see are made by making a chain between the next stitches.
You can also create long lengths of chains for use as decorative string or hanging loops for your makes or even laces for baby booties! The possibilities are endless!
Please note that some of the links in my blog are affiliate links. I may earn a small commission if you purchase via this links, but the price you pay is not affected
How to Crochet a Chain
For this tutorial I used the following materials:
- 6mm crochet hook
- PaintBox Yarns Simply Chunky in shade Lilac.
You can use any yarn with the hook size recommended on the yarn band.
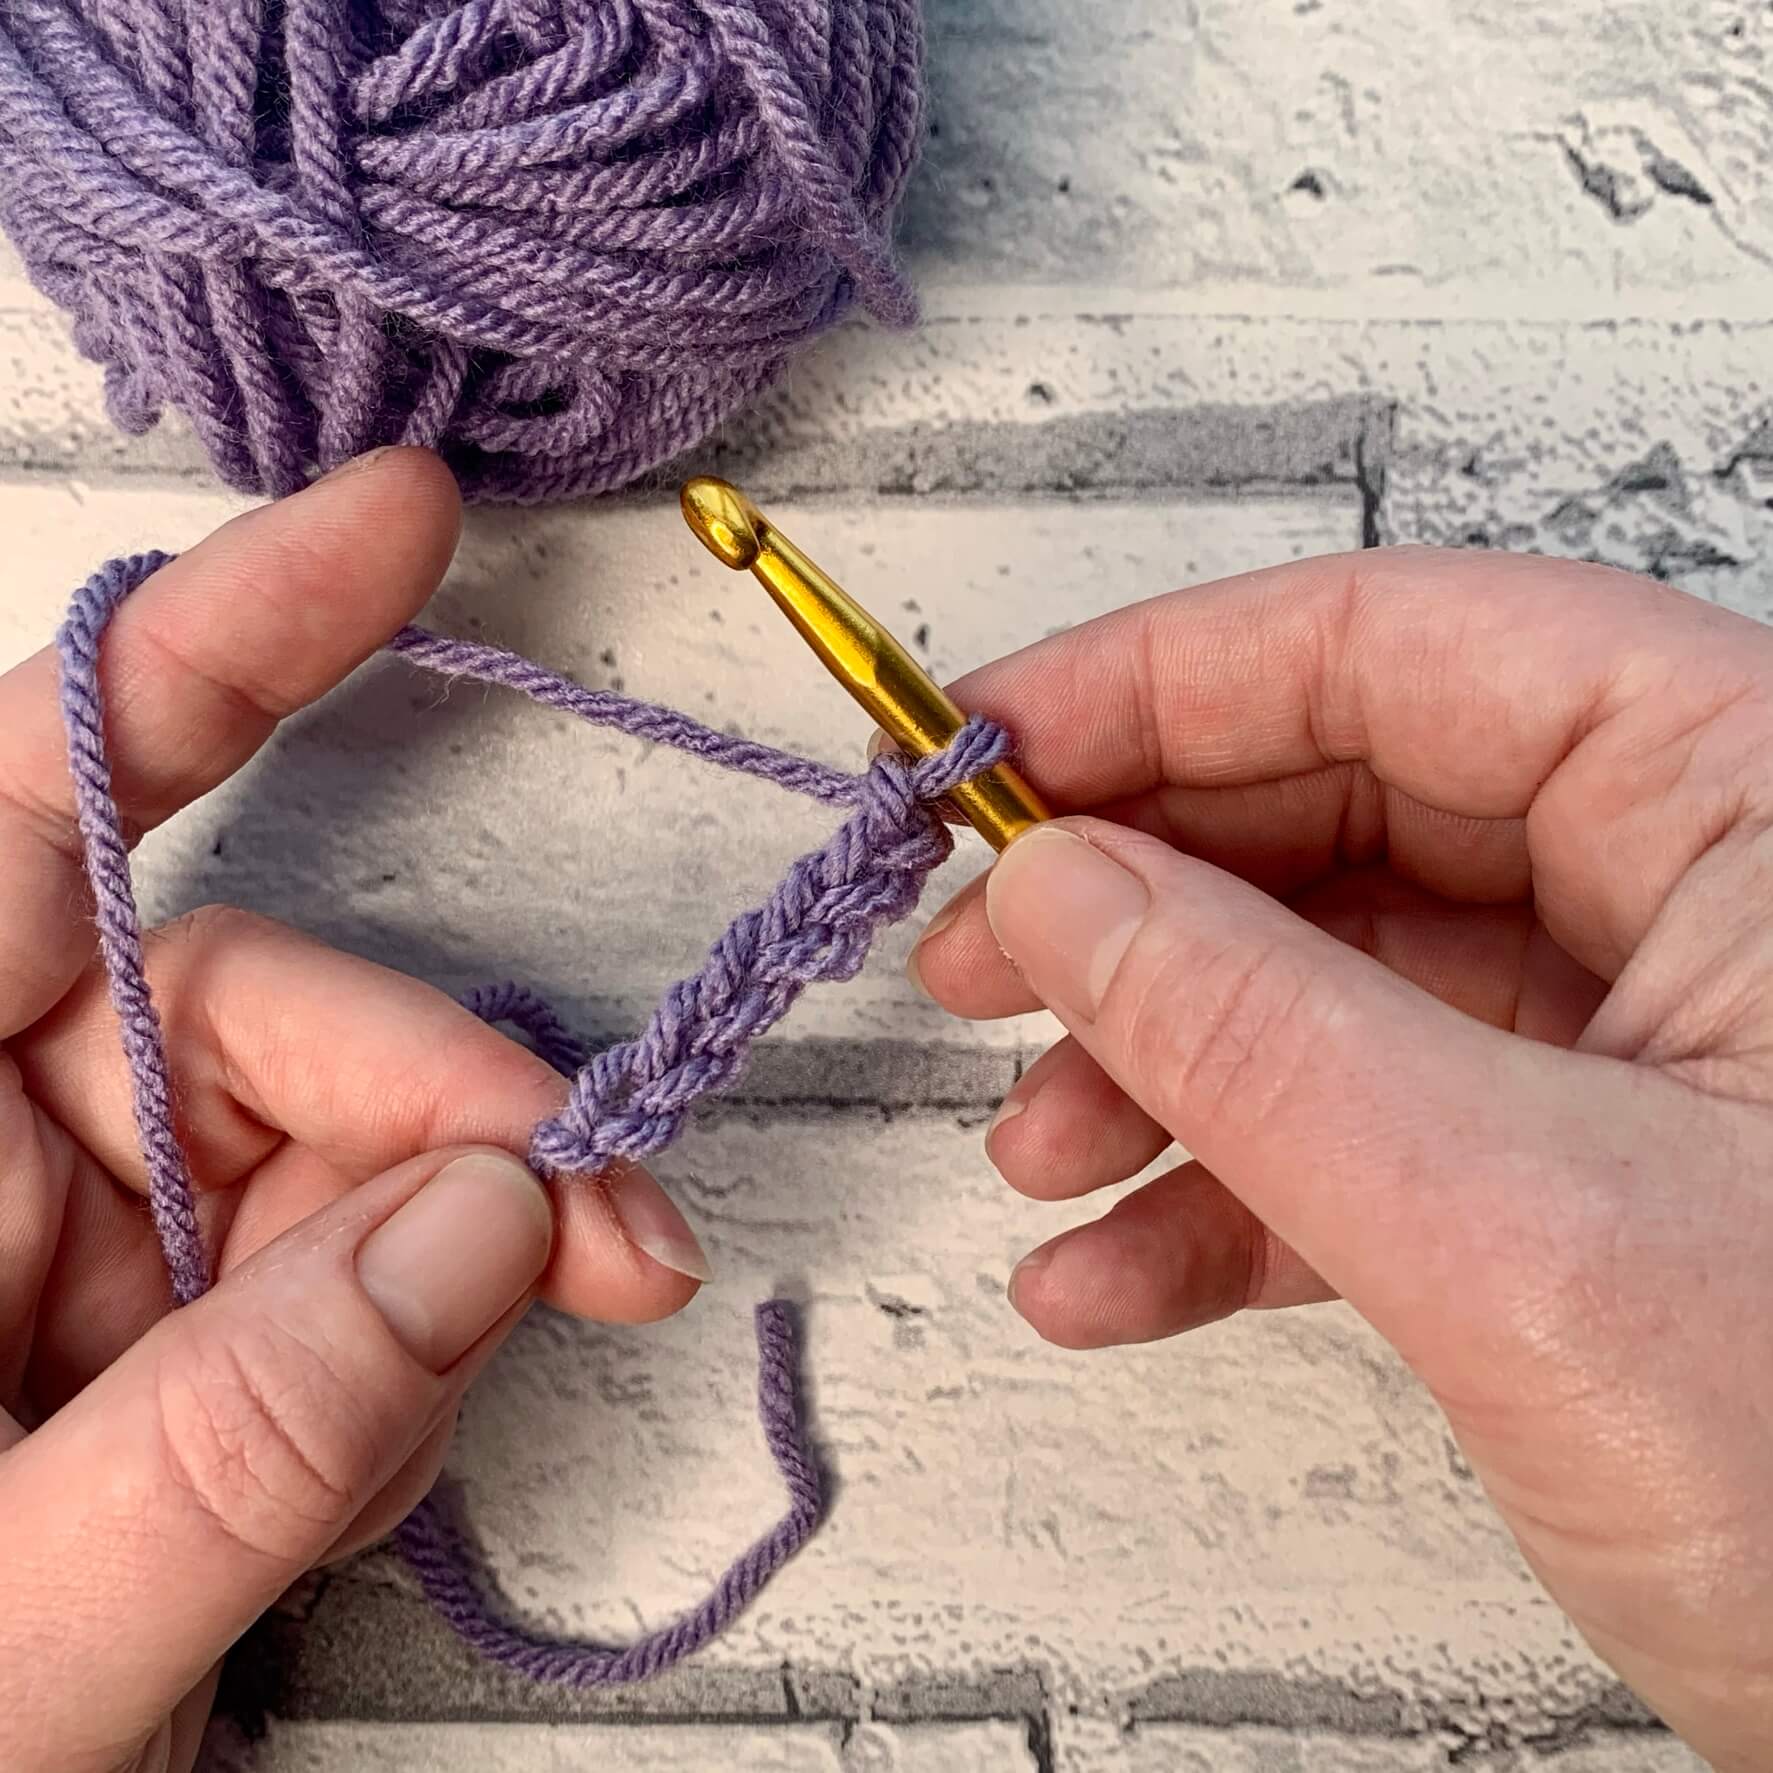
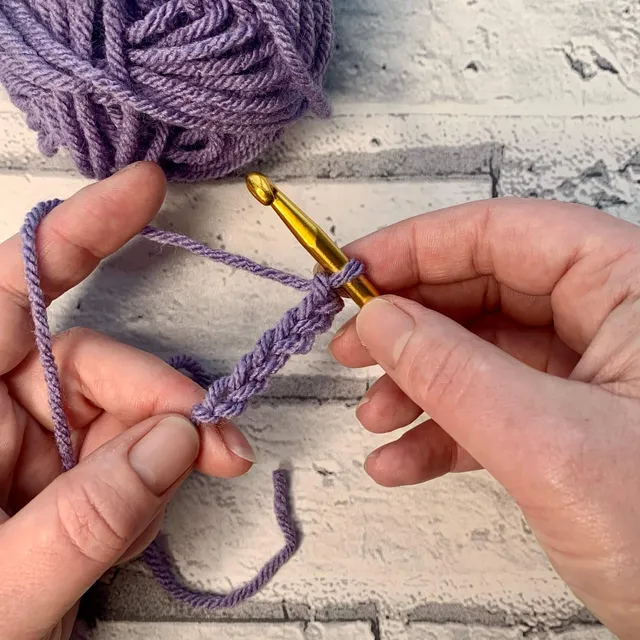
When making your chain, you are looking for them to be evenly sized with an even tension. This really does take practice, lots and lots of practice, but I always told myself, that as this creates the foundation of my project, it was worth taking time to get it right.
- Make a slip knot and secure on your hook
- Holding your hook in your dominant hand, weave the working yarn through your fingers to create some tension. Bring the yarn over the top of the hook (from the back to the front).
- Turn the hook so it captures the yarn
- Gently draw the yarn through the loop on your hook. Turn the hook back up so it is facing you. This will prevent your chain falling from your hook.
- You have now completed your 1st chain. This is know as “Chained 1”
- Continue to bring the yarn over the hook, and pull through to make a longer chain.
If the chain falls off your hook (and it will), don’t worry! Simply place the loop back on the hook and carry on practicing.

1. Make a slip knot and put on hook

2. Yarn over the hook

3. Pull the hook through the loop on the hook

Repeat steps 1-3 to make a longer chain
Crochet Chain Tips
Counting your chains
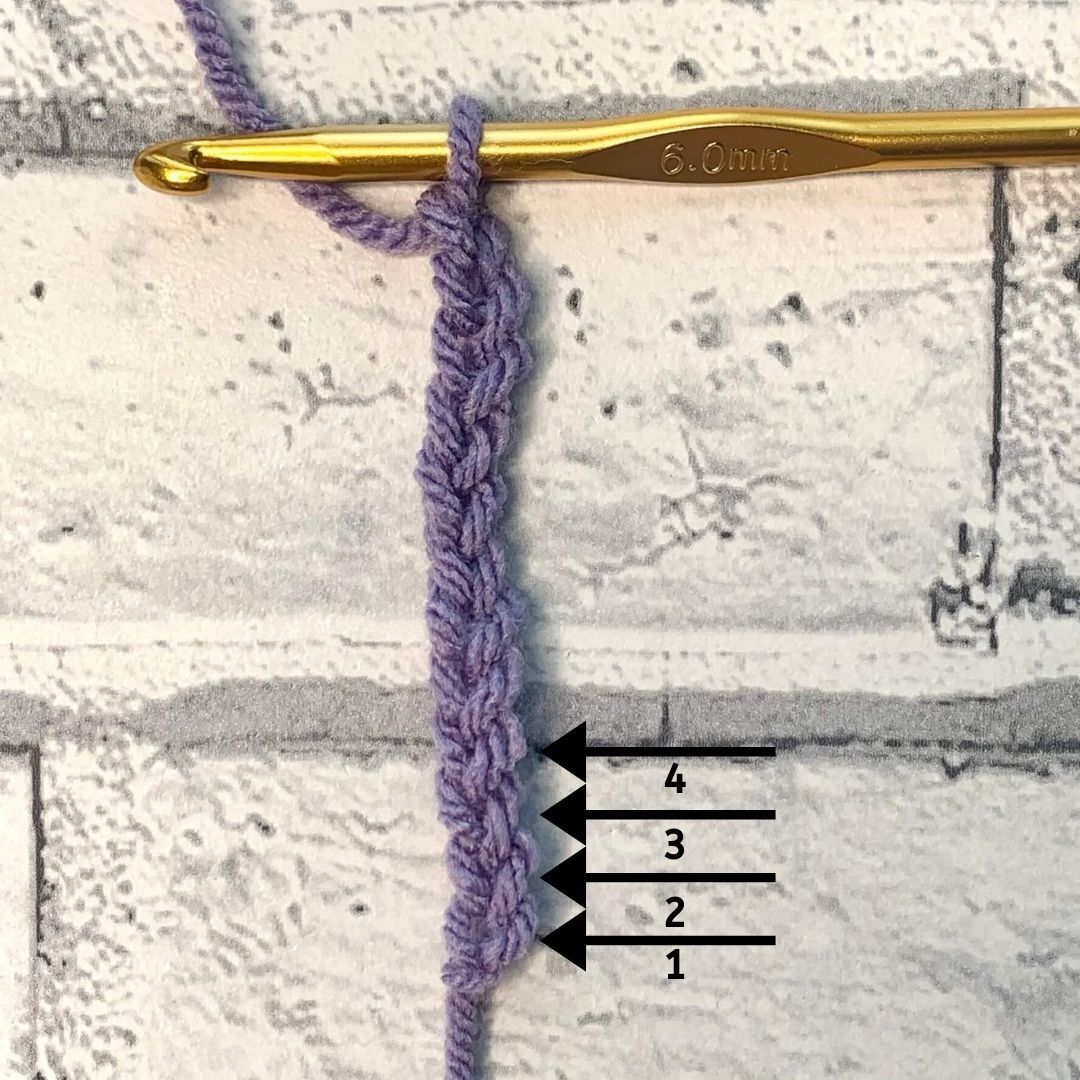
The knot from your slip stitch and the loop on your hook are not counted as chains. Begin to count up one side of your chain, beginning from the slip knot. Try counting the chain I’ve made – I’ve indicated the 1st four chains, find out below what the right number is…
Maintain an even tension
This will take practice! I mentioned that above because it really is true! The more you practice, the more even your chains will become. You also don’t want your chain to be too tight or too loose – it’s just like Goldilocks porridge! So, just keep practicing, you will get more even chains in time.
The answer was 12 chains – was that the number you got? Let me know in the comments
Adjust your yarn
It’s ok to not hold your yarn and hook like everyone else! You really need to be comfortable as once you’ve mastered the chain, you’ll be crocheting everything, every day! This can lead to strain in your hands and wrists so, get comfy! Try holding your yarn differently, put your hook in a different hold and keep adjusting and practicing until it feels natural for you!
Try a different crochet hook
Just like how we all hold our yarn differently, we may also need a different shape of crochet hook. You crochet hook can have a massive impact on the evenness of your chains and stitches! Check out my recommended crochet hooks for beginners.
You may also find that some yarns including cotton and other non-stretchy yarns will need a larger crochet hook, as the lack of stretch can make the chain too firm to work into.
Once again, practice. Try making a chain with different yarns to see how they work up differently.