Filet Crochet Christmas Stocking Pattern
This filet crochet stocking pattern is the cutest of the bonus patterns in the Jolly Holiday Blanket Crochet Along.
Please note that some of the links in my blog are affiliate links. I may earn a small commission if you purchase via these links, but the price you pay is not affected
Christmas Stocking | Filet Crochet Pattern
Hanging a stocking is one of those exciting Christmas traditions that should be continued regardless of your age.
It can be hung near the fire or at the end of a bed, and regardless if it’s Santa, your parents or your partner who fills it with treats, the little gifts, always feel a bit more special to me.
There’s still time to stitch up a handmade stocking for everyone in the household – including your pets – click here to see lots of pattern inspiration to stitch up a new stocking this holiday season.
This filet crochet ornament pattern is the 3rd and final bonus panel pattern to release as part of the Jolly Holiday Blanket.
Each of the filet crochet patterns releasing in this crochet blanket pattern is designed to be beginner friendly, encouraging you to fall in love with the filet crochet technique.
It’s important to note that unlke many of the panels included in this blanket pattern, it is NOT a symmetrical filet crochet chart. This means that there is both a left and right handed version of the written pattern, and the chart will be read in a different direction depending on which hand you hold your crochet hook in.
If you’re new to filet crochet, it is a crochet technique that uses stitches and chain spaces to show an image in crochet fabric – click here to learn more about the filet crochet technique.
Whatever your crochet skill level is, each of the 12 filet crochet panels releasing in the Jolly Holiday Blanket can be followed using more than just the filet chart. For each filet crochet blanket panel in the Jolly Holiday Blanket CAL, you’ll find, free to view on the website:
- filet crochet chart
- written version of the chart – Left & Right handed
- FULL written pattern with no need to refer to the chart – Left & Right handed
Even if you are new to the fillet crochet technique, all the ways to follow the pattern will be available for you to ensure you can complete your blanket with confidence.
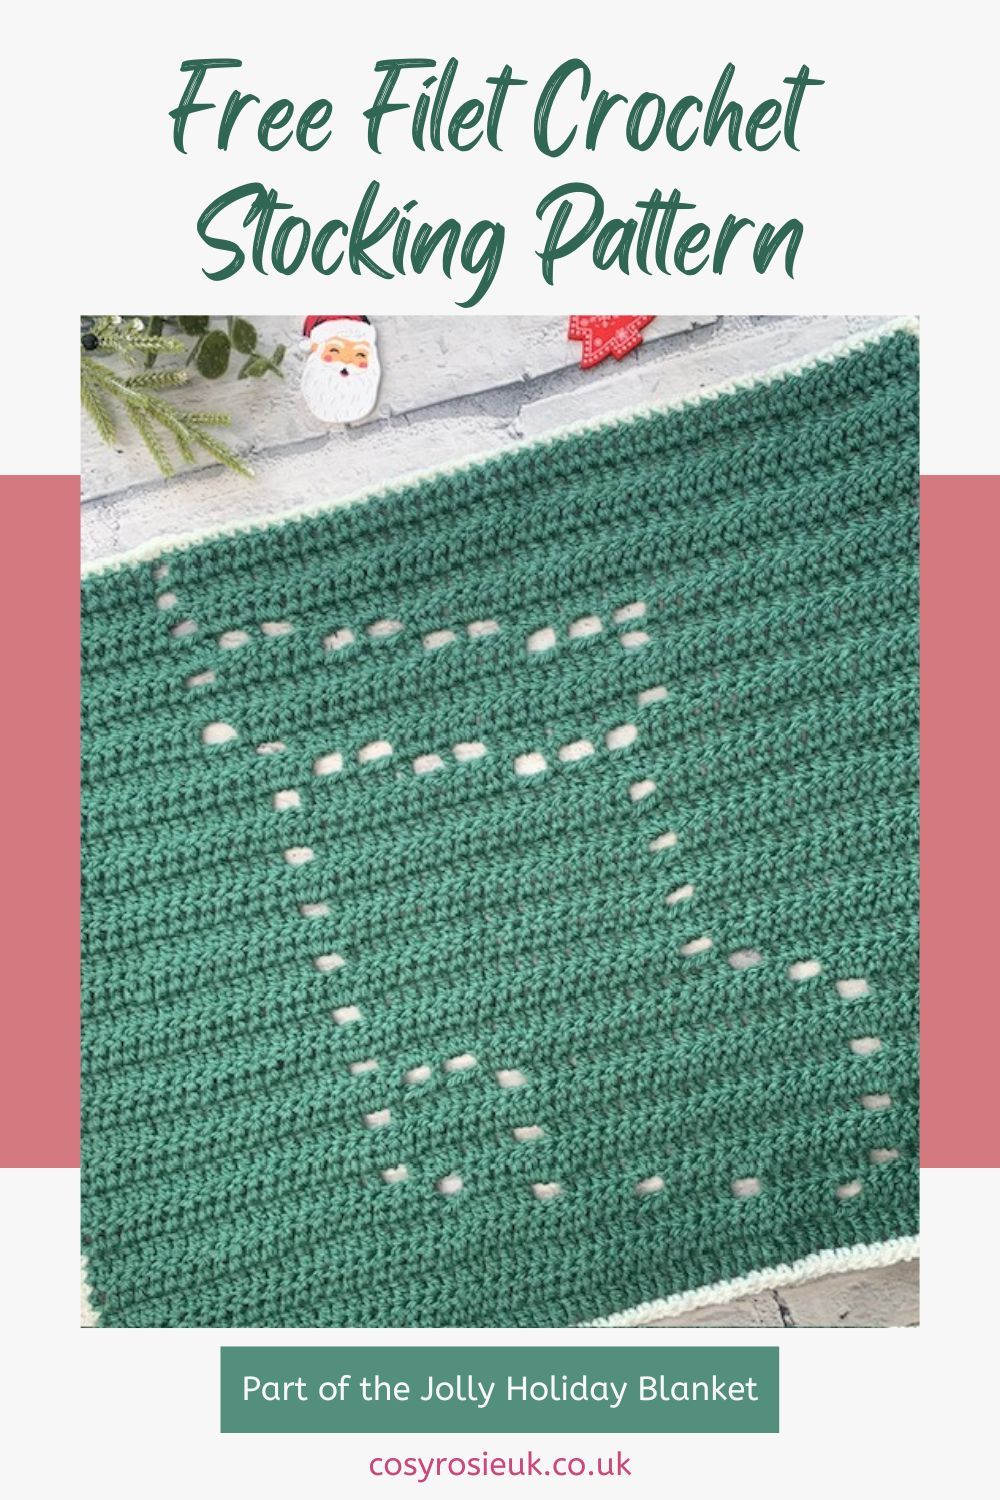
Pin This Pattern for Later!
Jolly Holiday Blanket Crochet Along
This pattern is releasing on the website as a crochet along (CAL), which means that each week a new panel featuring a new image will be released on the website in all of the easy to follow formats.
There will be a total of 12 different panels to choose from to join and create your own version of the Jolly Holiday Blanket:
You can opt to create a blanket with 9 or 12 different panels, to create your own version of the Jolly Holiday Blanket – Click the button below to see the release dates for each section blanket pattern below.
Purchase the Printable PDF Pattern
I have no doubt, that once you’ve completed your 1st filet crochet, you’ll want to keep on going to complete your Jolly Holiday Blanket.
If you don’t want to wait for each panel to release during the crochet along, you can opt to purchase the printable version of the pattern.
The pattern includes ALL 3 different ways to follow the panel sections of the blanket:
- Filet Charts
- Written Charts
- Fully written pattern
So, whichever way you prefer to read a filet crochet pattern, you can!
The full pattern, with all 12 panels, the joining and edging instructions is available to purchase from either Ravelry or Esty now.
Religious Elements | Jolly Holiday Blanket
There are now 6 religious panels to choose from to create a holiday blanket that celebrates everything about the Holidays. Click the image below to find out more.

Stocking Filet Crochet Pattern Details | Jolly Holiday Blanket
Skill Level: Easy
Materials:
- Any worsted /Aran weight acrylic yarn. I used Paintbox Yarns Simply Aran 100% Acrylic (100g (3.5oz), 184m (201 yds)) in the following 2 shades:
- A – Slate Green (226)
- B- Champagne White (202)
- 5.5mm hook
- Scissors
- Darning needle
Estimated Yarn Required
The estimated yarn required for each panel, using a 5.5mm hook is 180-200m of the main colour.
Each panel will be edged with the contrast colour you plan to join the panels.
Finished Size
Each panel will measure 18″ by 22″

Abbreviations – US Terms (UK in brackets)
St(s) – Stitches
Ch – Chain
Ch sp – Chain space
Sc (Dc) – Single Crochet (Double Crochet)
Dc (tr) – Double (treble) crochet
TC – turning chain
X – Solid Square
O – Open Square
RS – Right side
KEY
Solid Black Square (X) = dc in next 3
Open White Square (O) = dc, ch 2, skip next 2
- Turning ch-3 counts as dc, it is suggested to use a stitch marker to keep track of st. Turning ch is NOT shown on chart and is implied. Be sure to include in stitch count.
Gauge:
- 15 sts and 8 rows = 4”/10 cm in US double crochet. Use a larger or smaller crochet hook to obtain the correct finished size.
Pattern Notes:
- If you have any questions regarding pattern instructions please reach out – [email protected]
- Each panel is worked in turned rows, from bottom up, before edging in a contrasting colour.
- Beginning Ch 3 DOES count as a stitch.
- Turning ch-3 counts as 1st dc in chart, it is suggested to use a stitch marker to keep track of st. Turning ch is NOT shown on chart and is implied. Be sure to include in stitch count
How to Read A Filet Crochet Chart
The pattern includes filet crochet charts and although it’s not essential for you to understand how to read a filet crochet chart to complete this pattern, as each chart will be converted into a standard, written crochet pattern with a full video tutorial.
If you’d like to learn how to read a filet crochet chart, the video tutorial below takes you through all the steps.
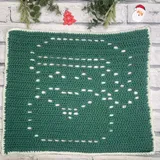
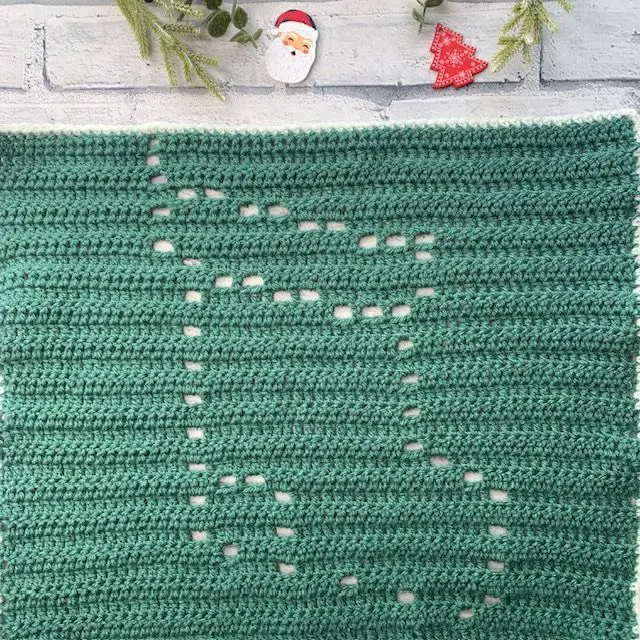
Stocking Filet Crochet Chart

Which Direction to Read the Chart
To recreate the pattern so that stocking shows in the same direction as the chart, it should be read in the following directions:
- Right handed –
- Row 1 – read from right to left
- Row 2 – read from left to right
- Continue to read odd numbered rows, right to left and even numbered rows, left to right
- Left Handed –
- Row 1 – read from left to right
- Row 2 – read from right to left
- Continue to read odd numbered rows, left to right and even numbered rows, right to left
Stocking – RIGHT HANDED – Written Chart
Right Handed
Row 1: Ch 66, dc in 4th ch from hook, (X) 21, turn. (64 dc) Stitch count will be 64 for every row, be sure to count turning ch.
Row 2: (X) 15, (O) 1, (X) 5, turn.
Row 3: (X) 4, (O) 1, (X) 2, (O) 1, (X) 13, turn.
Row 4: (X) 11, (O) 1, (X) 9, turn.
Row 5: (X) 4, (O) 1, (X) 6, (O) 1, (X) 9, turn.
Row 6: (X) 7, (O) 1, (X) 13, turn.
Row 7: (X) 4, (O) 1, (X) 6, (O) 1, (X) 2, (O) 1, (X) 6, turn.
Row 8: (X) 21, turn.
Row 9: (X) 4, (O) 1, (X) 6, (O) 1, (X) 2, (O) 1, (X) 6, turn.
Row 10: (X) 7, (O) 2, (X) 6, (O) 1, (X) 5, turn.
Row 11: (X) 6, (O) 1, (X) 7, (O) 1, (X) 6, turn.
Row 12: (X) 13, (O) 1, (X) 7, turn.
Row 13: (X) 14, (O) 1, (X) 6, turn.
Row 14: (X) 13, (O) 1, (X) 7, turn.
Row 15: (X) 14, (O) 1, (X) 6, turn.
Row 16: (X) 13, (O) 1, (X) 7, turn.
Row 17: (X) 14, (O) 1, (X) 6, turn.
Row 18: (X) 13, (O) 1, (X) 7, turn.
Row 19: (X) 14, (O) 1, (X) 6, turn.
Row 20: (X) 11, (O) 3, (X) 7, turn.
Row 21: (X) 6, (O) 1, (X) 3, (O) 2, (X) 2, (O) 1, (X) 6, turn.
Row 22: (X) 7, (O) 2, (X) 12, turn.
Row 23: (X) 6, (O) 1, (X) 7, (O) 1, (X) 6, turn.
Row 24: (X) 5, (O) 1, (X) 6, (O) 2, (X) 7, turn.
Row 25: (X) 9, (O) 2, (X) 10, turn.
Row 26: (X) 5, (O) 1, (X) 2, (O) 2, (X) 11, turn.
Row 27: (X) 13, (O) 2, (X) 6, turn.
Row 28: (X) 5, (O) 1, (X) 15, turn.
Row 29: (X) 15, (O) 1, (X) 5, turn.
Row 30: (X) 5, (O) 1, (X) 15, turn.
Stocking – LEFT HANDED – Written Chart
Left Handed
Row 1: Ch 66, dc in 4th ch from hook, (X) 21, turn. (64 dc) Stitch count will be 64 for every row, be sure to count turning ch.
Row 2: (X) x 5, (O) x 1, (X) x 15, turn.
Row 3: (X) x 13, (O) x 1, (X) x 2, (O) x 1, (X) x 4, turn.
Row 4: (X) x 9, (O) x 1, (X) x 11, turn.
Row 5: (X) x 9, (O) x 1, (X) x 6, (O) x 1, (X) x 4, turn.
Row 6: (X) x 13, (O) x 1, (X) x 7, turn.
Row 7: (X) x 6, (O) x 1, (X) x 2, (O) x 1, (X) x 6, (O) x 1, (X) x 4, turn.
Row 8: (X) x 21, turn.
Row 9: (X) x 6, (O) x 1, (X) x 2, (O) x 1, (X) x 6, (O) x 1, (X) x 4, turn.
Row 10: (X) x 5, (O) x 1, (X) x 6, (O) x 2, (X) x 7, turn.
Row 11: (X) x 6, (O) x 1, (X) x 7, (O) x 1, (X) x 6, turn.
Row 12: (X) x 7, (O) x 1, (X) x 13, turn.
Row 13: (X) x 6, (O) x 1, (X) x 14, turn.
Row 14: (X) x 7, (O) x 1, (X) x 13, turn.
Row 15: (X) x 6, (O) x 1, (X) x 14, turn.
Row 16: (X) x 7, (O) x 1, (X) x 13, turn.
Row 17: (X) x 6, (O) x 1, (X) x 14, turn.
Row 18: (X) x 7, (O) x 1, (X) x 13, turn.
Row 19: (X) x 6, (O) x 1, (X) x 14, turn.
Row 20: (X) x 7, (O) x 3, (X) x 11, turn.
Row 21: (X) x 6, (O) x 1, (X) x 2, (O) x 2, (X) x 3, (O) x 1, (X) x 6, turn.
Row 22: (X) x 12, (O) x 2, (X) x 7, turn.
Row 23: (X) x 6, (O) x 1, (X) x 7, (O) x 1, (X) x 6, turn.
Row 24: (X) x 7, (O) x 2, (X) x 6, (O) x 1, (X) x 5, turn.
Row 25: (X) x 10, (O) x 2, (X) x 9, turn.
Row 26: (X) x 11, (O) x 2, (X) x 2, (O) x 1, (X) x 5, turn.
Row 27: (X) x 6, (O) x 2, (X) x 13, turn.
Row 28: (X) x 15, (O) x 1, (X) x 5, turn.
Row 29: (X) x 5, (O) x 1, (X) x 15, turn.
Row 30: (X) x 15, (O) x 1, (X) x 5, turn.
Stocking – Right Handed – Written Pattern
Right Handed
Row 1: Ch 66, dc in 4th ch from hook, and each across, turn. (64)
Row 2: Ch 3 (counts as dc), dc in next 45, ch 2, skip 2, dc in next 15, dc in tc, turn.
Row 3: Ch 3, dc in next 12, ch 2, skip 2, dc in next 7, ch 2, skip 2, dc in next 39, dc in tc, turn.
Row 4: Ch 3, dc in next 33, ch 2, skip 2, dc in next 27, dc in tc, turn.
Row 5: Ch 3, dc in next 12, ch 2, skip 2, dc in next 19, ch 2, skip 2, dc in next 27, dc in tc, turn.
Row 6: Ch 3, dc in next 21, ch 2, skip 2, dc in next 39, dc in tc, turn.
Row 7: Ch 3, dc in next 12, ch 2, skip 2, dc in next 19, ch 2, skip 2, dc in next 7, ch 2, skip 2, dc in next 18, dc in tc, turn.
Row 8: Ch 3, dc in next and each across
Row 9: Repeat Row 7.
Row 10: Ch 3, dc in next 21, ch 2, skip 2, dc in next, ch 2, skip 2, dc in next 19, ch 2, skip 2, dc in next 15, dc in tc, turn.
Row 11: Ch 3, dc in next 18, ch 2, skip 2, dc in next 22, ch 2, skip 2, dc in next 18, dc in tc, turn.
Row 12: Ch 3, dc in next 39, ch 2, skip 2, dc in next 21, dc in tc, turn.
Row 13: Ch 3, dc in next 42, ch 2, skip 2, dc in next 18, dc in tc, turn.
Rows 14-19: Repeat Rows 12-13
Row 20: Ch 3, dc in next 33, ch 2, skip 2, (dc in next, ch 2, skip 2) 2 times, dc in next 21, dc in tc, turn.
Row 21: Ch 3, dc in next 18, ch 2, skip 2, dc in next 10, ch 2, skip 2, dc in next, ch 2, skip 2, dc in next 7, ch 2, skip 2, dc in next 18, dc in tc, turn.
Row 22: Ch 3, dc in next 21, ch 2, skip 2, dc in next, ch 2, skip 2, dc in next 36, dc in tc, turn.
Row 23: Ch 3, dc in next 18, ch 2, skip 2, dc in next 22, ch 2, skip 2, dc in next 18, dc in tc, turn.
Row 24: Ch 3, dc in next 15, ch 2, skip 2, dc in next 19, ch 2, skip 2, dc in next, ch 2, skip 2, dc in next 21, dc in tc, turn.
Row 25: Ch 3, dc in next 27, ch 2, skip 2, dc in next, ch 2, skip 2, dc in next 30, dc in tc, turn.
Row 26: Ch 3, dc in next 15, ch 2, skip 2, dc in next 7, ch 2, skip 2, dc in next, ch 2, skip 2, dc in next 33, dc in tc, turn.
Row 27: Ch 3, dc in next 39, ch 2, skip 2, dc in next, ch 2, skip 2, dc in next 18, dc in tc, turn.
Row 28: Ch 3, dc in next 15, ch 2, skip 2, dc in next 45, dc in tc, turn.
Row 29: Ch 3, dc in next 45, ch 2, skip 2, dc in next 15, dc in tc, turn.
Row 30: Repeat Row 28.

Stocking – Left Handed – Written Pattern
Left Handed
Row 1: Ch 66, dc in 4th ch from hook, and each across, turn. (64)
Row 2: Ch 3, dc in next 15, ch 2, skip 2, dc in next 45, dc in tc, turn.
Row 3: Ch 3, dc in next 39, ch 2, skip 2, dc in next 7, ch 2, skip 2, dc in next 12, dc in tc, turn.
Row 4: Ch 3, dc in next 27, ch 2, skip 2, dc in next 33, dc in tc, turn.
Row 5: Ch 3, dc in next 27, ch 2, skip 2, dc in next 19, ch 2, skip 2, dc in next 12, dc in tc, turn.
Row 6: Ch 3, dc in next 39, ch 2, skip 2, dc in next 21, dc in tc, turn.
Row 7: Ch 3, dc in next 18, ch 2, skip 2, dc in next 7, ch 2, skip 2, dc in next 19, ch 2, skip 2, dc in next 12, dc in tc, turn.
Row 8: Ch 3, dc in next and each across
Row 9: Repeat Row 7.
Row 10: Ch 3, dc in next 15, ch 2, skip 2, dc in next 19, ch 2, skip 2, dc in next, ch 2, skip 2, dc in next 21, dc in tc, turn.
Row 11: Ch 3, dc in next 18, ch 2, skip 2, dc in next 22, ch 2, skip 2, dc in next 18, dc in tc, turn.
Row 12: Ch 3, dc in next 21, ch 2, skip 2, dc in next 39, dc in tc, turn.
Row 13: Ch 3, dc in next 18, ch 2, skip 2, dc in next 42, dc in tc, turn.
Rows 14-19: Repeat Rows 12-13
Row 20: Ch 3, dc in next 21, ch 2, skip 2, (dc in next, ch 2, skip 2) 2 times, dc in next 33, dc in tc, turn.
Row 21: Ch 3, dc in next 18, ch 2, skip 2, dc in next 7, ch 2, skip 2, dc in next, ch 2, skip 2, dc in next 10, ch 2, skip 2, dc in next 18, dc in tc, turn.
Row 22: Ch 3, dc in next 36, ch 2, skip 2, dc in next, ch 2, skip 2, dc in next 21, dc in tc, turn.
Row 23: Ch 3, dc in next 18, ch 2, skip 2, dc in next 22, ch 2, skip 2, dc in next 18, dc in tc, turn.
Row 24: Ch 3, dc in next 21, ch 2, skip 2, dc in next, ch 2, skip 2, dc in next 19, ch 2, skip 2, dc in next 15, dc in tc, turn.
Row 25: Ch 3, dc in next 30, ch 2, skip 2, dc in next, ch 2, skip 2, dc in next 27, dc in tc, turn.
Row 26: Ch 3, dc in next 33, ch 2, skip 2, dc in next, ch 2, skip 2, dc in next 7, ch 2, skip 2, dc in next 15, dc in tc, turn.
Row 27: Ch 3, dc in next 18, ch 2, skip 2, dc in next ch 2, skip 2, dc in next 39, dc in tc, turn.
Row 28: Ch 3, dc in next 45, ch 2, skip 2, dc in next 15, dc in tc, turn.
Row 29: Ch 3, dc in next 15, ch 2, skip 2, dc in next 45, dc in tc, turn.
Row 30: Repeat Row 28.
Fasten off, weave ends.
Continue to Panel Edging.
Panel Edging
Once you have completed this Christmas Gift panel, Click here to find the pattern instructions to edge the blanket panel, in preparation of joining all the panels together.
Made it?
YAY!!! I’d love to see your finished Filet Crochet Christmas Bell – snap a picture and share it with us!
Come and join the community by clicking here, where you can find additional support and fun throughout the crochet along.
Want to make another?
Don’t forget that you can get access to all 12 panel options, along with the join and edging patterns by purchasing the printable pattern by clicking the button below to purchase from your favourite pattern shop.