Granny Circle to Square Free Wall Hanging Pattern
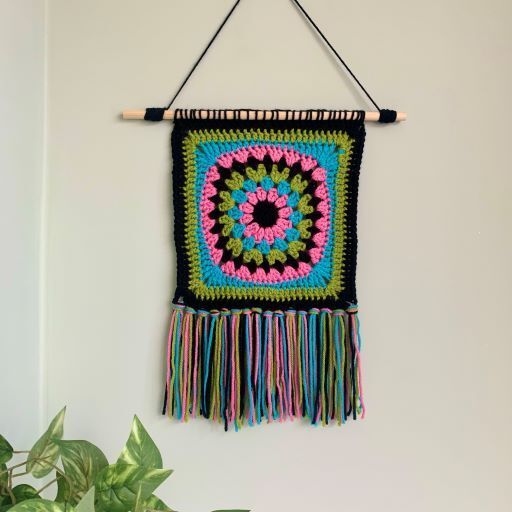
Learn how to crochet granny circle into a square as you create this bold and bright crochet wall hanging using the free pattern and full video tutorial with another Running Rings Around Granny pattern. This beginner friendly pattern uses the granny stitch working in the round to create a circle followed by the solid granny square technique.
Please note that some of the links in my blog are affiliate links. I may earn a small commission if you purchase via these links, but the price you pay is not affected
Running Rings Around Granny Wall Hanging | Free Crochet Pattern
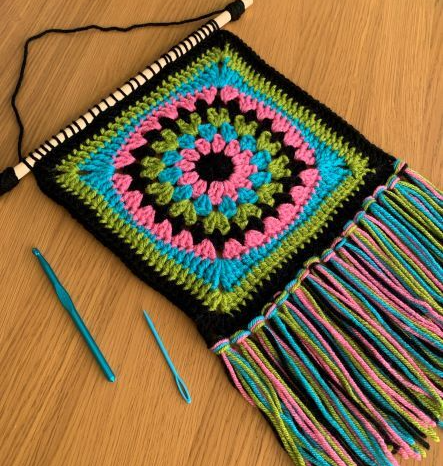
The Running Rings Around Granny square is so versatile that this crochet wall hanging pattern is another way to use my granny circle to square pattern to create a unique wall art that will add interest to any wall.
You can choose to make your wall hanging in colours to suit your home décor or go bold and bright to create a standout piece that captures everyone’s attention.
The Running Rings collection started out as a beautiful crochet teapot cosy that has a classical, vintage feel that lead me to create a granny square that used both the circular granny and combine it with the solid granny square to create another take on working with the granny stitch.
You can see variations of this stitch combination throughout the following patterns in the Running Rings Collection:
I still have more ideas and designs that I am planning to use this design in – as it’s just so fun to use!
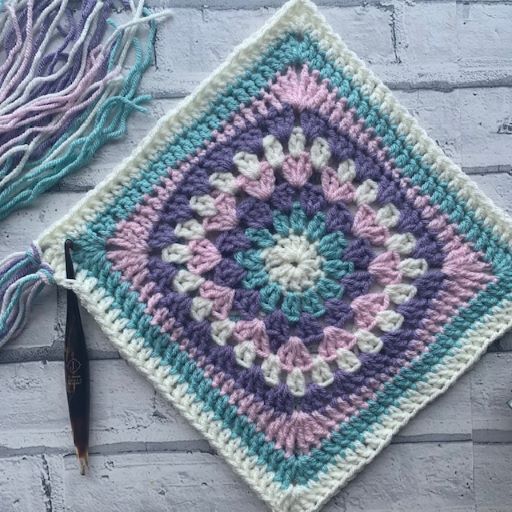
Featured Design | Granny Circle to Square Wall Hanging
This design was originally available exclusively in Happily Hooked Magazine in their Bold and Bright Edition published in January 2022 No. 94.
I am excited to share the full pattern with you, including the full video tutorial to help you create your own crochet wall hanging.

Purchase the Printable PDF Pattern
You can grab a copy of the printable Trinity Crochet Plant Hanger crochet pattern by simply clicking the link below to be taken to your favourite crochet pattern shop.Purchase the Printable PDF Pattern on Ravelry Purchase the Printable PDF Pattern on Etsy
Free Crochet Wall Hanging Pattern
Skill Level: Beginner
Materials:
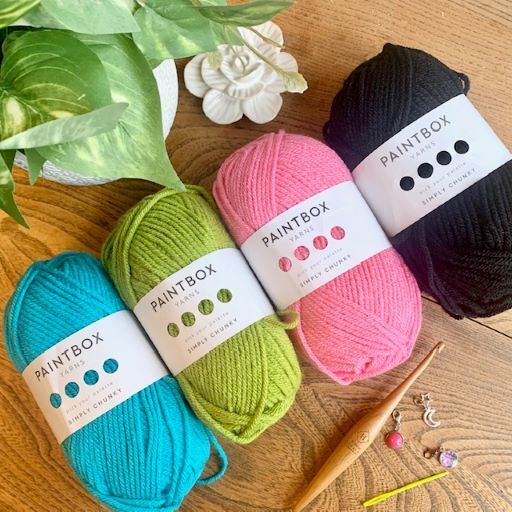
- 130m Chunky Acrylic Yarn I used PaintBox Yarns Simply Chunky 100% acrylic 100g/136m in the following 4 shades:
- Pure Black (A) – 43yds
- Bubblegum Pink (B) – 33yds
- Marine Blue (C) – 22yrds
- Lime Green (D) – 43yd
- 6mm Crochet Hook
- Scissors
- Tapestry needle for chunky yarn
- 30cm Wooden dowel
Abbreviations: US terms (UK in brackets)
US Terms
St(s) Stitch(es)
Ch Chain
Sc (Dc) Single Crochet (Double Crochet)
HDc (HTr) Half Double (Treble) Crochet
Dc (Tr) Double Crochet (Treble Crochet)
3Dc work 3 double (treble) crochet into the same chain space
Tr (DTr) (Double) Treble Crochet
Gauge:
- Gauge is not critical for this project
Finished Size:
- 11 inch x 11 inch without fringe
Pattern Notes:
- Whatever your skill level with crochet, I always recommend reading through this pattern before beginning. Get in touch on [email protected]
- This pattern is worked in the round
- Beginning ch-1 does NOT count as stitch, beginning ch-3 & ch-4 counts as 1st stitch
- Sl st to 1st to join
How to make this Granny Circle to Square Wall Hanging Pattern
With A, ch 4, join to 1st to form ring
Round 1: Ch 3 (counts as dc here and throughout), 11 dc in ring, join—12 dc. Fasten off A.
Round 2: With B, join to any, ch 3, dc in same, 2 dc in each around, join—24 dc. Fasten off B.
Round 3: With C, join between any 2-dc group, ch 3, 2 dc in same, *3 dc in next sp between 2-dc group; repeat from * around, join—12 3-dc groups. Fasten off C.
Round 4: With D, join between any 3-dc group, ch 3, 3 dc in same, *4 dc in next sp between 3-dc group; repeat from * around, join—12 4-dc groups. Fasten off D.
Round 5: With A, join between any 4-dc group, ch 3, dc in same, *skip 2, 2 dc in sp between 2nd and 3rd dc of 4-dc group, skip 2, 2 dc in next sp between 4-dc group; repeat from * around, join—24 2-dc groups. Fasten off A.
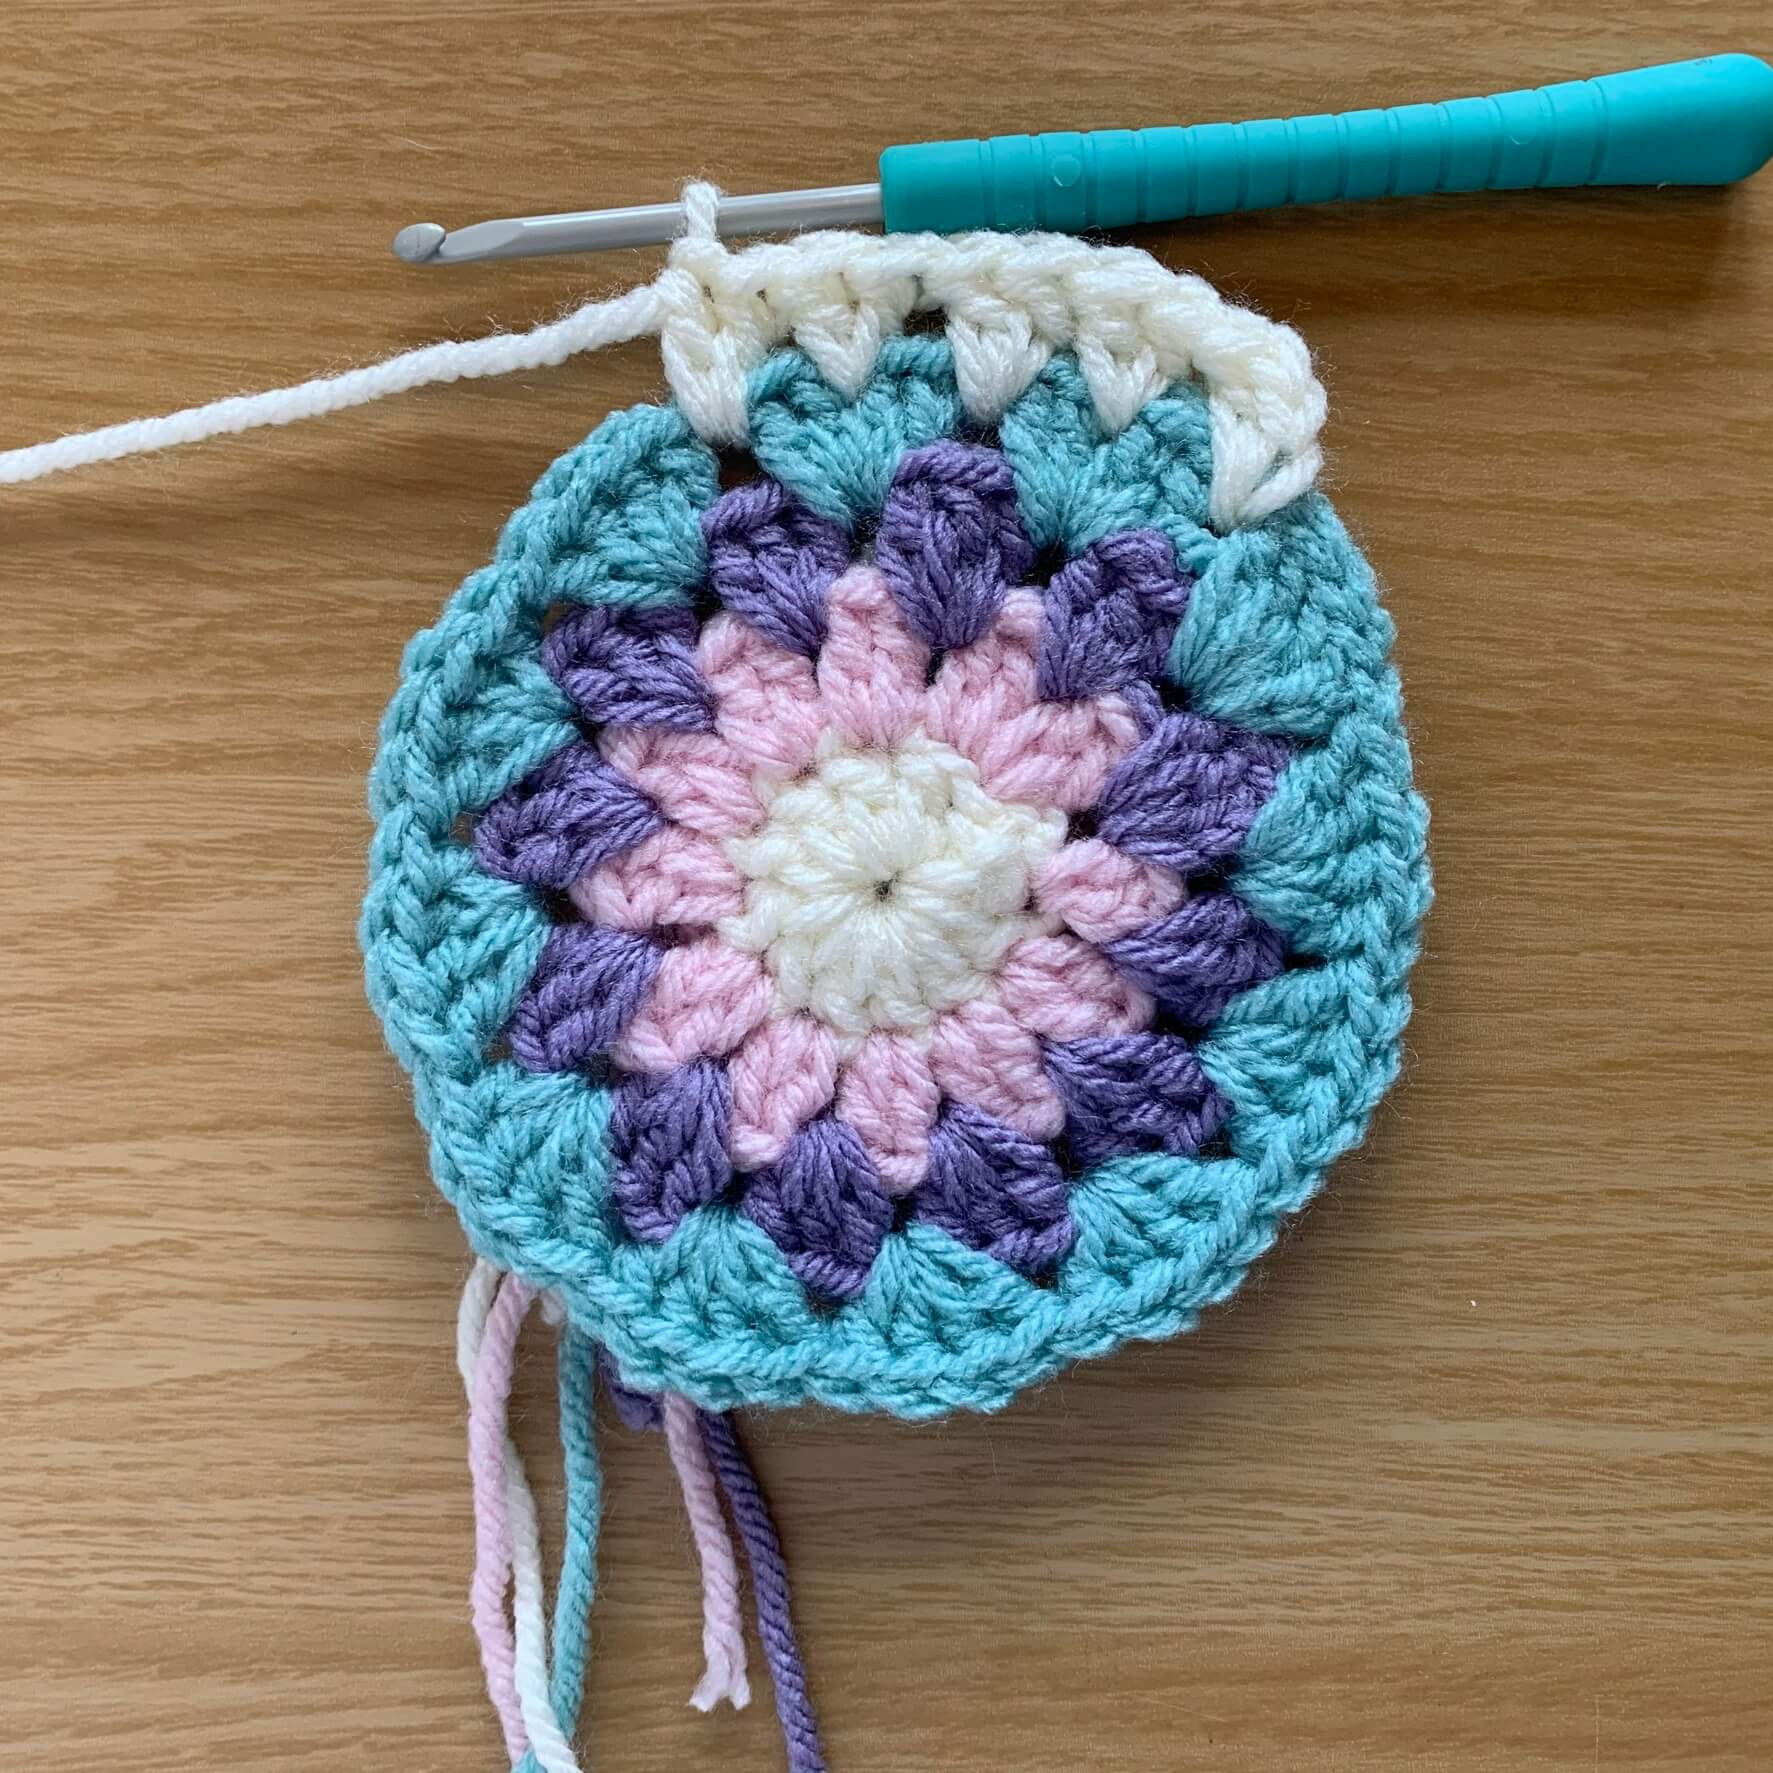
Round 6: With B, join between any 2-dc group, ch 3, 2 dc in same, *3 dc in next sp between 2-dc group; repeat from * around, join—24 3-dc groups. Fasten off B.
Circle should measure 8” after completion of Round 6
Place st marker in any sp between 3-dc group (corner marked), working around circle, place marker in every 6th sp between 3-dc groups (corners marked).
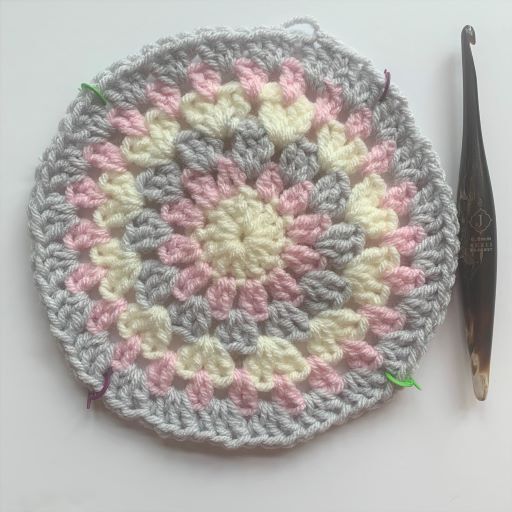
Create Square Edge to Crochet Circle
Round 7: With C, join in any marked, ch 4 (counts as tr now and throughout), (tr, ch 2, 2 tr) in same, tr in next, dc in next 3, hdc in next 3, sc in next 4, hdc in next 3, dc in next 3, tr in next, *(2 tr, ch 2, 2 tr) in next marked, tr in next, dc in next 3, hdc in next 3, sc in next 4, hdc in next 3, dc in next 3, tr in next; repeat from * around, join—16 sc, 24 hdc, 24 dc, 24 tr, 4 ch-2. Fasten off C.
Round 8: With D, join in any ch-2 sp, ch 3, (dc, ch 2, 2 dc) in same, dc in each across to next ch-2 sp, *(2 dc, ch 2, 2 dc) in next ch-2 sp, dc in each across to next ch-2 sp; repeat from * around, join—104 dc, 4 ch-2. Fasten off D.
Round 9: With A, repeat Round 8—120 dc, 4 ch-2. Fasten off, weave in all ends.
Gently block to shape before moving on to Fringe.

Adding Fringe to your Wall Hanging
Fringe
Cut 16 – 12” lengths of each color, with RS facing and using 1 strand of each color, add Fringe using preferred method.
Attaching Dowel
Cut 2 – 40” strands of A, with needle and 1 strand, sew wall hanging to dowel using preferred method. Using 2nd strand, tie one end securely to end of dowel, repeat for 2nd side
If you would like your own printable PDF version of this crochet pattern, you can purchase that directly in either my pattern shops:
Don’t forget to share a picture of your blanket into the community group so that we can celebrate your success with this pattern.
*This pattern and its images are copyright protected and the sole property of Fiona Field/Cosy Rosie UK 2022. Please do not redistribute, transfer, sell the pattern, or alter it to claim as your own. *
